


Page 3
Accessing
Your
New
Camera
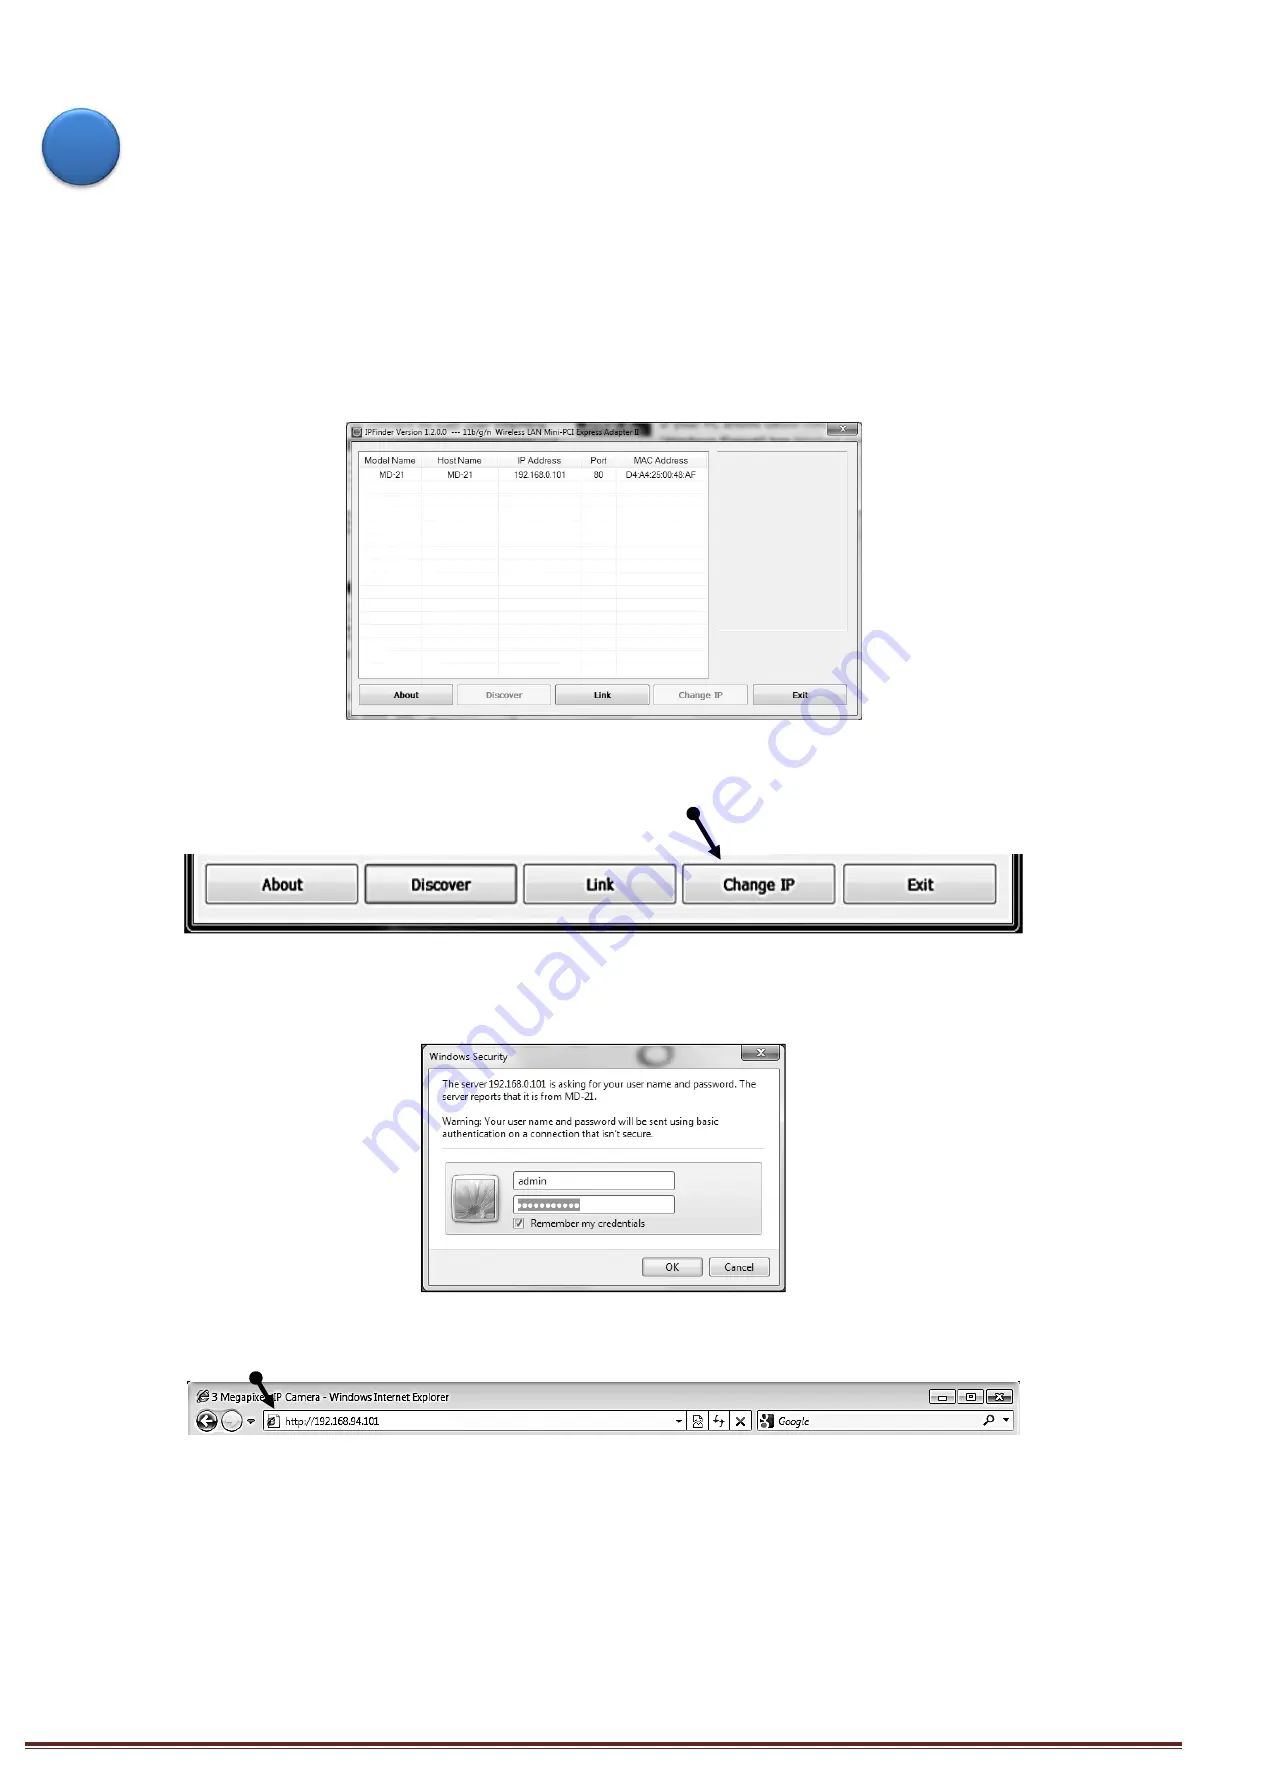
You can access your network camera by its web interface via web browser. Use the utility named ‘IPFinder.exe’
from the CD to find the IP address of the camera.
*
The new network camera's default IP address setting is DHCP mode.
*
The new network camera's default IP address: 192.168.1.99 if no IP address is provided.
1. Open ‘IPFinder.exe’ and press the ‘Discover’ button to search for all cameras within your local network.
Press the ‘Link’ button to connect to a camera’s web interface.
*
Make sure all cameras are powered on and connect to local network.
2. If you need to change the camera’s IP address, click ‘Change IP’ button on your selected camera to
change the camera’s IP address.
3. Connect to the camera’s web interface and install ActiveX plugin. The user login screen will appear when
connection is established.
*
The default Username and Password are both “admin.”
4. When accessing your camera, click on the indication bar of “Install This Add-on for All Users on This
Computer…” to install the ActiveX plugin. Then, click ‘Allow’ to install ActiveX plugin.
C


