

www.comsouth.net
Interactive Program Guide
Turning Power On and Off
Press
TV
then press
POWER
Press
CABLE
then Press
POWER
Changing Channels
You can change channels one of three ways:
Press
CHANNEL
+ or – on the front panel of the receiver or the remote
control to step through the channel selection.
Enter the number of the channel you wish to view using the number
keys on the remote control.
Select the channel in the Interactive Program Guide.
Adjusting the Volume
Press
VOLUME
+ or – on the remote control to adjust the volume.
When you adjust the volume, the volume scale is displayed on the
screen. Press
MUTE
on the remote control to toggle the sound on
and off.
Handy Keys
Press
MENU
for quick access to settings and other useful features. If
you are looking for something, you will probably find it in the menu.
Last
Press
LAST
to return to the previous screen or channel.
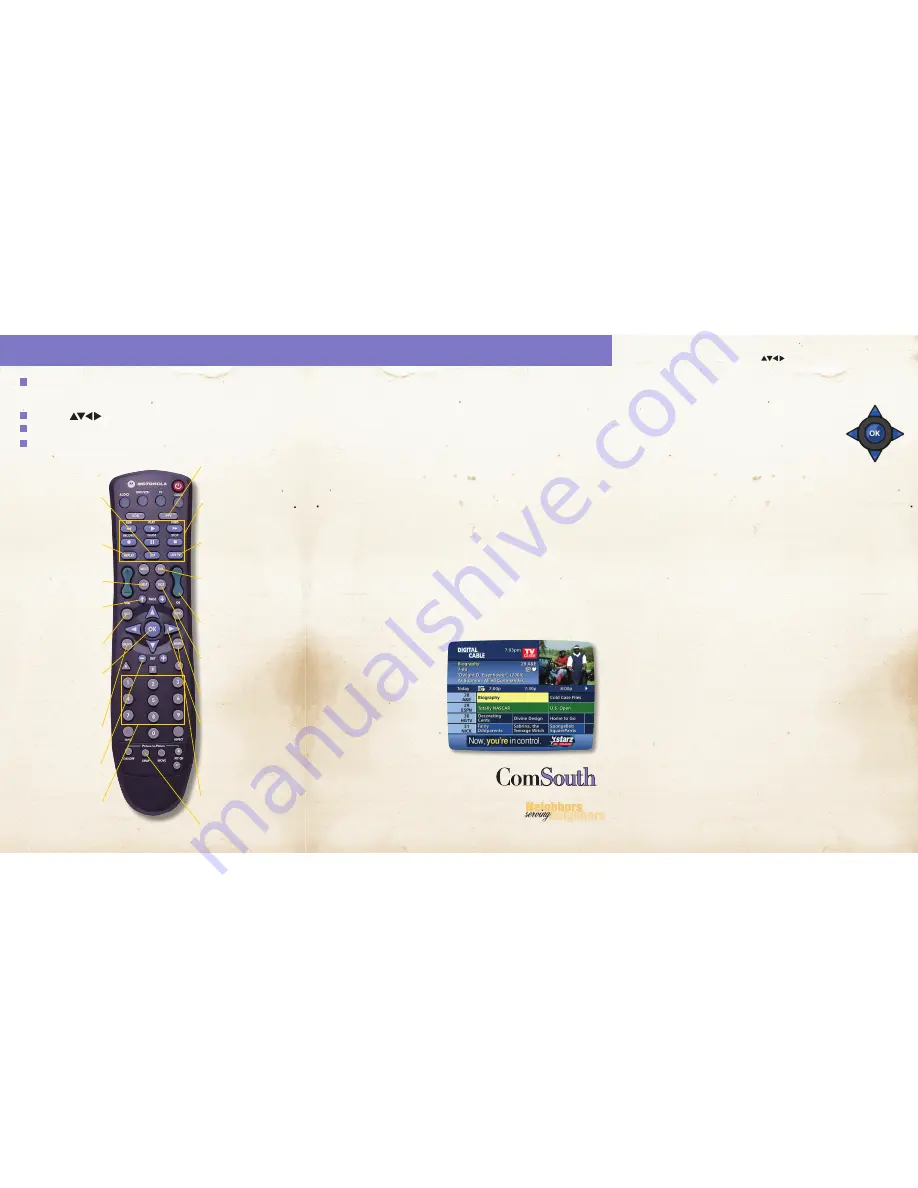
What’s on tonight?
Press
GUIDE
to display
the helpful on-screen
programming guide.
As you navigate throughout
the Guide, your current
selection is highlighted in
yellow, and a program or
feature description appears
on the screen. Please see
sample at right.
A Few Helpful Tips
When changing the channels make sure the
CABLE
button is selected instead of the
TV
button.
NOTE: YOUR TV SHOULD BE ON
CHANNEL 3 AT ALL TIMES!
LIST
Brings up the list of
recordings the user has
stored in the DVR hard drive
REPLAY
Replays the last 15 seconds
of program
HELP
Learn more about a feature
PAGE
Scroll to the next or previous
page of listings
EXIT
Return to watching television
OK
Select a highlighted item; or
while watching a program,
press to display or remove the
Flip Bar
or
Mini Guide
GUIDE
See program listings for the
current time
DAY*
See listings for the next or
previous day
NUMBERS
Press channel numbers, then
OK/SEL
to tune to a channel
PPV
Direct Access to Pay-Per-View
(PPV), where available
DVR CONTROLS
Controls
Digital Video
Recording
(if available)
LiveTV
Displays live television
programming
FAV
Tune to your Favorite
channels, once you set
them up
CHAN
Change channels and access
to the
Flip Bar
LAST
Return to the previous screen
or channel
INFO
See program information
ARROWS
Use to highlight guide
features, or while watching
television, press to begin
browsing. NOTE: Arrows
control play back or recorded
programs with
DVR
MENU
Enter and exit the
Main Menu
SWAP
Swap between television
tuners
Basic I-Guide Navigation Tips
Note: Remote pictured may not reflect your actual remote. Basic functions should be the same.
* Amount of programming data varies by system.
Yellow is always the highlight color. As you navigate listings
using your remote, the highlight appears on screen to indicate
your current selections.
Press the buttons on your remote to move the highlight.
Press the
OK
to make your selection.
Press the
EXIT
button on your remote to return to watching TV.
Remote Control Features
DVR offers the ability to
control your viewing
experience by pausing live
TV and providing trick
playback modes (pause,
fast forward, slow forward,
fast rewind, slow rewind).
How do I...
Pause?
As you watch live TV and
recorded programs, press
PAUSE
on
your remote and the video on your TV
screen instantly freezes. Your DVR will
remain in pause for up to 90 minutes.
Press
PLAY
to resume normal play of
the program.
Rewind?
Press
REWIND
. Press it again up to 4
times to increase the rewind speed.
REW, REW2, REW3 and REW4 will
appear on the box display. REW is
the slowest setting and REW4 is the
fastest. Press REW a fifth time or press
play to resume normal play.
Fast Forward?
Press
FAST FORWARD
to move
forward in the program. Press it up
to 4 times to increase the fast for-
ward speed, FF, FF2, FF3 and FF4 will
appear on the box display. FF is the
slowest setting and FF4 is the fastest.
Note: You can only fast forward up to
the point on live broadcast.
Control Live TV?
Anytime you tune to a channel, the
DVR begins making a temporary
recording of whatever you’re watch-
ing. So you can PAUSE if the phone
rings, REWIND the scene you missed
and FAST FORWARD to skip what you
don’t want to watch.
Return to Live TV?
Press the
LIVE TV
button.
Using the Remote Control Arrow Buttons
The
buttons on your remote control will
control playback when you are watching a program
in progess or while watching a recorded program.
Playback Controls
You can play back your video
recording using your remote
through the use of the Video
Control Buttons
Slow Motion
Use Slow Motion to get an
inside look. To activate slow-
forward, press
PAUSE
and
then
FAST FORWARD.
To
use slow-rewind, press PAUSE and the
REWIND.
To return to regular speed, press
PLAY.
Instant Replay
Press PAGE or REPLAY on your remote to replay the
last 15 seconds. Press PAGE repeatedly to
continue skipping back in 15-second increments.
Build Your Personal Video Library
Follow the steps below to build and manage your
personal video library.
There are 3 ways to set and schedule recordings:
One Touch Record
Press
RECORD
on your remote any time while
watching TV or while navigating through the guide.
Recording beings immediately at the point you
pressed
RECORD
for programs airing now. You can
automatically schedule recording for programs
starting at a later time or date by pressing
RECORD
while in the listings. Recording will start at the
program’s scheduled start time.
Record From Program Information
From the listings, highlight and select a program,
scheduled for a later time. Press the
INFO
button
and you will see an information screen. Highlight the
•
RECORD icon
and press
OK
to start a recording for
the time the program is scheduled to start.
Manually Schedule a Recording
Step 1: Select
DVR
from the Main Menu, then
select
Set a Recording
Step 2: Select the start and end times and the day
you wish to record and confirm your settings.
Step 3: A channel list will then appear, allowing you
to select the channel to record. Select the
channel you want.
Step 4: A
Create a New Recording
Screen will appear,
select Creat a Recording to confirm your
settings or select the Recording Options icon
for additional Recording options.
DVR
(Digital Video Recorder)
Quick Tips
PLAY/PAUSE
STOP
RE
WIND
FAST FOR
W
ARD


