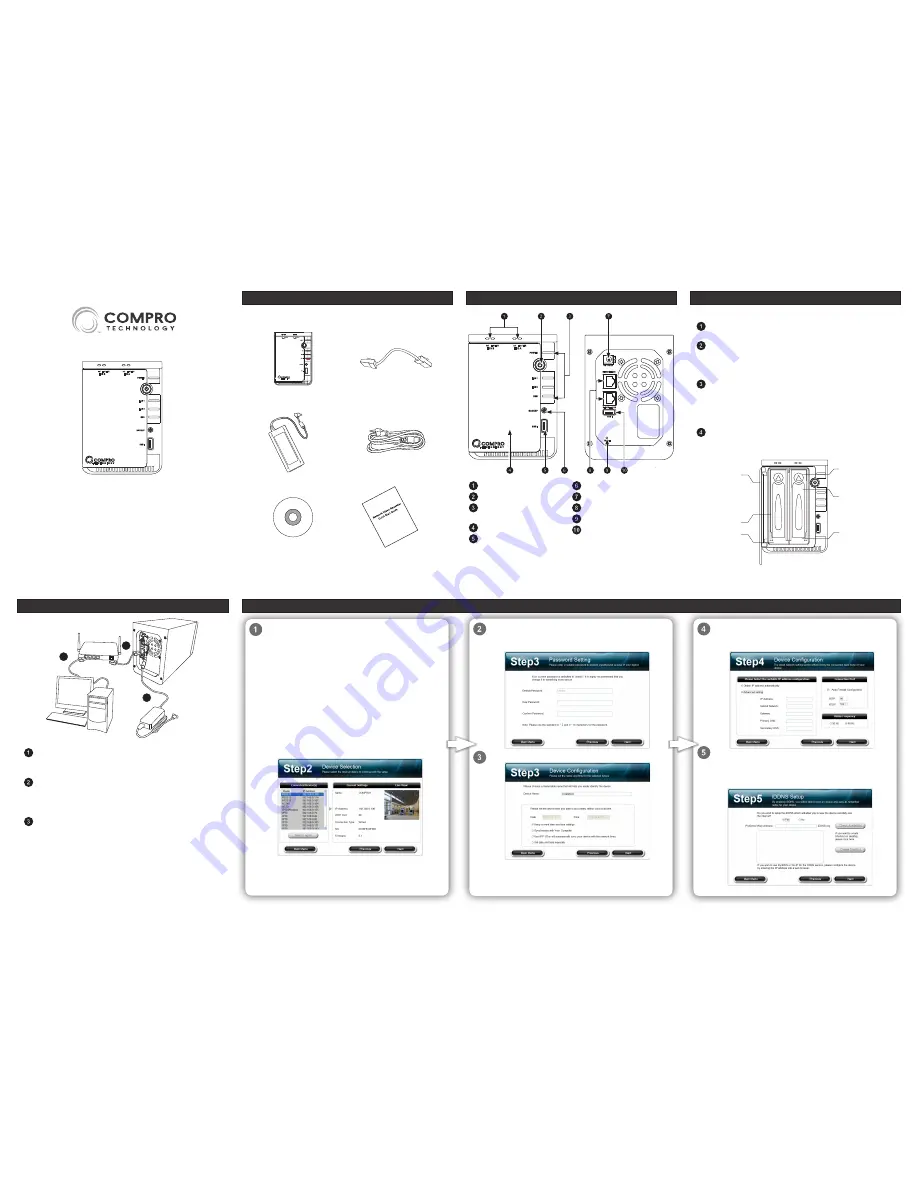
Insert the installation CD into your CD-ROM drive, and the
iWizard installer will start automatically (or manually run
the "iWizard.exe"). Afterwards, you will be asked to select the
displayed language. Then choose [Device Setup], and click on
the type of Compro surveillance product you wish to install, and
select a model from the list. Then hit [OK] and proceed with the
1st step.
In step 1, connect the device according to the illustration. In
step 2, The wizard searches for all the available Compro IP
surveillance products on your LAN network. Select your device
from the list, and then the live video and device information will
be showed on the right. You may also double-click on any item
on the "Connected Device(s)" list to view its live video in web
browser. (Meanwhile, the Windows Security Alert dialog may
appear. Please click [Unblock] to unblock it from firewall. )
Note:
If "Autorun" has been disabled in your computer, please
browse the contents of the installation CD and double-click the
"iWizard" executable to run the setup wizard.
We recommend you enter a new password to protect your
device. You can also click [Next] to skip this step. (The default
password is “admin”.)
Please check the device name and its date and time setting.
Choose to obtain IP address automatically (DHCP) or manually
configure IP address. Also configure your connection port and
local power line frequency here.
If you want to use iDDNS service, please click [Yes] and input
your desired address name. Then press [Check Availability]
button to check if the entered address has been used. Refer to
the user manual for the detailed information on Compro iDDNS.
Package Contents
Please check the package contents. If anything is missing, please don’t
hesitate to contact your local distributor.
Network video recorder
(HDD not included)
RJ-45 LAN cable
Power adaptor (DC12V)
Power cord
Network Video Recorder
Installation CD
Quick installation guide
Installing Hard Disk Drive
Follow the steps below to install a new hard drive.
Power off the NVR. Open then front lid, and then push the hard
drive release button to release the lever from its locked position.
Pull the lever slightly outward, and gently pull the hard drive
tray out. Then align the mounting holes on the hard drive to
match the hard drive tray, and use screws to fasten the hard
drive to the tray.
Slide the hard drive tray into the drive bay. Then gently push
the hard drive tray to ensure a secure connection between
the drive connector and the SATA connector inside the NVR.
Finally, push the lever to to its locked position and close the
front lid.
To install a second hard disk drive, repeate the previous steps.
If you intend to use RAID 1, it is recommended to install two
identical hard drives to avoid data incompatibility.
HDD Release
Button
Lever
Drive Bay 1
Front Lid
Drive Bay 2
HDD Tray
Note:
When intending to install a single hard disk drive into the
NVR system, please install it in the primary drive bay (HDD A).
Connecting the Cables
1
2
3
LAN cable from PC to hub/router:
If your LAN cable from PC has
been connected to the Cable/ADSL modem, please re-connect it
to the LAN port of your hub/router.
LAN cable from NVR to hub/router:
Use the bundled RJ-45 LAN
cable to connect the
2nd LAN port
of the NVR to the LAN port of
your hub/router. The number 1 LAN port, for the time being, is not
used by default.
Power:
Attach the power adaptor to the NVR's power connector
located at its rear panel. Then connect the power plug to a power
outlet.
Note:
This NVR supports UPS devices through its rear USB port.
To use the UPS, connect the USB cable from your UPS to the USB
port on the NVR. Then connect the power cord from your UPS to
a power outlet, and attach the NVR's power adaptor and connect
the power plug to your UPS.
Initial Software Setup
Hardware Layout
Drive status indicators
Power button
Power/LAN/USB status
indicator
Front lid
USB port 1
One-touch backup button
Power adaptor port
Gigabit LAN ports
Reset button
USB port 2
Note:
For the time being, only LAN port 2 is available for use.
RS-2208
RS-2212
Network Video Recorder
Quick Installation Guide


