background image


For Windows XP users 
 

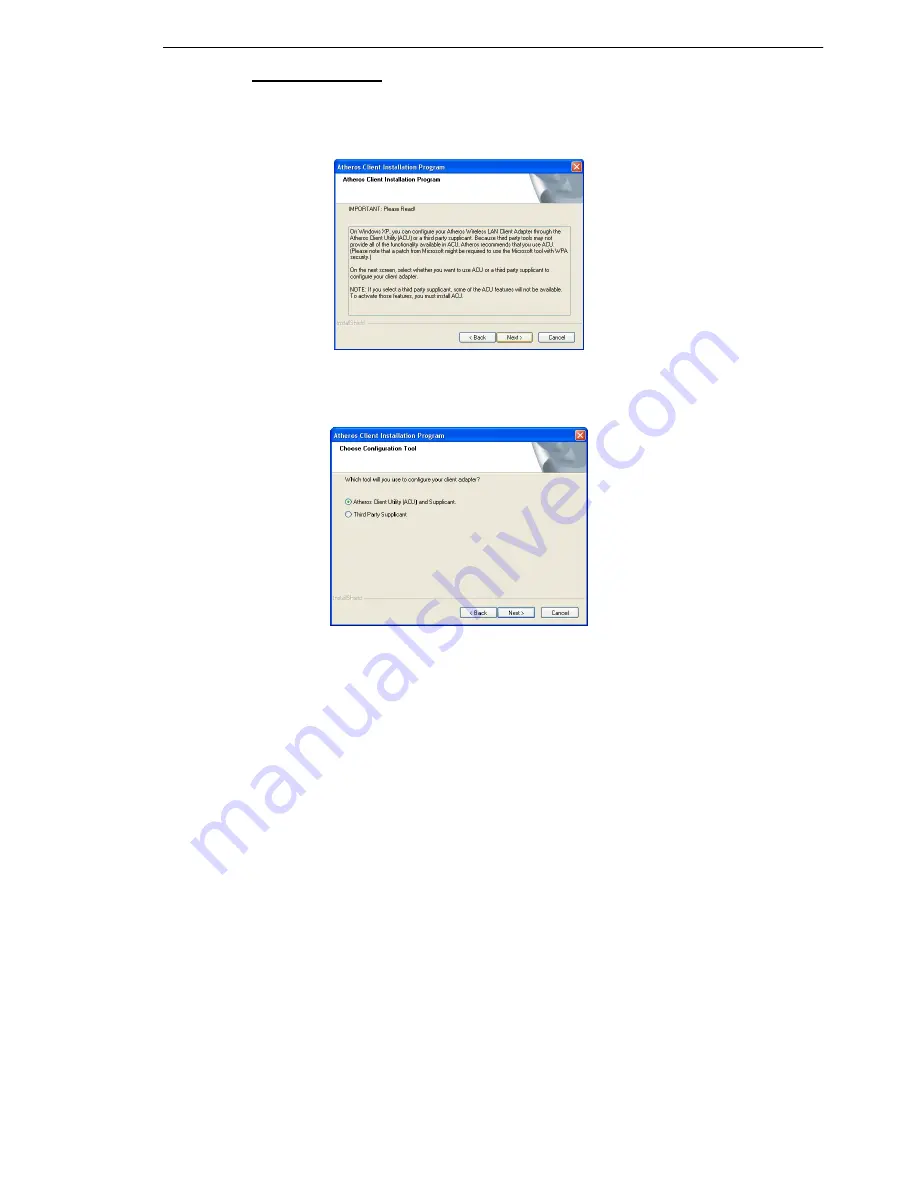
7.  If you are using Windows XP as operating system, the following 

screen will appear. Read the notice carefully and click on the Next> 
button to proceed. 


8. 

Select your choice of tool to assist you in configuring your adapter. 
Click on the Next> button to proceed. 


Atheros Client Utility (ACU) and Supplicant option 
Select this option to install your network adapter. (Recommended) 
 
Third Party Supplicant option 
Select this option if you decide to use Wireless Zero Configuration 

Utility to configure your wireless device. Installing this tool will only 
allow you to view the status of the connected wireless device/s 
through the utility; configuration using the utility will not be allowed. 

Summary of Contents for IWAVEPORT WLM54GP30

Page 1: ...IWAVEPORT WLM54GP30 USER MANUAL...

Page 2: ...anual Revision by Daniel Manual Number U 0539 V1 8C Version 1 8 May 2007 Disclaimer Compex Inc provides this manual without warranty of any kind expressed or implied including but not limited to the i...

Page 3: ...ealer or an experienced radio TV technician for help Caution Any changes or modifications not expressly approved by the grantee of this device could void the user s authority to operate the equipment...

Page 4: ...he provisions of the EC directive This Class B digital apparatus complies with Canadian ICES 003 Technical Support Information The warranty information and registration form are found in the Quick Ins...

Page 5: ...tion and 64 bit 128 bit and 152 bit WEP Wired Equivalent Privacy They support easy Plug and Play installation and combine simplicity data privacy and reliability for your wireless network Chapter 1 Ba...

Page 6: ...WLM54AG PCI slot...

Page 7: ...tility section and the system will run the setup exe automatically 3 Next the Atheros Client Installation Program screen appears Click on the Next button to proceed 4 When the License Agreement screen...

Page 8: ...option For Windows XP user only Select this option if you are going to use the Wireless Zero Configuration Utility to configure your PCI adapter Note that only Windows XP comes with the Wireless Zero...

Page 9: ...n the Next button to proceed Atheros Client Utility ACU and Supplicant option Select this option to install your network adapter Recommended Third Party Supplicant option Select this option if you dec...

Page 10: ...on the Next button to proceed 10 The screen below appears to inform you that the driver will be automatically installed if you have already inserted your client adapter into the PCI slot of your comp...

Page 11: ...lation Chapter 2 Using the System Tray Utility This chapter will elaborate on the Atheros system tray utility found at the right bottom corner of your screen Right click on the utility icon and the me...

Page 12: ...ty Launch the Client Utility Wireless G Excellent Signal Strength Example Wireless AG No Link Example Manual LEAP Login If you select this option you will have to manually start the LEAP authenticatio...

Page 13: ...e exists you will need to add a profile first Connection Status To view the connection status of your wireless PCI adapter Alternatively you may also double click on the utility icon in the system tra...

Page 14: ...Shows the IP address of the access point the wireless adapter is connected to if any Current Receive Rate Displays the data rate at which the wireless adapter is currently receiving from the wireless...

Page 15: ...e via the network statistics 3 1 Current Status Tab Displays the performance of the network adapter in the wireless network Wireless AG Current Status Upon clicking on the Advanced button you will be...

Page 16: ...ne wireless connection 3 3 Diagnostics Tab The Diagnostics tab lists the following receive and transmit diagnostics for packets received by or transmitted to the network adapter Multicast packets tran...

Page 17: ...al information on frames that are either received by or transmitted by the network adapter This button allows you to run the diagnostic test save the test report and view the test results on the wirel...

Page 18: ...mple examples the wireless clients communicate through router which are devices that act as base station for all wireless communication Data packets from the wireless clients are transferred to the wi...

Page 19: ...e same SSID as the AP will be able to access wirelessly to PC1 via the wireless router For Router Ensure that you have enabled the DHCP server in your router and that your wireless clients are set to...

Page 20: ...the wireless AP 3 Click on the Refresh button if your system is unable to detect your wireless AP Once found select the Network Name SSID used by the router wireless router and click on the Activate b...

Page 21: ...The SSID of both the wireless router and the wireless client must be the same for them to communicate with one another 4 Enter the Profile Name e g Workstation 2 for easy identification...

Page 22: ...nd click on the Configure button 6 Enter the encryption key in the field provided Please note that this key must be the same as the one that you had configured for your wireless router 7 Click on the...

Page 23: ...to your access point When the screen appears Pinging 192 168 168 1 bytes 32 time 2ms TTL 128 Pinging 192 168 168 1 bytes 32 time 2ms TTL 128 Pinging 192 168 168 1 bytes 32 time 2ms TTL 128 This indic...

Page 24: ...tify this profile a client name and the SSID of the wireless network to connect to Note that the Client name refers to the name that is registered to your PC You can enter up to 3 different SSIDs in o...

Page 25: ...changes Notice that ABC has been added to the profile list For details on how to set the different authentication and encryption types available under the Security Tab kindly refer to Chapter 7 Types...

Page 26: ...To modify an existing profile select the profile that you wish to modify and click on this button We are using profile Any as an example...

Page 27: ...lar profile that you wish to delete and click on this button We are using profile default as an example Note that the active profile the profile that you are currently using cannot be deleted Active p...

Page 28: ...To activate a profile select the profile and click on this button We are using profile wireless AP as an example Once a profile is activated this icon will appear next to the profile name wireless AP...

Page 29: ...disk Select the profile that you wish to save and click on this button We are using profile ESSID as an example Choose the folder to save to enter the name under which to save the profile and click on...

Page 30: ...profile select ESSID prf and click on the Open button Notice that the profile ESSID has been imported to the list of profiles If you have created several profiles this function allows you to establish...

Page 31: ...on the Add button from the Available Profiles list Refer to the screen shown below Please note that you need AT LEAST TWO profiles to activate the Auto Select Profiles function and that each of your...

Page 32: ...ves battery power but decreases radio range Power Save Mode Only applicable to Infrastructure mode This feature reduces power consumption by the PCI adapter There are 3 options for this mode Off The p...

Page 33: ...at support short preamble to boost the throughput Long Only If your device is having trouble to communicate with other 802 11b devices you may try to select the Long Only option 802 11 Authentication...

Page 34: ...se Shift Keying QPSK Complementary Code Keying CCK 16 QAM 64 QAM DBPSK DQPSK Antenna Type External 2dBi antenna and an SMA type connector Network Interface PCI 2 3 compatible Physical and Environment...

Reviews: