6
TESTING THE INSTALLATION
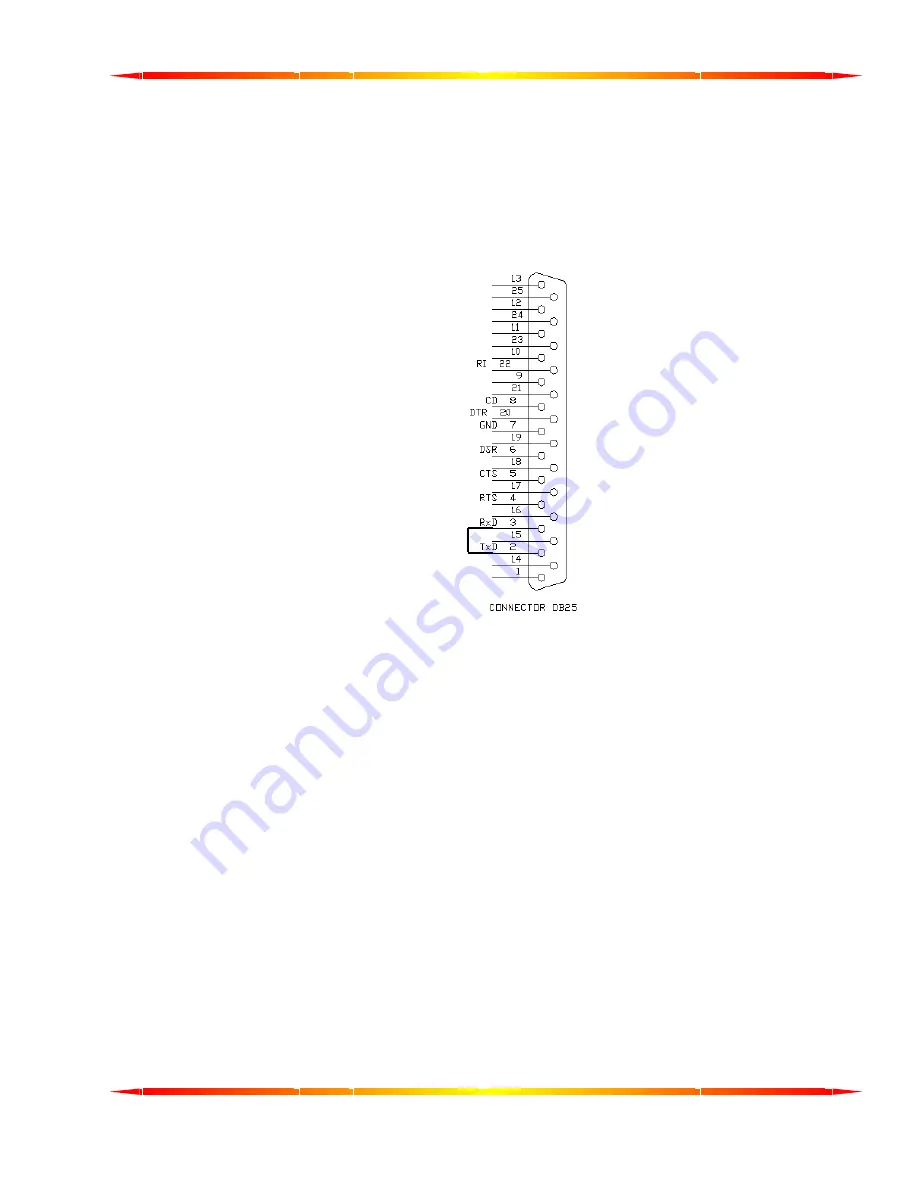
To fully test the installation of your Fastcom: 232/4-LPCI-335, you will need to build a "loop back plug". Materials
needed are a DB25 female receptacle, solder cup style, and two short pieces of 20 or 24 AWG stranded wire.
This loop back plug can be used to test each RS-232 port. Jumper the pins together on the DB25 as illustrated
below:
RxD Pin 3
TxD Pin 2
Testing the Fastcom Async PCI Port in Windows
These instructions assume that you have already installed the card and have followed the installation instructions.
The Device Manager should show the boards/ports that are installed, and the COM numbers assigned to those
ports.
1. Attach the supplied 232/4 Cable Assembly to the DB44 connector. Install the loopback plug on the port to
test.
2. Open an MS-DOS or Command prompt windows and change to the directory
(C:\> cd
directoryname )
where you saved the Fastcom software files that were either copied from the CD or
downloaded from our website. Change to the examples directory, then change to the loop_back
directory.
3. Type:
loop_back X
Where X is the COM port you wish to test.
4. This test will transmit data out of the specified COM port and receive the data on the same port, checking
to see that the data is still the same.
If you get error messages during the loop_back test, some possible reasons are:
1. You have an incorrect or faulty loop back plug construction or a bad connection. Verify that the wiring is
correct in your plug and correct any problems you may find.
2. The Fastcom board did not install correctly. Open the Device Manager (Start -> Run -> devmgmt.msc ->


