①
Fixed Board Lens
②
Gimbal Bracket
②
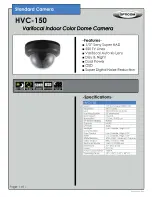
ITEM
NTSC
PAL
Total Pixels
811(H) x 508(V)
795(H) x 596(V)
Effective Pixels
768(H) x 494(V)
752(H) x 582(V)
Sensor
1/3" High Resolution CCD
Scanning System
2:1 Interlace
Frequency
Horizontal :15.734KHzVertical : 59.94Hz Horizontal :15.625KHzVertical : 50.00Hz
Resolution
More than 630 TV Lines
Video Output
1.0Vp-p Composite Signal ( 75ohm )
AGC
S/N (Y signal)
Min.Illumination
White Balance
Electronic shutter speed
1/60s - 1/100,000s
1/50s - 1/100,000s
3D-DNR
OFF / ON Selectable(LOW / MIDDLE / HIGH / CNR)
Sens-Up
OFF / AUTO( x2 ~ x1024)
D&N Selection
AUTO / COLOR / BW / EXT
BLC
ON / OFF Selectable
D-WDR
ON / OFF Selectable
HLM
ON / OFF Selectable
Defect Pixel Compensation
IR SMART
ON / OFF Selectable
Motion Detection
OFF / ON(AREA 1~4)
Privacy Masking
OFF / ON(MASK 1~8)
MIRROR
ON / OFF Selectable
SHARPNESS
ON / OFF (Level Adjustable 1~50)
Multi Language
Available
O.S.D
Available
IR LEDs
24IR LEDs
Lens Mount
3.6mm
Operating temperature/Humidity
-10
℃
~+50
℃
/ 0~80% RH
Power Supply
DC12V 80mA (CDS ON 350mA)
Dimensions
Weight
112(W)mm X 87(D)mm
Appx. 200g
E
L
E
C
T
R
I
C
A
L
OFF / LOW / MIDDLE / HIGH
52dB or more (AGC OFF)
0 Lux for Infrared Lighting Conditions
ATW / AWC / MANUAL / PUSH
Built In OSD
SPECIFICATIONS
SETTING & INSTALLATION
When you install the camera,
please glue up the end of
cable to keep it stable in order
to protect the camera from
the humidity problems.
!
①
CONNECTOR
ACCESSORIES
< DIMENSION >
Screws for Fixing
Base
Cover
Adjustable Angle
(Tilt : 10~90
˚
/ Manual)
Adjustable Angle
(Pan : 0~355
˚
/ Manual)
▶
Screw for fixing
▶
User's Manual
< FUNCTIONS >
▶
Video Test Output
▶
OSD Control
▶
Video Test
Cable
1. Dome Base Mounting
- Open the dome cover ring from the dome base with coins.
- Mount the base of camera to a sturdy surface using screws with
accessories supplied through premade holes on the base
of the dome.
2. Power Connection & Monitor Impedance
- To avoid fire or shock hazard, always use a CE listed power supply.
- Check Monitor impedance switch if the image is blurred.
3. Camera Adjustment
- Adjust camera angel by moving the gymbal bracket.
- Adjust Zoom and Focus by lever attached to lens if it is varifocal lens.
- Use the OSD control to select the different camera functions if it is
OSD model.
4. Dome Cover Mounting
- Put the dome cover back and make sure it is properly fixed.