ATTENTION:
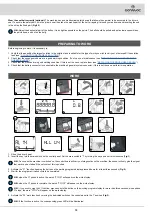
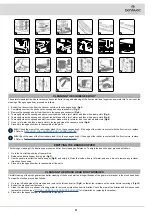
To select the reverse gear, you need to first shift the lever up and then in the direction indicated by the arrow (
Fig.11
). With
reverse gear engaged if you press the drive pedal a buzzer will sound and the white rear lights come on.
CAUTION:
the reverse speed is lower than the forward speed to comply with current health and safety standards.
N.B.:
in order to disengage the reverse gear, disengage the lever underneath the steering wheel.
N.B.:
once the lever has been engaged in the reverse position, the acoustic signalling device will be activated in order to signal that the
machine's reverse gear has been engaged.
N.B.:
If the reverse gear is engaged with the squeegee in its working position, once the drive pedal is pressed, the machine will begin to
move in reverse and the squeegee body will be raised into its resting position.
N.B.:
If the reverse gear is engaged with the brush head in its working position, once the drive pedal is pressed, the machine will begin to
move in reverse and the brush head will remain in its working position, but the solenoid valve will stop dispensing detergent solution to
the brushes.
ADJUSTING THE OPERATING SPEED
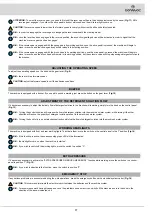
To adjust the operating speed, use the knob on the gear lever (
Fig.5
).
N.B.:
there are three forward speeds.
CAUTION:
adjust the forward speed to suit the adhesion conditions.
BUZZER
The machine is equipped with a buzzer. If you need to sound a warning, just press the button on the gear lever (
Fig.12
).
ADJUSTMENT OF THE DETERGENT SOLUTION FLOW
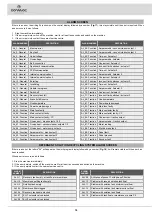
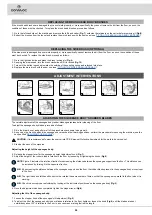
If it becomes necessary to adjust the delivery flow of detergent solution to the brushes while working, simply turn the knob on the control panel
(
Fig.13
).
N.B.:
Turning the knob clockwise will increase the flow of detergent solution into the machine's water system, while turning it the other
direction will reduce the quantity of detergent solution present in the machine's water system.
N.B.:
Turning the knob fully in an anticlockwise direction will stop the flow of detergent solution into the machine's water system.
WORKING HEADLIGHTS
The machine is equipped with front and rear working lights. To activate them, move the switch on the control panel to the “I” position (
Fig.14
).
N.B.:
If the function is active, the corresponding green LED will be illuminated.
N.B.
: the sidelights come on when the machine is started.
N.B.
: if you wish to switch off the working lights, move the switch to position “0”.
EXTRA PRESSURE
If it becomes necessary to activate the “EXTRA PRESSURE ON BRUSH HEAD BODY” function while working, move the switch on the control
panel to position “I” (
Fig.15
).
N.B.
: if you wish to deactivate the function, move the switch to position “0”.
EMERGENCY STOP
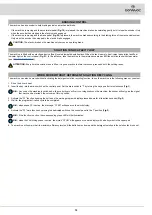
If any serious problems are encountered during the work operations, press the emergency button on the electrical system carter (
Fig. 16
).
CAUTION
: This command interrupts the electrical circuit between the batteries and the machine system.
N.B.
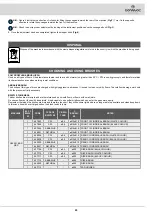
: To recommence work having stopped and once the problem has been resolved, switch off the machine and turn the knob in the
direction of the arrows indicated on it.
17


