


25
Removing and Replacing the SATA Hard Disk
NOTE:
The system does not support Parallel ATA (PATA) hard drives.
Before you remove the old hard drive, be sure to back up the data from the old hard drive so that you
can transfer the data to the new hard drive. Also, if you are replacing the primary hard drive, make sure
you have a Recovery Disc Set to restore the operating system, software drivers, and any software
applications that were preinstalled on the system.
1.
Remove all removable media, such as compact discs, from the system unit.
2.
Turn off the system power properly through the operating system, then turn off any
external devices.
3.
Disconnect the power cord from the power outlet and disconnect any external devices.
CAUTION:
Regardless of the power-on state, voltage is always present on the main board as
long as the system is plugged into an active AC outlet. You must disconnect the power cord to avoid
damage to the internal components of the system.
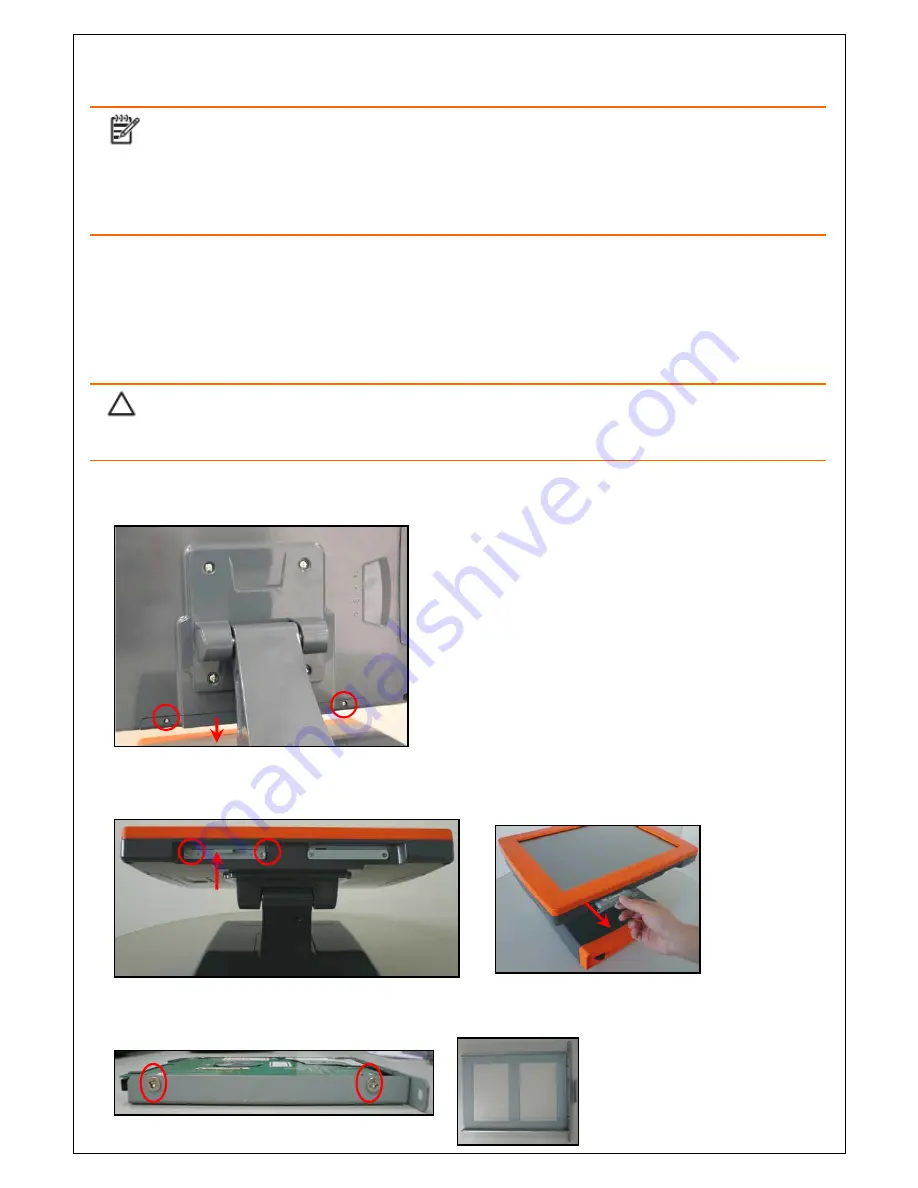
4.
Remove 2 screws and unplug HDD cover.
5.
Remove 2 screws that secure the HDD tray holder, and pull out the HDD box.
6.
Remove 4 screws at both sides, and remove the hard disk.
HDD box
Summary of Contents for P1000
Page 1: ...P1000 Installation Guide P1000 Installation Guide Ver Draft 1 2_2009 06 29 ...
Page 13: ...5 Rear View 2nd Display Cover IO Cover WiFi Bluetoooth Cover RFID HDD Cover Display Hinge ...
Page 16: ...8 Dimensions P1000 Dimensions P1000 and MSR Dimensions ...
Page 17: ...9 P1000 and 15cm 8 9 Pole Display Dimensions ...
Page 18: ...10 P1000 and 15cm VFD Pole Display Dimensions ...
Page 39: ...31 P1000 and 8 9 15cm pole display full view P1000 and VFD 15cm pole display full view ...


