background image


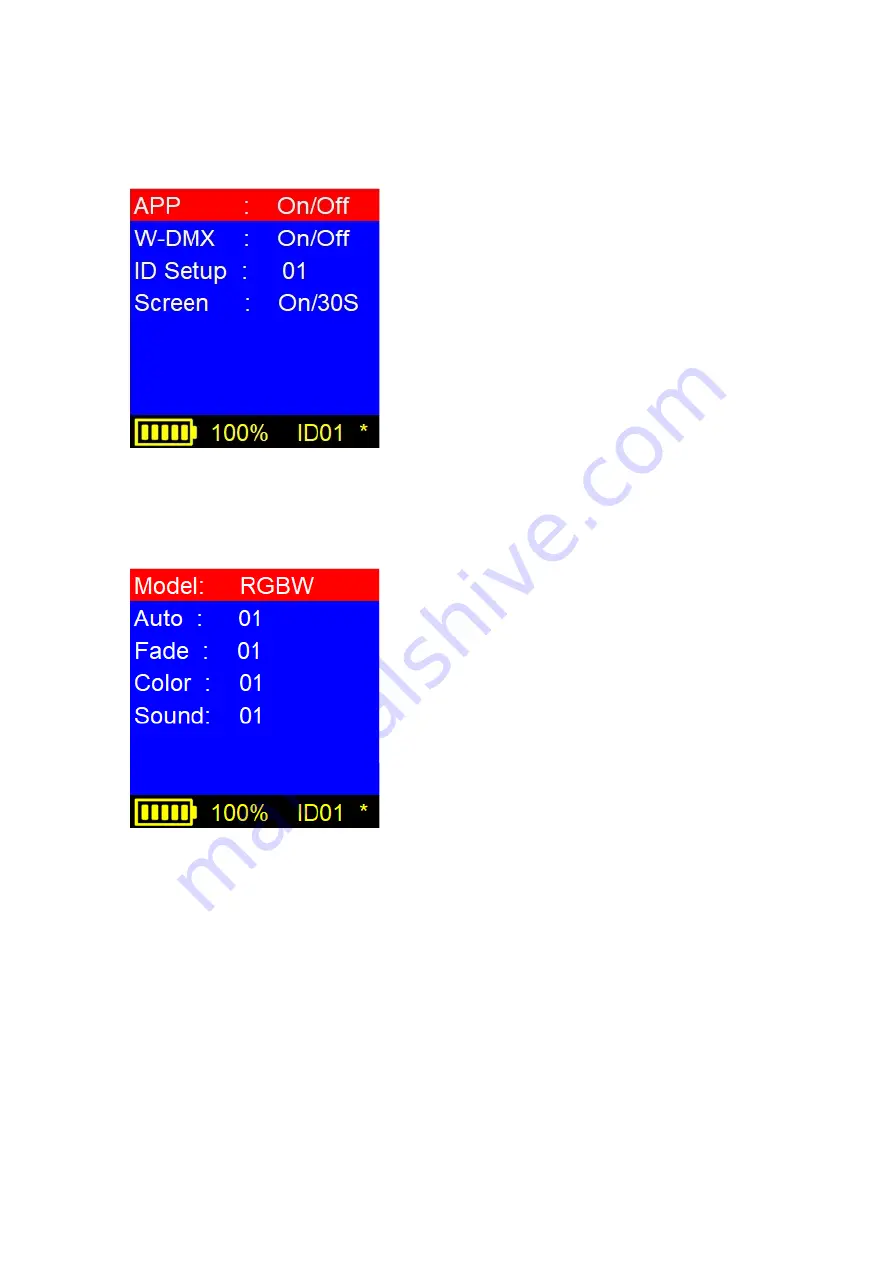
Menu Page 2 

On this page, you will find the wireless ID, W-DMX, and screen settings.   

è

 To set the wireless group ID, press the Down 

button until 

ID Setup

 is highlighted. Press Enter 

multiple times until you reach your desired ID. 
Press Esc to confirm. 

è

 Wireless DMX is on by default. To turn it off, 

press the Down button until 

W-DMX

 is highlighted. 

Press Enter to select, and down to change the 
setting. Press Enter to confirm. 

è

 The screen can be set to stay on or turn off after 

30 seconds. To change the screen settings, press 
the Down button until 

Screen

 is highlighted. Press 

Enter to select, and down to change the setting. 
Press Enter to confirm. 


Menu Page 3 

On this page you will find the fixture selection and 
presets.   

è

  AirHub includes presets for RGBW and 

RGBAW-UV lights. To select your fixture type, 
press the Down button until 

Model

 is highlighted. 

Press Enter to select, and down to change the 
setting. Press Enter to confirm.   

è

  To set your fixtures to Auto or Fade modes, 

press the Down button until 

Auto

 or 

Fade

 is 

highlighted. The fixture will immediately change to 
the highlighted mode. To change the speed of the 
program, press Enter, then Up or down to change 
the speed. Press Enter to confirm.   

è

  To set your fixtures to a static color, press the Down button until 

Color

 is highlighted. 

The fixture will immediately change to the selected color. To change the color, press 
Enter, then Up or Down. Press Enter to confirm.   

è

  To set your fixtures to Sound Active mode, press the Down button until 

Sound

 is 

highlighted. The fixture will immediately change to the selected color. To change the 
color, press Enter, then Up or Down. Press Enter to confirm.   


Summary of Contents for AirHub DMX CKU-7010

Page 1: ...SKU CKU 7010 USER MANUAL...

Page 2: ...N 4 POWER CHARGING 5 DISPLAY OPERATION 6 SETUP EXAMPLES 8 TROUBLESHOOTING 10 TECHNICAL INFORMATION 11 Please read these instructions carefully before use Operating this fixture according to these inst...

Page 3: ...away from any lighted objects Do not install or operate this fixture near flammable materials This device must be installed operated and maintained by a qualified professional Please check if the vol...

Page 4: ...asier than ever to fill a room with color by simply setting all the fixtures to the same wireless group ID and watching them automatically connect and synchronize The ColorKey Air Series ecosystem inc...

Page 5: ...s whenever the included power adapter is connected and plugged into a power source The AirHub can be used while charging If it is plugged in and not in operation make sure it is turned off The indicat...

Page 6: ...ed and communicating wirelessly ESC Navigate to the previous higher level menu item Down Scrolls through the menu items and numbers in descending order Up Scrolls through the menu items and numbers in...

Page 7: ...irHub includes presets for RGBW and RGBAW UV lights To select your fixture type press the Down button until Model is highlighted Press Enter to select and down to change the setting Press Enter to con...

Page 8: ...n also transmit wireless DMX512 to most 2 4Ghz enabled fixtures outside of the Air Series ecosystem through group ID 0 5 such as the ColorKey MobilePar Mini HEX 4 Simply scroll through the wireless ba...

Page 9: ...o the DMX input of a lighting fixture Connect to the wireless transmitter using the same wireless group ID AIRHUB D M X ESC DOWN UP ENTER AIRHUB DMX DMX CONTROLLER AIRPAR COB QUAD ESC DOWN UP ENTER IR...

Page 10: ...he same as the receiving light or hub Make sure the receiving fixture is in DMX mode Make sure wireless is enabled on your AirHub Make sure a DMX cable is properly connected to your DMX controller Mak...

Page 11: ...thium Ion battery 20 hours working time 5 hours charge time Power Consumption 11 7W Power supply 12 6V 1A AC100 240V 50 60Hz Working temperature up to 40 C Product size 5 5 x 5 5 x 3 5 in Net Weight 1...

Reviews: