Page
27
of
42
SoniQ HQ Plus
Setting Print Origin
Print origin sets the print starting point with right most print head position as the reference point. It can be set
by two ways; moving and positioning the carriage and typing the offset value directly in the given field.
Follow these steps to change the print origin:
Step 1
:
Move
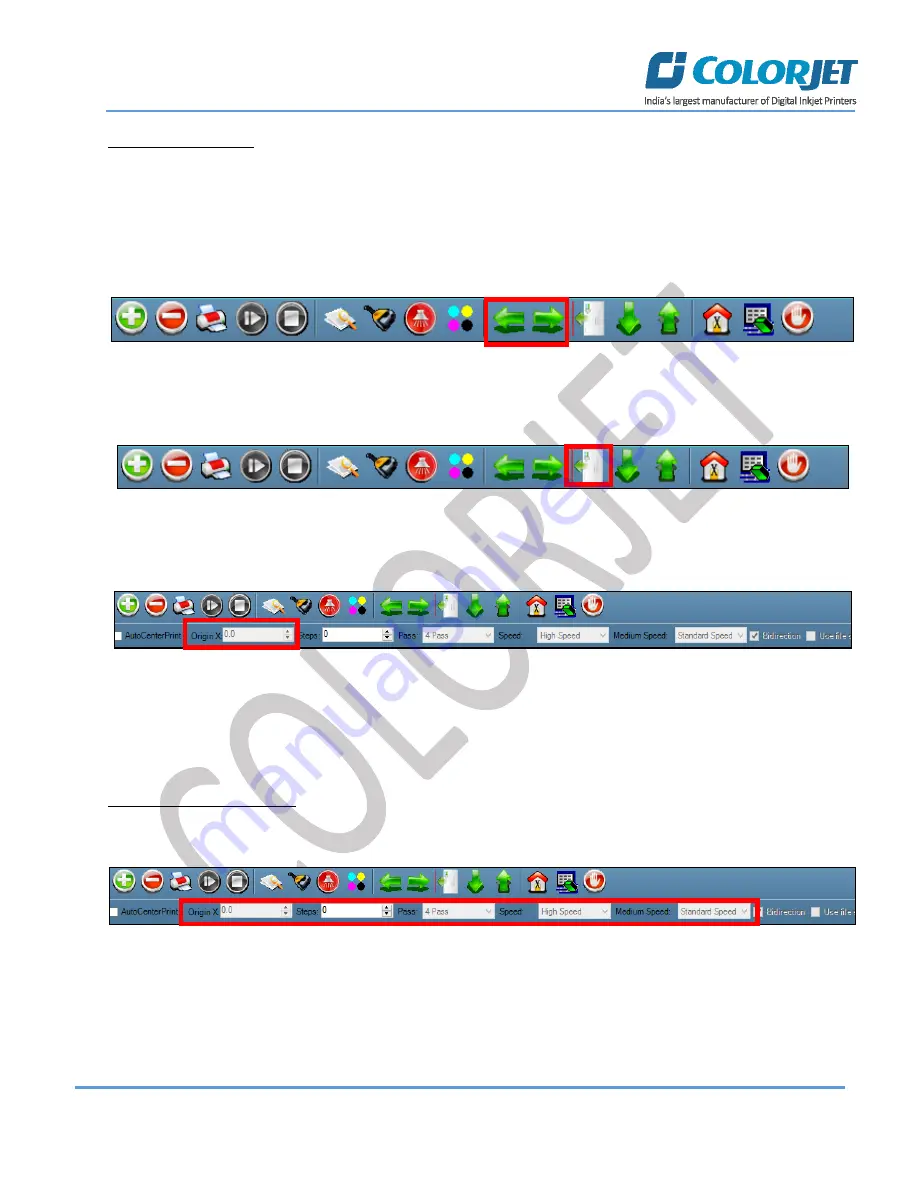
the carriage at the position from where you want to start the printing by
clicking
on the left and
right buttons on the
Quick Access Toolbar
, as shown below:
Fig 32: Adjusting the Carriage Position
Step 2
: After positioning the carriage,
click
on the
Set print origin
icon on the
Quick Access Toolbar
, as shown
below:
Fig 33: Selecting the Set Print Origin Option
On clicking the
Set print origin
icon, the current position of the carriage gets updated in the
Origin X
text box, as
shown below:
Fig 34: Displaying the Origin Value
Now, the printing origin gets set. Additionally, you can also enter the print origin value manually in the Origin X
field under the Print Parameter section.
Setting Print Parameters
Using the Printer Manager, you can manually change print preferences as per the printing requirements such as
print origin, printing speed, no of steps, and more as shown below:
Fig 35: Setting Printing Parameters
The description of printing parameters is given as follows:
•
Origin X
: Directly enter the print origin value.
•
Steps
: Remove step size errors in the current print job by specifying number of steps.


