background image

5

Using Your  Remote Transmitter 

(cont.)

Disabling the IT-s

TM

 Interior Theft Sensor

It may be necessary at times to disable the IT-s

TM

 Interior Theft Sensor,

especially when parking in areas (like parking garages) where
extreme vibration may cause false alarms. Press the ARM button and
then press the FIND/PANIC button within two seconds of pressing
ARM to disable the interior theft sensor. The siren will chirp three times
to indicate that the sensor is disabled. The sensor will become
enabled again the next time the system is armed normally.

Two-Stage Door Unlock

If this feature is enabled on your system, pressing DISARM one time
will unlock only the driver’s door. Press DISARM again within 1 minute
to unlock all doors.

Activating the Trunk Release Feature

Press and hold TRUNK to open the vehicle trunk or hatch (if equipped
and connected). If this button is used to operate another accessory,
the accessory will stay active for as long as the button is held.

Turning on the Vehicle Headlights

Press and hold the LIGHTS button to turn on the vehicle headlights.
(The alarm system will attempt to arm if not already armed, unless it is
in Valet mode.) The lights will stay on for 20 seconds, or until LIGHTS
is pressed again.

Using AUX 3

If this feature is enabled on your system, pressing AUX for 1 second
will activte the auxilliary function.

Using the Progressive Car Finder Feature

Press FIND on the remote control to locate your vehicle. The siren will
emit five short chirps at low volume, increasing in volume each of
three times the button is pressed.

Personal Protection Alarm (Panic)

Press and hold the PANIC button to activate the vehicle siren and
parking lights for 30 seconds. (If the vehicle horn is connected, the
horn will “pulse” for 30 seconds.) Press any remote control button to
turn off the Panic alarm.

Remote Start / Stop Feature

Press ARM, then press START within 2 seconds on the remote control.
If all safety parameters are correct, the engine will start within 5 seconds
(diesel engines will take longer.) Press and hold START again to turn
off the vehicle. (Turn to page 6 for more on remote start features.)

Using Second Car Mode

If this feature is enabled, one transmitter will control two vehicles
equipped with a PowerCode

TM

 system. To operate the second vehicle,

press the shift button, then within two seconds, press the desired
function button.

Summary of Contents for PC 7500

Page 1: ...bed in this manual is applicable to most vehicles However due to the engine type and configuration of some vehicles i e diesel engines some functions AND OR SAFETY PRECAUTIONS may not apply Please see your installing dealer for more information PC 7500TM Car Start Security and Convenience System 101516 3 ...

Page 2: ...If your vehicle stalls or does not start Remote Start Safety Features Entering the Vehicle While it is Running via Remote Start Pre Heating or Pre Cooling the Interior of the Vehicle Turning on the Rear Window Defroster Using the Quick stop Feature Automatic Convenience Options 7 When Your Security System is Triggered 8 The Interior Status Indicator 9 System Maintenance 9 Changing the Remote Contr...

Page 3: ...s and personal belongings Remote Keyless Entry The PowerCode PC 7500TM conveniently locks and unlocks vehicle doors and opens the trunk or hatch by remote control Personal Protection Features Remote Panic Alarm Headlight control Illuminated Entry and Car Finder are among an array of features that enhance personal safety May require additional components and or charges Interior Status Indicator The...

Page 4: ...ecured entrance until it is closed Disarming the Security System To disarm the system press the DISARM button The siren will chirp and the parking lights will flash once and the doors will unlock The courtesy light will turn on for 1 minute or until the vehicle is started Attempted Intrusion Identification If the siren chirps four times when disarming this indicates that the system was triggered i...

Page 5: ...tem will attempt to arm if not already armed unless it is in Valet mode The lights will stay on for 20 seconds or until LIGHTS is pressed again Using AUX 3 If this feature is enabled on your system pressing AUX for 1 second will activte the auxilliary function Using the Progressive Car Finder Feature Press FIND on the remote control to locate your vehicle The siren will emit five short chirps at l...

Page 6: ...ansmitter after turning the ignition key off Doing so places your system into a temporary or onetime Valet mode Next time you exit your vehicle the system will arm in the normal manner Using Your Remote Starter StartingYourVehicle The remote start function is activated by pressing the ARM button then pressing the START button on the remote control within 2 seconds The system will check the vehicle...

Page 7: ...he temperature controls to the desired setting and operation After the Power CodeTM starts the vehicle the heater or air conditioning will activate and heat or cool the interior to your setting Turning on the Rear Window Defroster if connected While the vehicle is running via remote start press DEFRST on the remote control The vehicle defroster will activate and run for 10 minutes or for your vehi...

Page 8: ... doors will automatically unlock When Your Security System is Triggered The Power Code PC 7500TM will trigger if one of the following events occurs while the system is armed Any protected entrance is opened The vehicle ignition is turned on The vehicle is jolted hard enough to signal the impact detector Once the alarm is triggered the siren or horn sounds and the vehicle parking lights flash for 3...

Page 9: ...ogether then test the remote control Adding Remote Controls toYour System The Power Code PC 7500TM has the ability to operate from up to eight 8 remote controls Follow these instructions to add a remote control to your system 1 Make sure the security system is disarmed and the ignition is off 2 Open the driver s door 3 Turn vehicle ignition on 4 Press and hold emergency override button After 15 se...

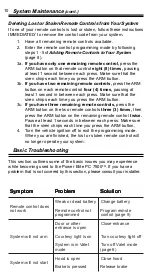
Page 10: ... Deleting Lost or Stolen Remote Controls fromYour System If one of your remote controls is lost or stolen follow these instructions IMMEDIATELY to remove the control code from your system 1 Have all remaining remote controls available 2 Enter the remote control programming mode by following steps 1 5of Adding Remote Controls to Your System page 8 3a If you have only one remaining remote control pr...

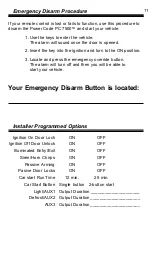
Page 11: ...erride button The alarm will turn off and then you will be able to start your vehicle Your Emergency Disarm Button is located Installer Programmed Options Ignition On Door Lock ON OFF Ignition Off Door Unlock ON OFF Illuminated Entry Exit ON OFF Siren Horn Chirps ON OFF Passive Arming ON OFF Pasive Door Locks ON OFF Car start Run Time 12 min 25 min Car Start Button Single button 2 button start Lig...

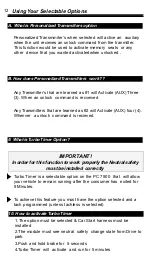
Page 12: ...s 2 will Activate AUX four 4 Whenver a unlock command is recieved IMPORTANT In order for this function to work properly the Neutral safety must be installed correctly Turbo Timer is a selectable option on the PC 7500 that will allow your vehicle to remain running after the consumer has exited for 5 Minutes To achieve this feature you must have the option selected and a tach programmed unless tachl...

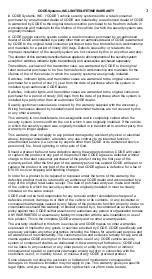
Page 13: ... i e service by anyone other than CODE or its authorized service personnel fire flood lightning or other acts of God Should a product be found to be defective during the warranty duration CODE will repair or replace the product or any part of the product that CODE agrees is defective without charge to the retail consumer purchaser of the product during the first year of the warranty period After t...

Page 14: ...thorized CODE dealer 3 Vehicle must be less than three 3 model years old at the time of installation 4 The security system must have been fully armed at the time of the vehicle theft 5 The vehicle in which the system is installed must be insured for theft by a licensed insurance underwriter in the state in which the vehicle is registered Terms of payment 1 The vehicle must first be considered a to...

Page 15: ...g two conditions 1 This device may not cause harmful interference and 2 This device must accept any interference received including any interference that may cause undesired operation Warning Changes or modifications not expressly approved by the party responsible for compliance could void the user s authority to operate the equipment Notes ...

Page 16: ...16 ...

Reviews: