background image

4

2009 Audiovox Electronics Corporation. All rights reserved.

  Valet Mode

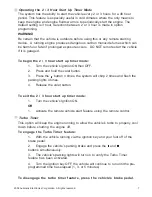
To engage valet mode:

1. Turn the ignition key to the ON position.
2. Press and hold the emergency override button.
3. The LED will light solid indicating that the system is in valet mode.

When valet mode is activated the status LED will light solid, and all security and
remote start functions will be disabled.

To disengage valet Mode:

1. Turn the ignition key to the ON position.
2. Press and release the emergency override button.
3. The LED will turn off indicating that the system has exited valet mode.

  Two Stage Door Unlock (Optional)

If this feature is enabled on your system, pressing the    button one time will
unlock only the driver’s door. Press   again within three seconds to unlock the
remaining doors.

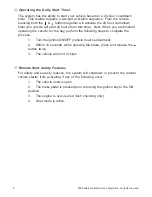
  Manually Overriding the Security System

Your system can be disarmed without the use of the transmitter. This is
necessary, since you will need the ability to operate your vehicle if the transmitter
is lost or its battery fails. To by-pass the alarm system;

1.  Open the vehicle door.  The alarm will sound.

2.  Turn the ignition key to the ON position.

3.  Within 5 seconds, press and release the valet push button switch.

The alarm system will stop sounding and enter the (by-passed) mode.  You can
now start and operate the vehicle normally.

  Activating the Trunk Release Feature (Optional)

If this feature is enabled on your system, pressing and holding the   button for 3
seconds will open the vehicle’s trunk or hatch.

  Activating Optional AUX 1 (Optional)

If this feature is enabled on your system, pressing the   and   buttons
simultaneously will activate an optional feature. This feature can be programmed
for a wide range of functions like power window or sunroof automation, please
consult your installing dealer to determine the functionality of your system.

Summary of Contents for CA 6550

Page 1: ...operation of the Security and Convenience System as described in this manual is applicable to most vehicles However due to the configuration of some vehicles some functions AND OR SAFETY PRECAUTIONS...

Page 2: ...sing the Personal Protection Alarm 5 Eliminating Arm Disarm Notification Chirps 5 Car Jack Mode 5 Using Your Remote Vehicle Starter 6 Remote Starting Your Vehicle 6 Entering Your Vehicle while it is R...

Page 3: ...l status Bypassing The Shock Sensor To arm the system and ignore the shock sensor press button then within 5 seconds press the system will respond with 1 long chirp NOTE The system will only change th...

Page 4: ...System Your system can be disarmed without the use of the transmitter This is necessary since you will need the ability to operate your vehicle if the transmitter is lost or its battery fails To by pa...

Page 5: ...and release the valet programming button 3 times The system will respond with 1 chirp for ON or 2 chirps for OFF Car Jack Mode This feature must be turned on in system programming please consult your...

Page 6: ...ing Your Remote Vehicle Starter Remote Starting Your Vehicle To activate the remote vehicle start function press and release the button 2 times within 2 seconds The system will sound the parking light...

Page 7: ...hicle s ignition ON then OFF 2 Press and hold the valet button 3 Press the button 4 times the system will chirp 2 times and flash the parking lights 4 times 4 Release the valet button To exit the 2 3...

Page 8: ...is active Operating the Daily Start Timer The system has the ability to start your vehicle based on a 24 hour countdown timer This feature requires a two part activation sequence From the remote pres...

Page 9: ...ID VALET MODE 2 FLASH PAUSE ZONE 2 TRIGGER HOOD TRUNK 3 FLASH PAUSE ZONE 3 TRIGGER DOOR 4 FLASH PAUSE ZONE 4 TRIGGER SHOCK 5 FLASH PAUSE ZONE 5 TRIGGER IGNITION Siren Horn Indications Chirps Function...

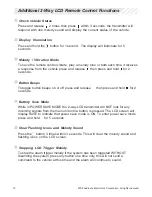
Page 10: ...s and release then press and hold for 2 seconds Battery Save Mode While in POWER SAVE MODE the 2 way LCD transmitter will NOT look for any incoming signals from the main unit until a button is pressed...

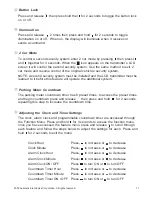
Page 11: ...ter Countdown The parking meter countdown timer has 6 preset times to access the preset times and begin countdown press and release then press and hold for 2 seconds repeating this step to increase th...

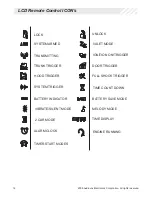
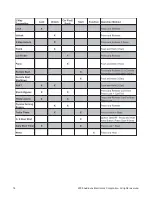
Page 12: ...UNLOCK SYSTEM ARMED VALET MODE TRANSMITTING TRUNK TRIGGER DOOR TRIGGER FULL SHOCK TRIGGER IGNITION ON TRIGGER ENGINE RUNNING 2 CAR MODE BATTERY INDICATOR BATTERY SAVE MODE VIBRATE SILENT MODE HOOD TR...

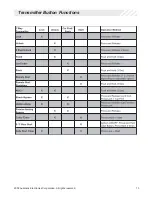
Page 13: ...13 2009 Audiovox Electronics Corporation All rights reserved Transmitter Button Functions...

Page 14: ...14 2009 Audiovox Electronics Corporation All rights reserved...

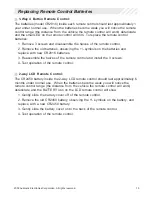
Page 15: ...ls on the batteries and replace with new CR2016 batteries 3 Reassemble the halves of the remote control and install the 3 screws 4 Test operation of the remote control 2 way LCD Remote Control The CR2...

Page 16: ...16 2009 Audiovox Electronics Corporation All rights reserved...

Page 17: ...ration or use contrary to its intended function fire flood or other natural acts In order for the Product to be repaired or replaced under the terms of this warranty the defective Product must be retu...

Page 18: ...and with RSS 210 of Industry Canada Operation is subject to the following two conditions 1 This device may not cause harmful interference and 2 This device must accept any interference received inclu...

Reviews: