background image

12

ca4552. 2011 Audiovox Electronics Corporation. All rights reserved.

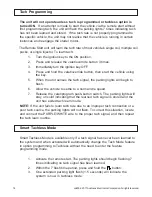
Manual Feature Programming - Feature Bank 2 - 5

1.

Turn the ignition ON.

2.

Press and hold the valet/override button.

3.

Within 10 seconds the parking lights will flash (3) three times.

4.

Use the valet/override button to advance through each option bank. For
feature programming advance to Feature Bank 2, 3, 4  or 5, which is  (4)
four, (5) five, (6) six and (7) seven parking light flashes.

5.

Use the transmitter 

  button to scroll through the selections in each

feature bank, the parking lights will flash to match the feature number.

6.

Press the BRAKE to change the desired feature. The LED will flash
indicating the changed feature.

NOTE: The system will remain in feature programming mode as long as the
ignition is on, there is no time limit. To exit programming turn the IGNITION OFF.

Set Up & Programming

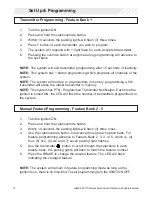
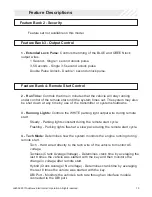
Transmitter Programming - Feature Bank 1

1.

Turn the ignition ON.

2.

Press and hold the valet/override button.

3.

Within 10 seconds the parking lights will flash (3) three times.

4.

Press 1 button of each transmitter you wish to program.

5.

The system will respond with 1 light flash for each accepted transmitter.

6.

Pressing the override button at anytime during programming will advance to
the next bank.

NOTE: The system will exit transmitter programming after 15 seconds of inactivity.

NOTE: This system has 1 button programming which programs all channels of the
system.

NOTE: The system will hold up to 4 transmitters in memory, programming a 5th
transmitter will erase the oldest transmitter in memory.

NOTE: This system has PTN - Programmed Transmitter Notification. Each time the
ignition is turned ON, the LED will flash the number of transmitters programmed to
the system.


Summary of Contents for ca 4552

Page 1: ...1 ca4552 2011Audiovox Electronics Corporation All rights reserved PROFESSIONAL SERIES Remote Start Installation Guide ca 4552...

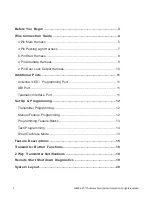
Page 2: ...oor Lock Output Harness 10 Additional Ports 11 Antenna LED Programming Port 11 DBI Port 11 Telematic Interface Port 11 Set Up Programming 12 Transmitter Programming 12 Manual Feature Programming 12 Pr...

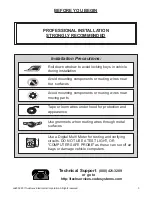
Page 3: ...near hot surfaces Avoid mounting components or routing wires near moving parts Tape or loom wires under hood for protection and appearance Technical Support 800 421 3209 or go to http techservices cod...

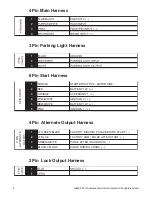
Page 4: ...3 Pin Parking Light Harness 1 LT GREEN BLACK FACTORY DISARM PULSE BEFORE START 2 LT BLUE FACTORY ARM PULSE AFTER START 3 GREEN WHITE PULSE AFTER SHUTDOWN 4 BLACK YELLOW PULSE DURING CRANK 4 PIN ALTERN...

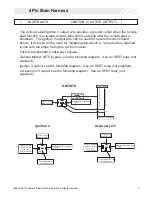
Page 5: ...owing diagram Use an SPDT relay not supplied Ignition 3 output see the following diagram Use an SPDT relay not supplied Accessory 2 3 output see the following diagram Use an SPDT relay not supplied Fu...

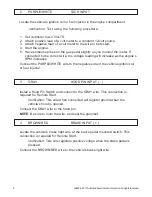
Page 6: ...l increase as the engine s RPM increases Connect the PURPLE WHITE wire to the negative side of the vehicle ignition coil or fuel injector 3 GRAY HOOD PIN INPUT Install a Hood Pin Switch and connect to...

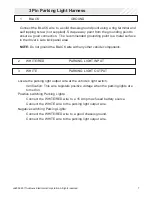
Page 7: ...K wire with any other vehicle components 3 Pin Parking Light Harness 2 WHITE RED PARKING LIGHT INPUT 3 WHITE PARKING LIGHT OUTPUT Locate the parking light output wire at the vehicle s light switch Ver...

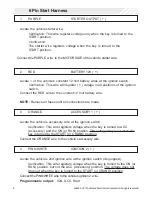
Page 8: ...constant 12 Volt battery wire NOTE Remove all fuses until all connections are made 3 ORANGE ACCESSORY 1 Locate the vehicle s accessory wire at the ignition switch Verification This wire registers vol...

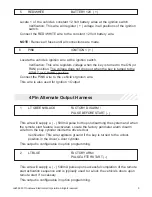
Page 9: ...wire to the constant 12 Volt battery wire NOTE Remove all fuses until all connections are made 4 Pin Alternate Output Harness 1 LT GREEN BLACK FACTORY DISARM PULSE BEFORE START This wire will supply...

Page 10: ...86 85 BLAC K YE LLOW P ulse During C rank Wire To Vehicle s2nd S tarter Wire Jump To P UR P LE S tarter Output Wire From The C ontrol Module 2 Pin Lock Output Harness 1 BLUE UNLOCK The door unlock ou...

Page 11: ...t Supervision Transponder Interface Activation Factory Alarm Arm Disarm Manual Arm Disarm Inputs factory keyless controls system Antenna Port Mount the supplied antenna receiver to a clear spot on the...

Page 12: ...n is on there is no time limit To exit programming turn the IGNITION OFF Set Up Programming Transmitter Programming Feature Bank 1 1 Turn the ignition ON 2 Press and hold the valet override button 3 W...

Page 13: ...LED Flash 1 Extended Lock Pulse 1 Second 3 5 Seconds Double Pulse Unlock Feature Bank 5 7 Chirps 4 Pin Alternate Output Control 1 LED Flash 2 LED flash 3 LED Flash 4 LED Flash 5 LED Flash 6 LED Flash...

Page 14: ...nses the tach signal the parking lights will begin to flash 6 Allow the vehicle to settle to a normal idle speed 7 Release the valet program push button switch The parking lights will stay on solid in...

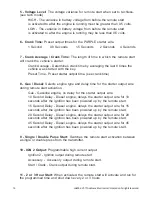
Page 15: ...of the transmitter or system shutdowns 3 Running Lights Controls the WHITE parking light output wire during remote start Steady Parking lights constant during the remote start cycle Flashing Parking l...

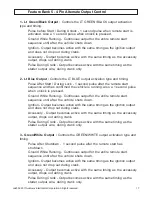
Page 16: ...put wire during remote start activation Gas Gasoline engine no delay for the starter output wire 10 Second Delay Diesel engine delays the starter output wire for 10 seconds after the ignition has been...

Page 17: ...ce and has confirmed the vehicle is running Also a 1 second pulse when unlock is pressed Ground While Running Continuous output for the entire remote start sequence until after the vehicle shuts down...

Page 18: ...es active with the same timing as the starter output wire during crank only Ground While Running Continuous output for the entire remote start sequence until after the vehicle shuts down Ignition Outp...

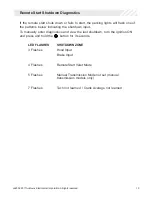
Page 19: ...e patterns below indicating the shutdown input To manually enter diagnostics and view the last shutdown turn the ignition ON and press and hold the button for 3 seconds LED FLASHES SHUTDOWN ZONE 3 Fla...

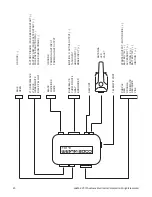
Page 20: ...K YELLOW PULSE DURING CRANK BLUE UNLOCK OPEN PURPLE STARTER OUTPUT MOTOR SIDE RED BATTERY 12V ORANGE ACCESSORY 1 PINK WHITE IGNITION 2 RED WHITE BATTERY 12V PINK IGNITION 1 BLACK GROUND WHITE RED PARK...

Page 21: ...21 ca4552 2011Audiovox Electronics Corporation All rights reserved...

Page 22: ...les and with RSS 210 of Industry Canada Operation is subject to the following two conditions 1 This device may not cause harmful interference and 2 This device must accept any interference received in...

Reviews: