


4
Dim Operation
The DEFENDER features a low power "Dimming" mode. Dimming will be controlled by ap12V by way of the appropriate wire
(Blue) in the wire harness/wire list. When DIM is engaged, the TriCore light heads will operate in a reduced power mode.
Note: The corner mounted TriCore light heads are excepted from this function and will not dim.
Please contact the factory if more information is needed concerning the dimming mode.
The Dim setting reduces the light output of emergency warning lights reducing the effectiveness of
them especially in brightly lit areas. Failure to use adequate light for the circumstances can cause
motorists to fail to see the emergency vehicle and lead to serious personal injury or death. Never
use the DIM setting in a brightly lit area. Use of the DIM setting may cause emergency lights to not
comply with applicable emergency warning light standards. Use caution when using the DIM setting to
assure that motorists can clearly see the emergency vehicle.
WARNINg!
This Product contains high intensity TriCore devices. To prevent eye damage,
DO NOT stare into light beam at close range.
WARNINg!
LED ArrowStik feature
The DEFENDER has a programmable ArrowStik feature integrated into the light bar that operates independently of the other
features. Refer to the ArrowStik Programming section of this manual for detailed information on pattern selection and
operation instruction.
Selecting Flash Patterns
The Pattern Select wire is the BLK/RED wire in the sixteen conductor lightbar control cable and is activated by momentarily touching
the wire to +power.
STEP 1
Power-up the lightbar and select the Level-1 flash mode by appower to the GRN/BLK wire in the 16 conductor control cable.
STEP 2
Observe the flashing pattern operation and determine which pattern is in operation for Level-1.
Refer to Table 1. This table shows the
available flash patterns. Note: the Factory Default is different and identified in the table for each of the flash mode Levels (L1, L2, L3).
Once the flash pattern has been determined, proceed to Step 3.
STEP 3
Scroll to the next flash pattern by momentarily holding the Pattern Select wire (BLK/RED) to +power for ~1 sec, until the TriCore light
heads switch flash patterns, and then releasing it. This will step to the next pattern in numbered order as listed in Table 1 for the
selected 3-Level mode. The new pattern is automatically stored each time. Repeat this procedure for Level-2 and Level-3.
Note: All control inputs are +power enabled.
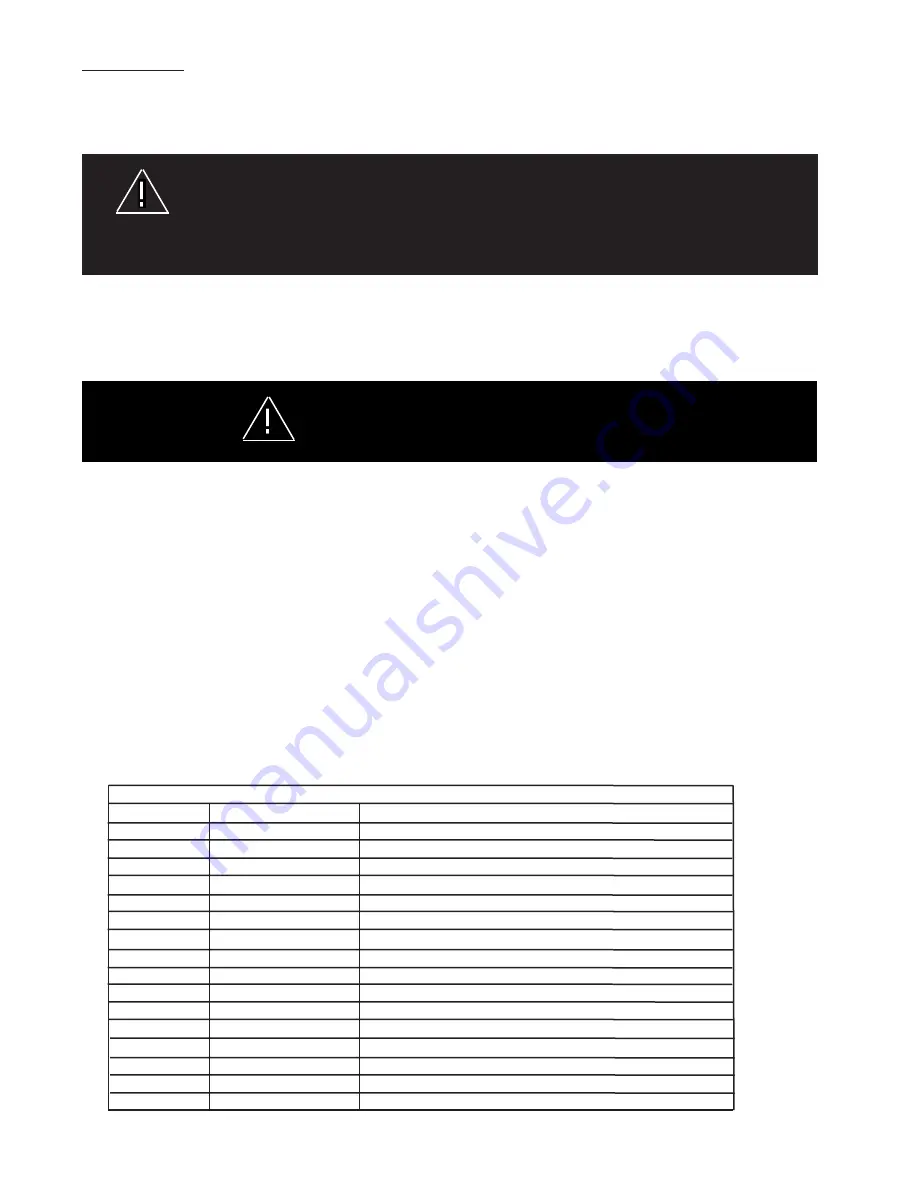
Control Input Function Definitions
Wire Color Function Description
GRN/BLK
Level 1
Level 1 Emergency Mode
WHT/BLK
Level 2
Level 2 Emergency Mode
RED/BLK
Level 3
Level 3 Emergency Mode
ORG/BLK
Takedown lights Takedown Lights Steady Burn (overrides Takedown Flash)
BLU/BLK
Rear Cut-Off
Blacks-Out Rear Facing heads
GRN/WHT
Front Cut-Off
Blacks-Out Front Facing heads
RED/WHT
Right Alley Light Right Alley Steady Burn (overrides Alley Light Flash)
BLK/WHT
Left Alley Light
Left Alley Steady Burn (overrides Alley Light Flash)
WHT
ArrowStik Flash ArrowStik Flash (overrides L1, L2 & L3 for rear of light bar)
BLK/RED** Pattern Select
Pattern Select for ArrowStik, L1, L2 & L3, (enables test mode)
BLK
Takedown Flash Enables Takedown Lights Wig/Wag Flash
RED*
ArrowStik Left
Left ArrowStik (overrides L1, L2 & L3 for rear of light bar)
GRN
Cruise Lights
End heads only (overridden by all other functions)
ORG*
ArrowStik Right Right ArrowStik (overrides L1, L2 & L3 for rear of light bar)
BLU
Light bar DIM
Sets heads to Dim mode
BLU/WHT
Alley Light Flash Enables Alley Light Wig/Wag Flash
See "Notes" Next Page
Summary of Contents for DEFENDER TriCore
Page 11: ...11 Notes...


