background image

DIGITAL VIDEO


SECURITY SYSTEM

WITH 500GB HARD DRIVE

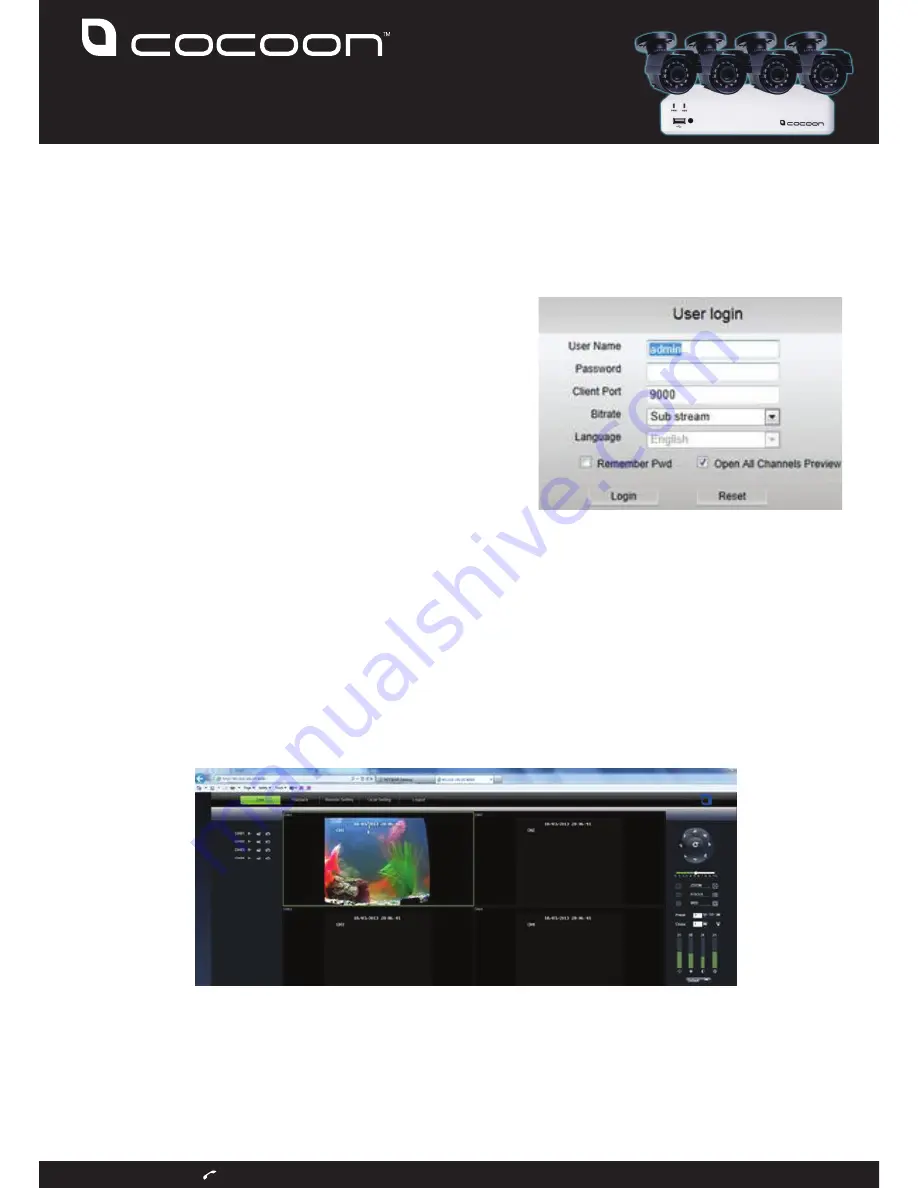
You will now be logged into your Cocoon DVR Security System. From this screen you 
can view your 4 channels; you can change the various playback and local settings 
from this screen as well. If you have a PTZ (Pan, Tilt, Zoom) camera added onto your 
system you can also remotely adjust their settings from the menu on the right side of 
the screen.

You have now successfully configured your Cocoon DVR Security System.

Mobile Viewing

In order to view your Cocoon DVR Security System from your mobile device you will 
need an Android or iOS Smartphone or Tablet. You will need to download the 
RXCamPro or RXCamHD app from the GooglePlay or iOS app stores.

In Internet Explorer or Safari enter into your address bar the external IP Address from 
step 7 follow by a colon : and finally the HTTP port from step 3. In our example this will 
be 60.224.165.24:8080

Note: Other browsers are not supported at 

this time. Enter your login credientials on 

the screen. Enter the username and 

password that you have configured for 

your Cocoon DVR Kit to have. It is 

recommended you change the 

administrator password for security 

purposes. The default username is 

admin.When connected locally you will not 

be required to enter your username or 

password. When connected via Internet 

Explorer there is no default password 

required only the username. Further 

information on configuring the username 

and password settings can be found at 

page 19 of the manual

Enter the Client Port that you have configured in 

Step 3

In our example this is 9000. You can change the quality of the video stream via the 
Bitrate drop down menu. Click Login to view your Cocoon DVR remotely.

6

7

After Sales Support

1300 663 907

Summary of Contents for IT115008

Page 1: ...NETWORK CONFIGURATION AND REMOTE VIEWING After Sales Support 1300 663 907 DIGITAL VIDEO SECURITY SYSTEM WITH 500GB HARD DRIVE Navigate to your UPnP settings In our example this is easily found on the UPnP settings tab Occasionally this will be also found on your LAN IP settings page Once you have chosen these settings click Apply then Exit to return to the 4 camera channel screen Your Cocoon DVR w...

Page 2: ...enter the following information shown in this guide The information you will need to set up port forwarding can be found in the preceding steps You will need Your Cocoon DVR IP address as assigned by your network This can be found in step 4 In our example this 192 168 1 9 The HTTP Port that you assigned in step 3 In our example this is 8080 The Mobile Port that you assigned in step 3 In our exampl...

Page 3: ...namic IP Address can be found at http bc whirlpool net au bc action list Note Check with your ISP to see if you have a Dynamic or Static IP Address on your current internet plan A Static IP Address will be constant a dynamic IP Address will be changed by your ISP every so often Once this IP address is changed by your ISP the external IP address shown above will be different and you will not be abl...

Page 4: ... external IP Address from step 7 follow by a colon and finally the HTTP port from step 3 In our example this will be 60 224 165 24 8080 Note Other browsers are not supported at this time Enter your login credientials on the screen Enter the username and password that you have configured for your Cocoon DVR Kit to have It is recommended you change the administrator password for security purposes Th...

Reviews: