


Scart adapter:
See figure
4
1. Connect the power supply to the wall socket and insert the cable into the
micro-USB socket on the TV Streamer.
2. Insert the male stereo mini-jack on the audio cable into the female stereo
mini-jack input on the TV Streamer [no. 4 in figure 1].
3. Connect the scart adapter to the red and white plugs at the other end of
the audio cable.
4. Plug the scart adapter into the audio source’s scart terminal.
Note:
The
scart output terminal is usually located on the back or side of the audio
source.
Please consult your audio source’s manual if additional scart output
configuration is needed.
Connecting the TV Streamer to a digital audio source
(e.g. TV or stereo)
Note:
The TV Streamer supports both analogue and digital audio input.
When using digital audio input the following formats are supported:
Stereo PCM
- Sample rate: Up to 192 kHz
- Sample resolution: Up to 32 bit
Dolby Digital
- Channels: Max 5.1
- Bitrate: 32 kbs to 640 kbs
- Sample rate: 32, 44.1 and 48 kHz
Note:
Dolby Digital Plus (requiring an HDMI interface), Dolby TrueHD,
Dolby Pro Logic, Dolby Digital EX, Dolby Digital Surround EX, and AAC
(Advanced Audio Coding) are not supported.
Using the optical (Toslink) audio input
See figure
5
1. Connect the power supply to the wall socket and insert the cable into the
micro-USB socket on the TV Streamer.
2. Insert one of the plugs on the optical audio cable into the optical audio
input socket [no. 5 in figure 1] on the TV Streamer.
Note: Most optical cables are delivered with a small protective cap to protect
the tip of the cable. Please remove this protective cap before inserting the
cable.
3. Plug the other end of the optical audio cable into the “Digital Audio Out/
Optical” on your audio source.
Using the coaxial audio input
See figure
6
1. Connect the power supply to the wall socket and insert the cable into the
micro-USB socket on the TV Streamer.
2. Connect one of the plugs on the coaxial audio cable to the coaxial plug [no.
6 in figure 1] on the TV Streamer.
3. Plug the other end of the coaxial audio cable into the “Digital Audio Out/
Coaxial” on your audio source.
Pairing with your sound processors
You can pair up to three Cochlear streaming devices with your Cochlear sound
processor.
Select a separate channel for each device paired with the sound processor.
Pairing the TV Streamer in channel 1
1. Make sure that the TV Streamer power supply is plugged into a wall socket
and that the green light indicator on the front of the TV Streamer [no. 9 in
figure 1] is ON. Your sound processors must be OFF.
2. Press the pairing button on the TV Streamer [no. 2 in figure 1] once. The
yellow indicator light on the front of the TV Streamer [no. 10 in figure 1] will
now flash once every 2 seconds to indicate that the TV Streamer is ready
to be paired in channel 1. Your TV Streamer will remain in pairing mode for
20 seconds.
3. While pairing mode is active, turn on your sound processor.
Successful pairing will be indicated by either an audible melody played in the
sound processor, or by a flashing light on the sound processor (depending on
the type of sound processor).
Pairing the TV Streamer in channel 2
1. Press the pairing button twice. The yellow indicator light on the front of the
TV Streamer will now flash twice every 2 seconds to indicate that it is ready
to be paired in channel 2.
2. While pairing mode is active, turn on your sound processor.
Pairing the TV Streamer in channel 3
1. Press the pairing button three times. The yellow indicator light on the front
of the TV Streamer will now flash three times every 2 seconds to indicate
that it is ready to be paired in channel 3.
2. While pairing mode is active, turn on your sound processor.
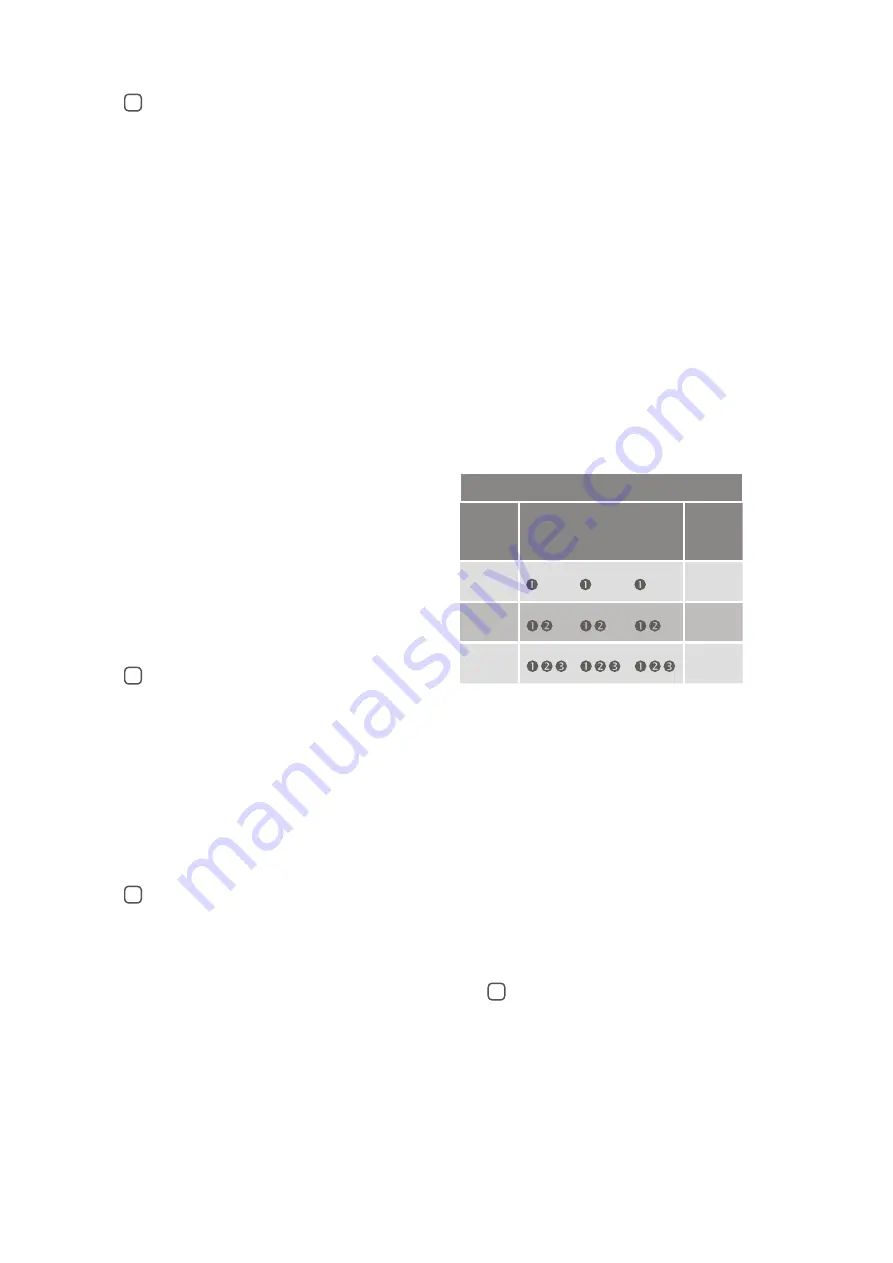
Pairing flashing pattern
Pairing
button
pushes
LED blinking pattern
Channel
1
1
2
2
3
3
Streaming
Start streaming
Turn on the TV, stereo, computer or other audio device connected to the TV
Streamer. Make sure your sound processors are turned on as well. Streaming
may be started in one of two ways:
Option A
1. Press and hold the wireless streaming button on your sound processor for
about three seconds.
2. An audible melody or a flashing light (depending on the type of sound
processor) will be followed by streamed audio via the TV Streamer.
Option B
If you have a Cochlear Baha Remote Control** (optional), simply press the
streaming button [no. 3 in figure 7] on this Baha Remote Control**. For more
information, refer to the Baha Remote Control** manual.
Start streaming on a 2nd or 3rd TV Streamer unit
See
figure
7
If your sound processor is paired with more than one streaming device, you
can start streaming in two ways.
Option A
Press and hold the wireless streaming button on your sound processor for
about three seconds a 2nd or 3rd time to access the 2nd or 3rd Cochlear
streaming device.
Option B
Press the streaming button on a Baha Remote Control** a 2nd or 3rd time to
access the 2nd or 3rd Cochlear streaming device.


