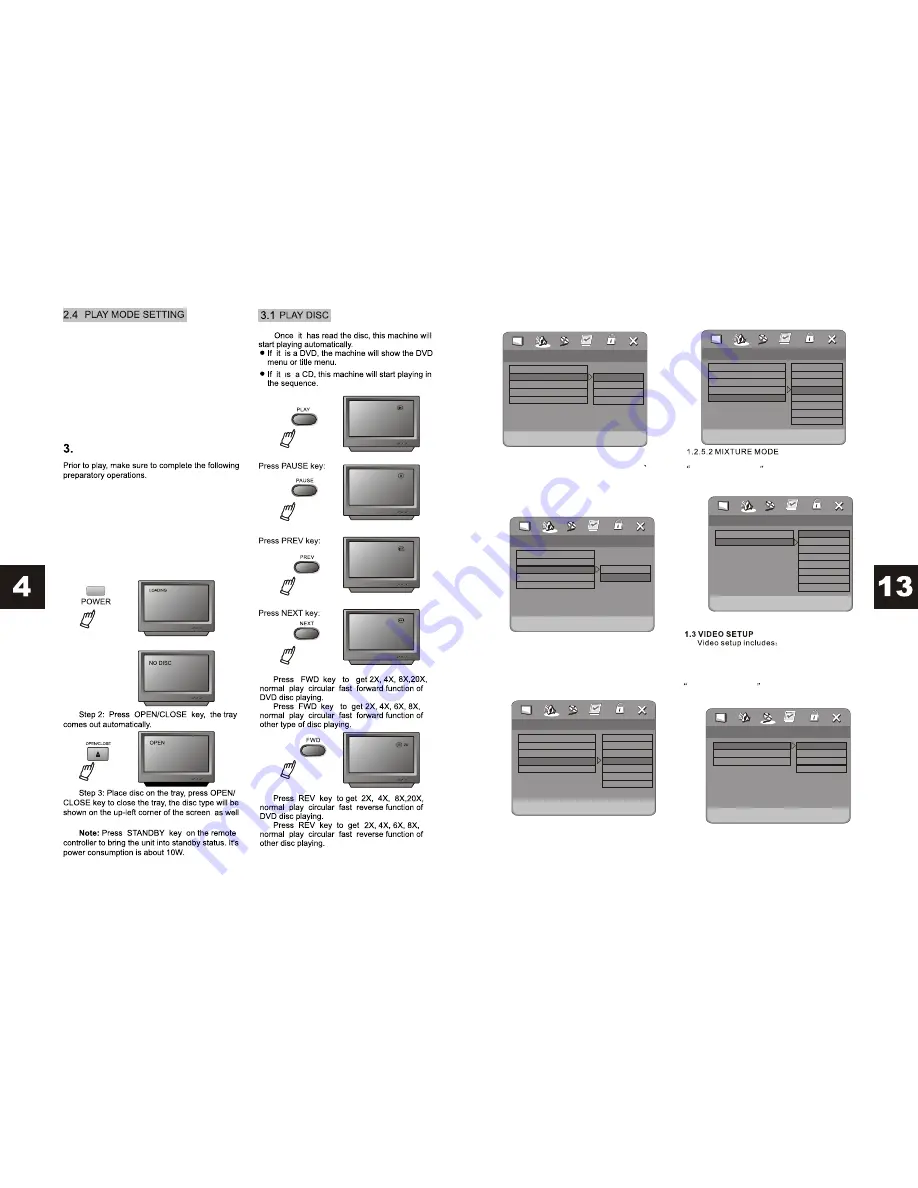
Select PRO Logic II Mode
On
Off
PRO Logic II Config
On
MUS
Off
00
03
PRO Logic II
Mode
Panorama
Dimension
Center width
Select PRO Logic II Mode
PRO Logic II Config
On
MUS
Off
00
03
PRO Logic II
Mode
Panorama
Dimension
Center width
Size -3
Size -2
Size -1
Size 0
Size 1
Size 2
Size 3
Reverb Mode
Off
Concert
Living room
Hall
Bathroom
Cave
Arena
Church
.. 3D Processing page .. ..
Off
PRO Logic II
Reverb Mode
Video setup page ..
Component
Component
Tv mode
Quality
Svideo
YUV
RGB
1.2.5.1.2 PRO LOGIC II SETUP
1.2.5.1.3 PRO LOGIC II SETUP
Only in the non-automatic mode can
Panorama,Dimension and Center width
be adjusted.
1.2.5.1.4 PRO LOGIC II SETUP
1.2.5.1.5 PRO LOGIC II SETUP
Component, TV mode
and quality.
1.3.1 COMPONENT
as shown on VFD screen.
If you find that the picture cannot expand, is
rolling or is colorless, please adjust the PAL/NTSC.
BASIC OPERATION
Follow the operation instructions stated in
DVD MENU SETUP in combination with desired
option in the following figure.
Follow the operation instructions stated in
DVD MENU SETUP in combination with desired
option in the following figure.
Select PRO Logic II Mode
Music
Movie
PRO Logic
AUTO
PRO Logic II Config
On
MUS
Off
00
03
PRO Logic II
Mode
Panorama
Dimension
Center width
Select PRO Logic II Mode
PRO Logic II Config
On
MUS
Off
00
03
PRO Logic II
Mode
Panorama
Dimension
Center width
Level 0
Level 1
Level 2
Level 3
Level 4
Level 5
Level 6
Level 7
VGA
DVD discs can support a picture in different
proportions. Depending on the DVD disc, you may
be able to modify the picture size of your TV
screen. Press the SETUP key to get to General
Set up. Press the PLAY key, then use the directional
keys to select TV Mode. Press the left arrow key,
to select Normal/Full, Normal/Letterbox or
Widescreen according to your needs. To save
press Play. Certain DVD discs cannot be modified.
1. Switch on TV and select AV, Input or Video
mode. If you are connected via S-Video cable,
choose S-Video.
2. Switch on the amplifier (if connected) and
select AC-3 or DVD mode.
3. Plug in DVD player.
Step1:Press the POWER key manually on the
DVD, and DISC LOADING will show on screen. You
MUST turn the DVD player on manually before
using the remote control.
If there is no disc, NO DISC will appear on screen.


