English
10
Getting Started
Intro
Operation
Customer
Assistance
Warranty
Notice
Main Icons
Secondary Icons
Nothing
Comes Close to a Cobra
®
11
Getting Started
Your Detector
Intro
Operation
Customer
Assistance
Warranty
Notice
Main Icons
Secondary Icons
Display Control
•
Illumination
The display illumination intensity can be adjusted to suit driving conditions:
Bright
for daytime driving.
Dim
for dusk driving.
Dimmer
for night driving.
The
Dark
icon will remain to indicate the detector is On. (The Dark Icon
will be replaced by a blinking dot, if the display is not set for Always On.)
You can adjust the screen illumination
by Clicking the
Brightness
icon to step
through the levels in the sequence
listed above.
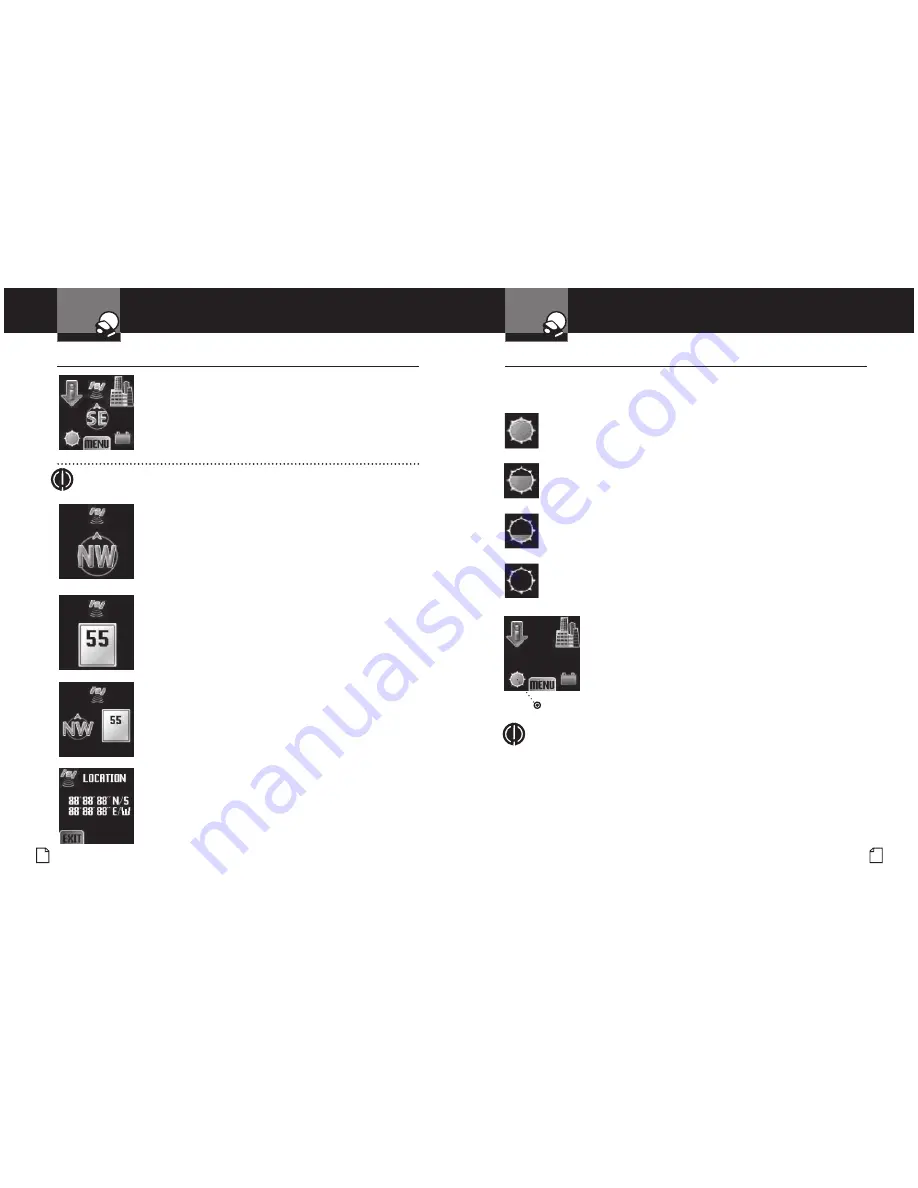
Standby Screens
•
Main Standby Screen
Displays the maximum possible information about the detector
and its settings. The
GPS
and
Compass
icons will show only if
the GPS Locator unit is connected. From this screen you can
select modes and alternative standby screens, control unit
functions and access setup menus.
Compass
The compass indicates driving direction if the GPS Locator
unit is installed and receiving a signal. If the GPS signal is
lost, the
GPS
icon will change to that status and the center of
the
Compass
icon will show two bars. To display this standby
screen, click on the
Compass
icon in the
Main Standby
screen.
Speed
If the GPS Locator unit is installed and receiving a signal, the
vehicle’s speed will be shown. See page 39 for Speed Alert and
Speed Units information. To display this standby screen, click
on the
Compass
icon in the Compass screen.
Compass and Speed
Combines Compass and Speed information in a single screen.
To display this standby screen, click on the
Speed
icon in the
Speed
screen. From this screen, clicking on the
Compass
or
Speed
icons will return the unit to the
Main Standby
screen.
Lat/Lon
If the GPS Locator unit is installed and receiving a signal,
the vehicle’s present location will be shown and continuously
updated. To display this standby screen, press the
GPS
icon in
any standby screen. Pressing the
Exit
icon in this screen will
return the unit to the last
Standby
screen.
Brightness Icon
NOTE
Pressing the
Brightness
icon provides a shortcut to the Display
Color (see page 23) and Display Timer (see page 23) settings in
the
User Settings
menu.
NOTE
GPS Icon, Compass, Speed and Lat/Lon only appear when used in conjunction
with GPS Locator (included with XRS 9970G; optional for XRS 9965).