


Customer Assistance
Warranty
Introduction
3
Nothing
Comes Close to a Cobra
®
Operation
Intro
Operation
Customer
Assistance
Warranty
Notice
Secondary Icons
2
English
Using Your Radio
Operation
Intro
Operation
Customer
Assistance
Warranty
Notice
Secondary Icons
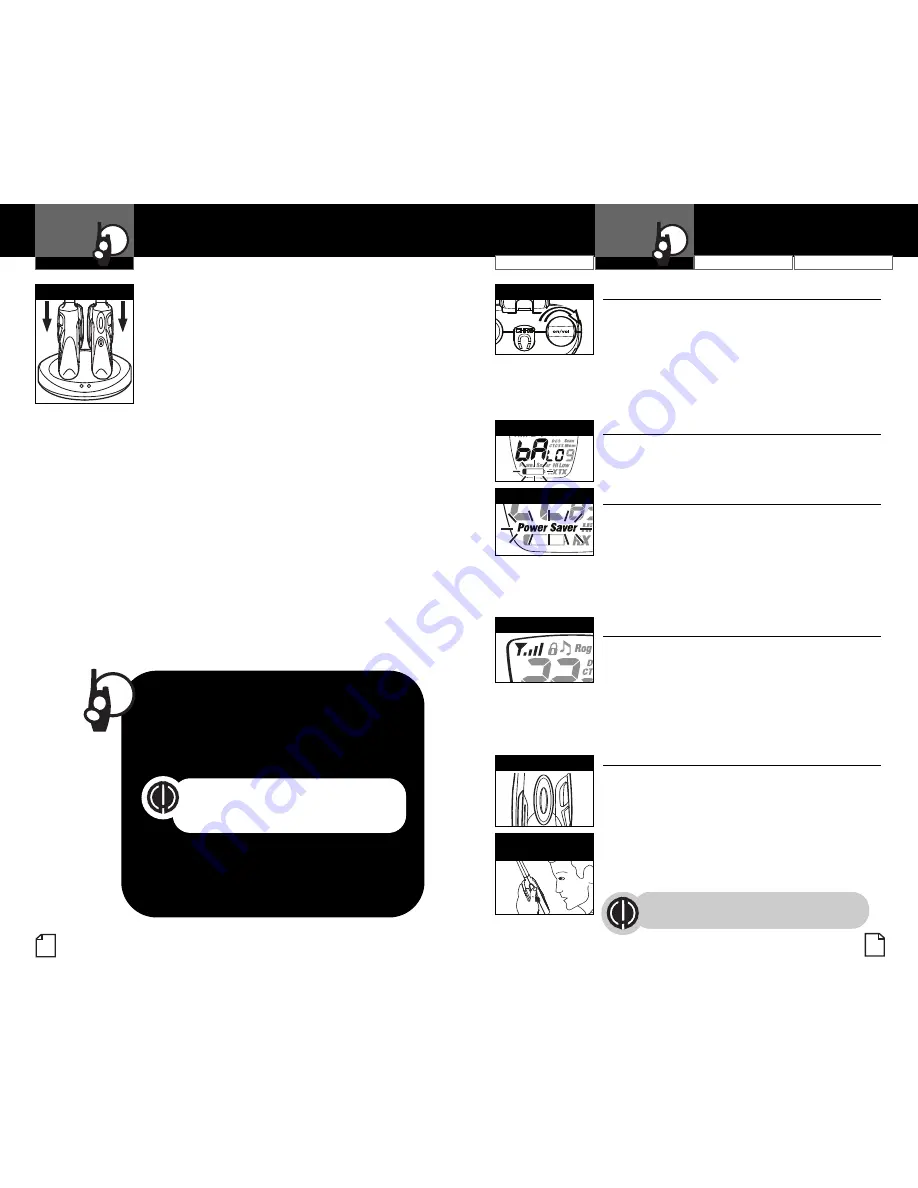
For charging microTALK radio(s) in desktop
charger:
1.
Insert radio(s) into desktop charger as shown.
2.
Insert round connector of 120-volt adapter
into jack on back of charger.
3.
Plug 120-volt adapter into electrical outlet.
If charging light is not
on
, check position of radio. Radio should be
upright. The charge indicator light will stay
on
as long as the radio
is in the charging well, even after the batteries are fully charged.
It normally takes about 15 hours to fully recharge batteries.
Batteries will not be damaged if they stay in the charging well
longer than that.
Note:
To charge a single radio, you can bypass the desktop charger
and simply insert the wall adapter’s round connector directly into
the speaker/microphone/charge jack located on the top of the radio.
Use only the supplied rechargeable batteries and charger for
recharging your Cobra microTALK radio.
Cobra recommends your radio is turned
off
while being charged.
Non-rechargeable alkaline batteries can also be used in your radio.
Insert Radio(s)
Intro
Operation
Customer
Assistance
Warranty
Notice
Main Icons
Secondary Icons
Quick Start
1.
Rotate the
On/Off Volume
knob to turn
on
your radio.
2.
Press the
Channel Up
or
Channel Down
button to select a channel.
Both radios must be tuned to
the same channel/privacy code
to communicate.
3.
Press and hold the
Talk
button while
speaking into the microphone.
4.
When finished talking, release the
Talk
button and listen for a response.
Intro
Operation
Customer
Assistance
Warranty
N
ons
S
ary Icons
Turning on Your microTALK Radio
•
Rotate the
On/Off Volume
knob clockwise to turn
on
your radio and adjust the volume. A series
of tones will indicate the radio is
on
.
Your microTALK radio is now in
Standby
mode,
ready to receive transmissions. The radio is
always in
Standby
mode, except when the
Talk
,
Call
or
Mode/Lock
buttons are pressed.
When battery power is low, the
Battery Low
icon
will blink. Your batteries should be recharged or
replaced if using alkaline batteries.
Your microTALK radio has a unique circuit
designed to extend battery life. If there are
no transmissions for 10 seconds, the radio will
automatically switch to
Battery Save
mode and
the
Power Saver
icon will flash in the display.
This will not affect the radio’s ability to receive
incoming transmissions.
Your microTALK radio has a
Signal Strength
Meter
that shows the strength of your incoming
and outgoing transmissions. The ascending bars
next to the signal strength indicate the strength
of the signal. The greater the number of bars
visible, the stronger the signal. The fewer
number of bars visible, the weaker the signal.
Customer Assistance
Warranty
Introduction
Operation
Intro
Operation
Customer
Assistance
Warranty
Notice
Secondary Icons
Intro
Operation
Customer
Assistance
Warranty
Notice
Main Icons
Secondary Icons
Battery Low
•
Auto Battery Save
•
Signal Strength Meter
•
Two Inches (5 cm)
from Mouth
Talk Button
On/Off Power
Battery Low
Battery Save Mode
Signal Strength
Communicating with Another Person
•
1.
Press and hold the
Talk
button.
2.
With the microphone about 2 inches (5 cm)
from your mouth, speak in a normal voice.
3.
Release the
Talk
button when you are
finished talking and listen for a response.
You cannot receive incoming calls while
pressing the
Talk
button.
Both radios must be tuned to the same
channel/privacy code to communicate.


