Intro
Operation
Customer
Assistance
Warranty
Notice
Main Icons
Secondary Icons
Intro
Operation
Customer
Assistance
Warranty
Notice
Main Icons
Secondary Icons
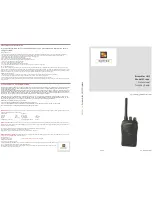
Lock/Mode Button
Channel Buttons
DCS Privacy Code
Intro
Operation
Customer
Assistance
Warranty
Notice
Main Icons
Secondary Icons
Intro
Operation
Customer
Assistance
Warranty
Notice
Main Icons
Secondary Icons
Customer Assistance
Warranty
Introduction
9
Nothing
comes close to a Cobra
®
Operation
Intro
Operation
Customer
Assistance
Warranty
Notice
Main Icons
Secondary Icons
8
English
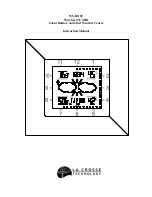
Mode Functions
Privacy Codes
•
Your microTALK
®
radio incorporates two advanced coded squelch
systems that can help to reduce interference from other users
on any given channel. CTCSS (Continuous Tone Coded Squelch
System) provides 38 privacy codes and DCS (Digitally Coded
Squelch) provides 83 privacy codes. This provides a total of 121
Privacy Codes
. Either system can be used on all channels, but both
systems cannot be used on the same channel at the same time.
To successfully communicate using a privacy code, both
the sending and receiving radios must be tuned to the same
channel and to the same privacy code system (CTCSS or
DCS) and privacy code number. Each channel will remember
the last privacy code system and number you select.
The privacy code 00 is not a privacy code, but allows all
signals to be heard on a channel that is set to 00 on both
the CTCSS and DCS systems.
Set CTCSS Privacy Codes
•
To select a CTCSS privacy code:
1.
After selecting a channel, press the
Lock/Mode
button until the CTCSS icon
appears and the small numbers flash
on the display (01 through 38).
NOTE
If DCS is turned
on
at the channel
selected, the display will flash the
CTCSS icon and “OFF.” To switch from
DCS to CTCSS, press the
Channel Up
or
Channel Down
button while the
display is flashing “OFF.” The display
will then show the small numbers
flashing and you will then be able
to proceed to step 2.
2.
Press using the
Channel Up
or
Channel
Down
button to select a CTCSS privacy
code. You can hold the
Up
or
Down
button for fast advance.
Operation
Intro
Operation
Customer
Assistance
Warranty
Notice
Main Icons
Secondary Icons
Lock/Mode Button
Channel Buttons
CTCSS Privacy Code
3.
When your desired CTCSS privacy code is
displayed, choose one of the following:
a.
Press the
Lock/Mode
button to enter the
new setting and proceed to other functions.
b.
Press the
Hi•Low/Enter
button to enter the
new setting and return to
Standby
mode.
c.
Do not press any buttons for 15 seconds
to enter the new setting and return to
Standby
mode.
Set DCS Privacy Codes
•
To select a DCS privacy code:
1.
After selecting a channel, press the
Lock/Mode
button until the DCS icon
appears and the small numbers flash
on the display (01 through 83).
NOTE
If CTCSS is turned
on
at the channel
selected, the display will flash the
DCS icon and “OFF.” To switch from
CTCSS to DCS, press the
Channel Up
or
Channel Down
button while the
display is flashing “OFF.” The display
will then show the small numbers
flashing and you will then be able
to proceed to step 2.
2.
Press using the
Channel Up
or
Channel Down
button to select a DCS privacy code. You can
hold the
Up
or
Down
button for fast advance.
3.
When your desired DCS privacy code is
displayed, choose one of the following:
a.
Press the
Lock/Mode
button to enter the
new setting and proceed to other functions.
b.
Press the
Hi•Low/Enter
button to enter the
new setting and return to
Standby
mode.
c.
Do not press any buttons for 15 seconds to
enter the new setting and return to
Standby
mode.