1.
IMPORTANT – READ ALL INSTRUCTIONS BEFORE YOU BEGIN
The electrical system is a critical component affecting both the operation and safety of your vehicle. It
is important to have the proper tools and equipment to install your wiring kit, but it is equally important that
you have knowledge and experience with automotive electrical systems. You should be familiar with voltage,
current, and resistance, and how to use a volt/ohm meter and clamp-on current meter to measure these basic
parameters. If you do not feel you have the necessary tools, knowledge, and experience, Coach Controls
strongly recommends that you get professional assistance with your wiring project.
SPECIAL TOOLS REQUIRED
Proper wire terminations are essential for the safety, operation, and long term durability of your
vehicle’s electrical system. To install this wire kit you will need a heat gun and a quality crimp tool.
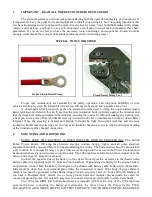
A closed barrel crimp tool such as the one shown should be used to crimp the non-insulated closed
barrel terminals provided in this kit. Note that the wire insulation butts up firmly against the terminal and
that the crimp tool creates a dimple in the terminal, securing the conductor without breaking any strands. Use
a heat gun and a piece of heat shrinkable sleeving included in the kit to insulate each crimped closed barrel
terminal. Once the sleeving is heated and shrunk it should be tight around the terminal and the wire
insulation. In this way the sleeving acts not only as an insulator but also as a strain relief to minimize bending
of the conductor at the crimped connection.
2.
MOUNTING AND GROUNDING
MAKE SURE THE BATTERY IS DISCONNECTED BEFORE PROCEEDING. The Switch
Panel, Power Center, 100 amp fuse holders, steering column, battery, lights, and all other electrical
equipment should be mounted before you begin installing the wiring. The Power Center must be mounted in
a dry location. It is normal for relays to get a little warm during continuous use so the Power Center should
be mounted where air can circulate around the unit. The 100 amp fuse holders should be mounted near the
battery and at least 6” away from exhaust.
Connect the negative side of the battery to the engine block if possible as well as to the chassis using
battery cable (not supplied) and 3/8” bolts and tooth washers. If grounding the battery to the engine block is
not practical, connect both the battery and engine to the chassis with battery cable, bolts, and tooth washers.
Metal must be clean, free from rust and paint where the connection is made. If the body of your vehicle is
metal, it too must be grounded to the chassis using at least 8 awg wire and 1/4” bolts and tooth washers. If
you have a fiberglass body, mount one or more ground studs and terminal blocks inside the cabin for
convenient ground points. Use at least 8 awg wire to connect all your ground points to clean steel chassis.
Two 100 amp MIDI fuse holders and fuses are included with this kit. One of the 100 amp fuses
protects the wires connecting the battery and alternator, the other protects the Power Center. TWO
SEPARATE 10 AWG WIRES SUPPLY BATTERY POWER TO THE POWER CENTER. BE SURE TO
Proper Closed Barrel Crimp
Closed Barrel Crimp Tool


