USER INFORMATION
User Information shall be provided to the user of the product.
NFPA Standard 1983 recommends separating the User
Information from the equipment and retaining the information in a
permanent record. The standard also recommends making a
copy of the User Information to keep with the equipment and that
the information should be referred to before and after each use.
Additional information regarding auxiliary equipment can be
found in NFPA 1500,
Standard on Fire Department Occupational
Safety and Health Programs
, and NFPA 1983,
Standard on Life
Safety Rope and Equipment for Emergency Services.
INSPECTION
Inspect the equipment according to your department's policy for
inspecting life safety equipment. Inspect the equipment prior to
entry into service, after each use, and at least once every 12
months. The equipment should be thoroughly inspected by an
inspector that meets your department's training standard for
inspection of life safety equipment. Keep a record of the date,
person performing the inspection and results, as well as the date
of first use, name of users and any other pertinent information
necessary to keep accurate track of the equipment’s usage
history in the equipment log or on a tag that attaches to the
equipment. Each user should be trained in equipment inspection
and should inspect the equipment before each use.
When inspecting the equipment, check the webbing and rope
for cuts, worn or frayed areas, broken fibers, soft or hard spots,
discoloration, or melted fibers. Check the stitching for pulled
threads, abrasion, or breaks. Check the hardware for damage,
sharp edges, and improper operation. If any of the above is
noted, or if the equipment has been subjected to shock loads, fall
loads, or abuse other than normal use, remove the equipment
from service and destroy it. If there is any doubt about the
serviceability of the equipment, remove the equipment from
service and destroy it.
The service life of equipment depends greatly on the type of
use and the environment of use. Because these factors vary
greatly, a precise service life of the equipment cannot be
provided.
USE
1. Connect the O-Ring of the litter harness into two locking
carabiners. Connect one of the carabiners to the main line and
the other to the belay line, or connect both carabiners into both
lines.
2. Connect the D-Ring on each leg of the harness to the litter
using a locking carabiner. The carabiner should connect through
the attachment points designated by the litter manufacturer. If no
specific attachment points are designated by the manufacturer,
CMC recommends attaching the carabiners through the small
square-shaped openings formed by the top rail and its vertical
supports. Face the carabiner gates towards the inside of the litter
and make sure the gate is down and locked.
3. Adjust the length of each leg and check each of the buckles
before putting a load on the harness. Because it is easier to lower
the litter, we recommend that you start with the legs as short as
possible unless otherwise warranted by the situation. This allows
the maximum amount of adjustment later. When the system has
been loaded and the litter is hanging by the harness, re-adjust as
needed to level the litter.
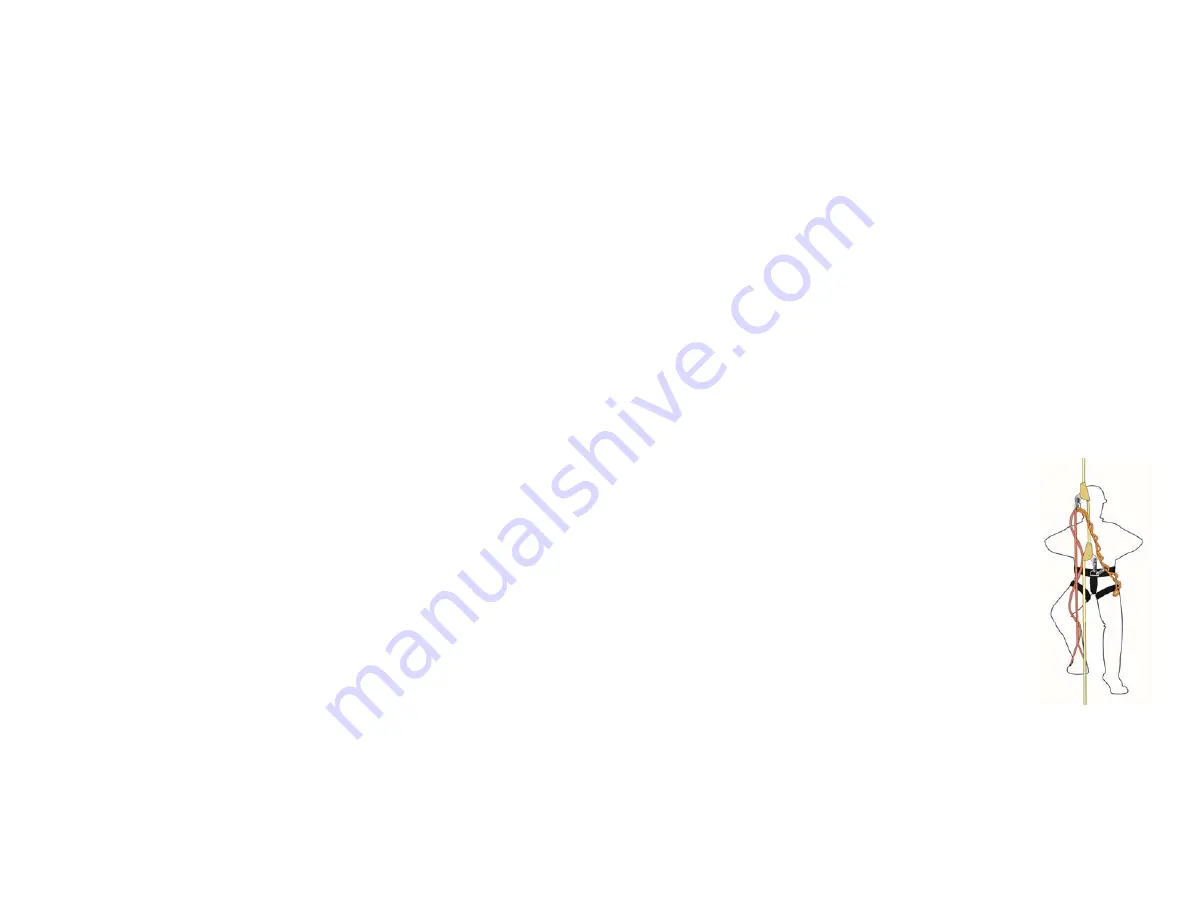
4. The tender should connect their harness
directly into an ascender on the Tender Line. A
second ascender with an Etrier or foot loop should
be attached above the first. With a Multi-Loop
Strap or a runner, connect the second ascender
to the tender’s harness as a back up. The Etrier
allows the tender to take his weight off of his
harness ascender when he needs to move up or
down the Tender Line. Tie a knot in the end of the
Tender Line in the unlikely event that the
ascender would fail to grip and potentially slide off
the end of the rope.
5. To shorten a leg of the litter harness, grasp the tail end of the
web below the adjuster buckle and pull downwards. To lengthen
the leg, grasp the sewn web loop of the adjuster buckle and
rotate the buckle upwards.


