12 | C
LAB User’s Guide
To charge battery
Use only the USB cable and USB power adapter delivered with your
C
LAB.
•
Connect the USB cable to the mini USB port of
C
LAB.
•
Connect the other end of the USB cable to a USB power adapter.
•
Plug the USB power adapter into a standard power outlet.
- or -
•
Connect the USB cable to the mini USB port of
C
LAB.
•
Connect the other end of the USB cable into a free USB port of your computer.
Notice, that the efficiency of charging via a USB port, is limited by the maximal
current provided by a USB socket (500 mA for USB 2.0 and 800 mA for USB
3.0).
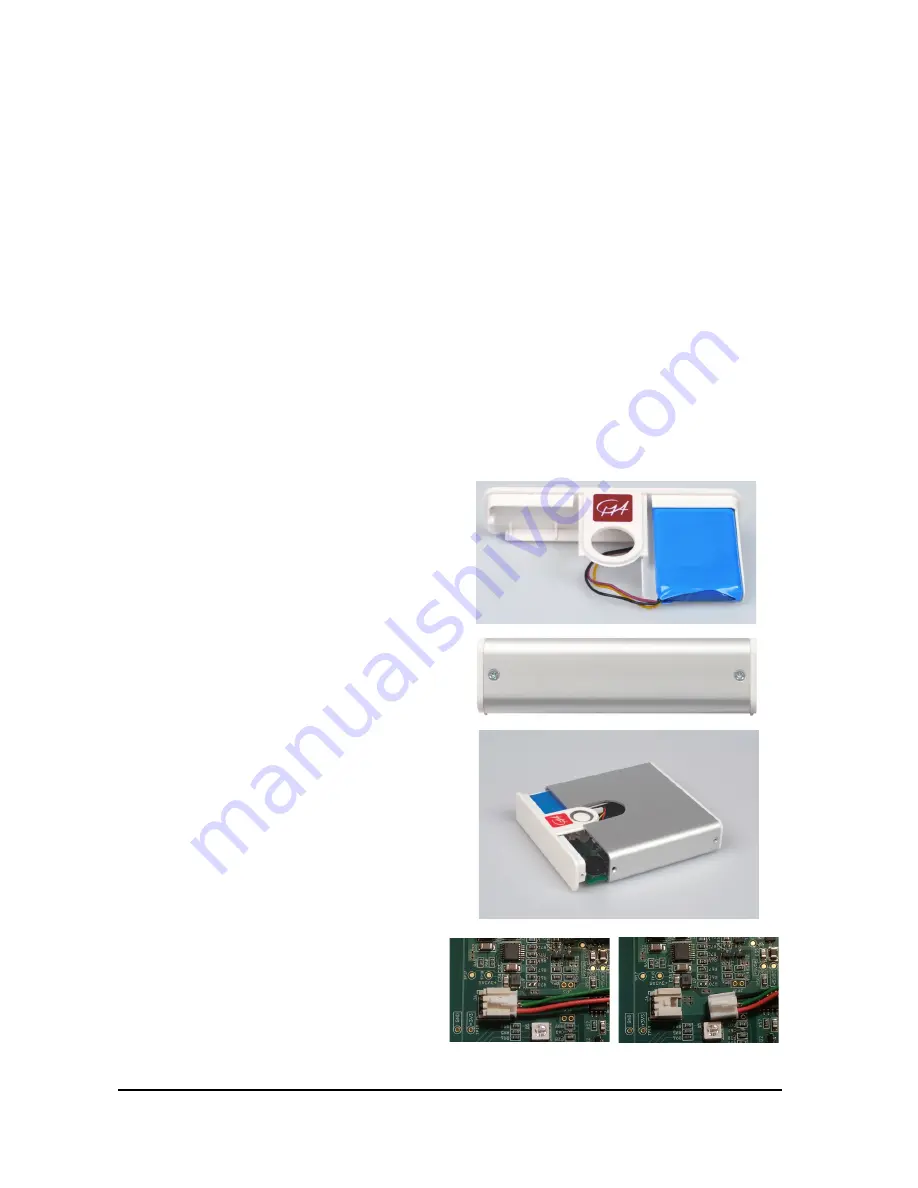
To replace battery
Use
only
the approved rechargeable batteries provided by CMA. To simplify the
battery replacement CMA provides a complete backside of
C
LAB (as shown in
photo) in which a new battery is already placed.
•
Turn
C
LAB off.
•
Use a small cross-slotted (Philips
head) screwdriver to unscrew the
screws located on the sides of
C
LAB.
•
Very carefully move the back side of
C
LAB out of its housing. The battery
is connected to the
C
LAB’s PCB
board via a wire and the board
moves together with the plastic
part.
•
Very carefully disconnect the
battery from the PCB by pressing
the battery plug and moving it out
of the battery connector on the
PCB.
•
Move out the Power button from
the backside of
C
LAB. Notice that
this button is made from three
plastic parts, which can fall apart.
•
Connect the new battery to the PCB
board by inserting the battery plug
into the battery connector on the
board.
Summary of Contents for CLAB DATA-LOGGER 003
Page 27: ...CLAB User s Guide 27...


