


3
The yellow Status LED lights up continually during the charging pro-
cess. The Status LED goes out as soon as the battery is fully charged.
The device is automatically detected by the com-
puter, installed as a removable medium and ap-
pears as a drive in the My Computer" folder.
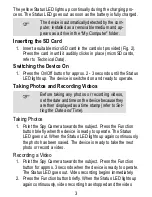
Inserting the SD Card
1. Insert a suitable microSD card in the card slot provided (Fig. 2).
Press the card in until it audibly clicks in place (microSD cards,
refer to
Technical Data
).
Switching the Device On
1. Press the On/Off button for approx. 2 − 3 seconds until the Status
LED lights up. The device is switched on and ready to operate.
Taking Photos and Recording Videos
Before taking any photos or recording videos,
set the date and time on the device because they
are then displayed as a time stamp (refer to
Set-
ting the Date and Time
).
Taking Photos
1. Point the Spy Camera towards the subject. Press the Function
button briefly when the device is ready to operate. The Status
LED goes out. When the Status LED lights up again continuously,
the photo has been saved. The device is ready to take the next
photo or record a video.
Recording a Video
1. Point the Spy Camera towards the subject. Press the Function
button for approx. 3 seconds when the device is ready to operate.
The Status LED goes out. Video recording begins immediately.
2. Press the Function button briefly. When the Status LED lights up
again continuously, video recording has stopped and the video
Summary of Contents for Car Key Ring HD Spy Camera
Page 8: ...8...


