Disassembly
2 - 16 Removing the Optical (CD/DVD) Device
2.Disassembly
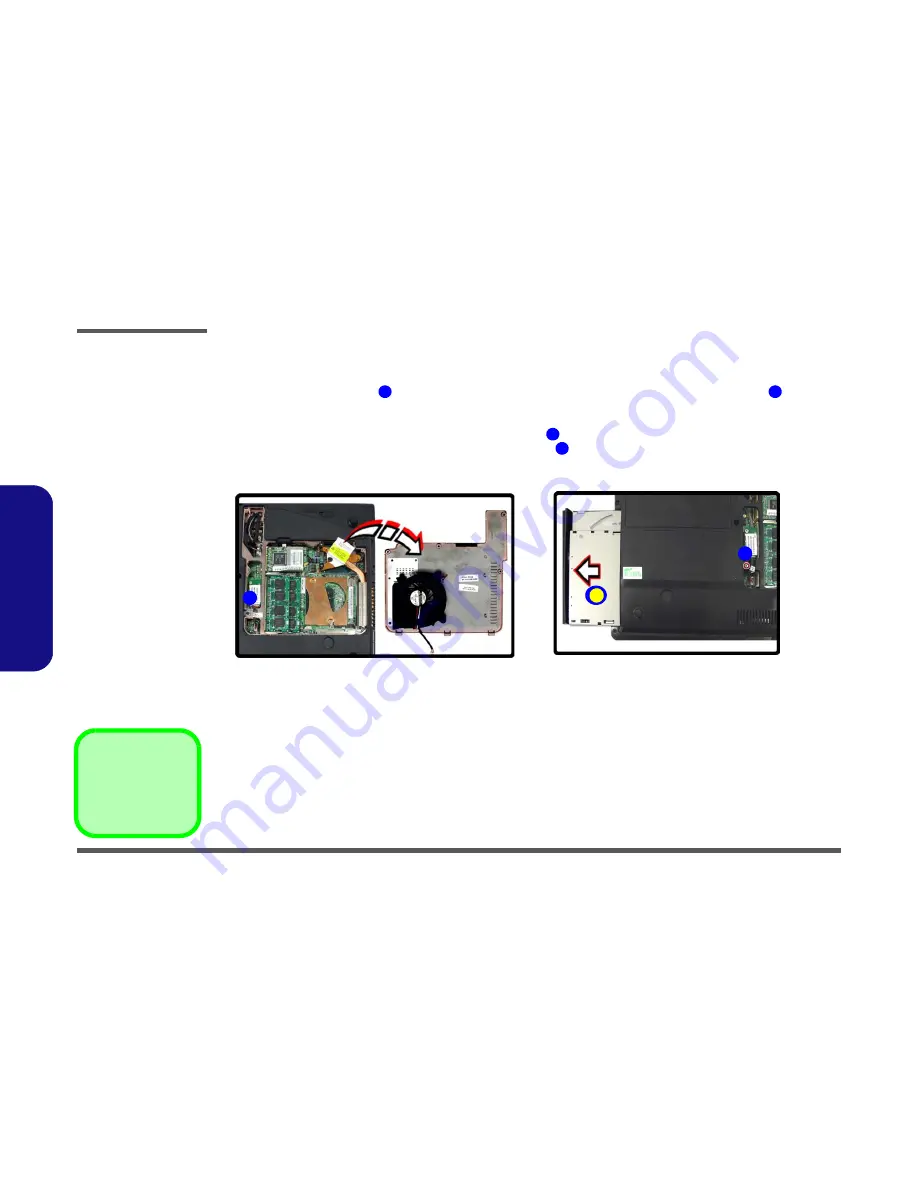
Removing the Optical (CD/DVD) Device
1.
Turn off the computer, remove the battery (
page 2 - 5
), and the CPU/RAM bay cover (
page 2 - 9
)
.
2.
Remove the screw at point
, and use a screwdriver to carefully push out the optical device at point
.
3.
Insert the new device and carefully slide it into the computer (the device only fits one way. DO NOT FORCE IT; The
screw holes should line up.
4.
Insert the new device and replace the optical device screw
.
5.
Reconnect the fan cable before replacing the bay cover
(
in
Figure 5 on page 2 - 9
).
6.
Replace the bay cover and screws.
7.
Restart the computer to allow it to automatically detect the new device.
Figure 12
Optical Device
Removal
a. Remove the cover and
locate the screw.
b. Remove the screw and
push the optical device
out off the computer at
point 2 and remove the
optical device.
1
2
1
5
3. Optical Device
•
1 Screw
3
1
a.
3
b.
2
Summary of Contents for TN120R
Page 1: ......
Page 2: ......
Page 3: ...Preface I Preface Notebook Computer TN120R Service Manual ...
Page 42: ...Disassembly 2 18 2 Disassembly ...
Page 48: ...Part Lists A 6 Combo TN120R A Part Lists Combo TN120R Figure A 4 Combo TN120R 寬降低 無鉛 無鉛 無鉛 無鉛 ...
Page 50: ...Part Lists A 8 HDD TN120R A Part Lists HDD TN120R Figure A 6 HDD TN120R 無鉛 無鉛 ...
Page 90: ...Schematic Diagrams B 40 B Schematic Diagrams ...


