Disassembly
CCD Removal 2 - 15
2.Disassembly
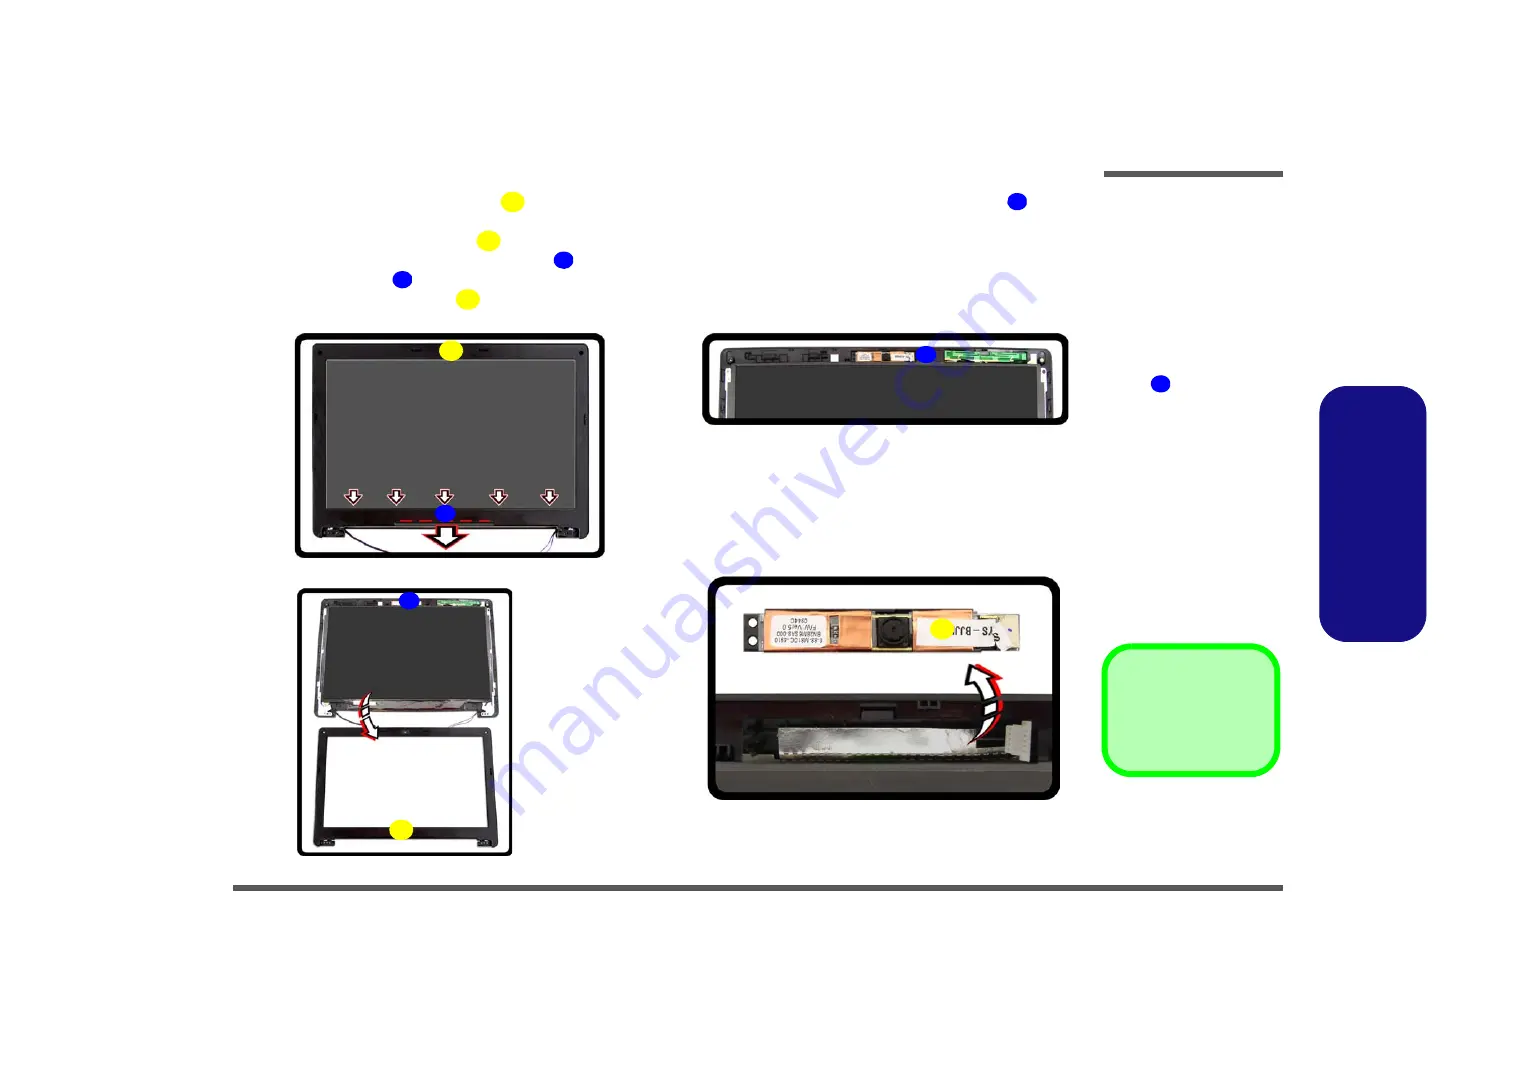
10. Carefully lift the LCD front panel
forward from the bottom of the frame in the direction of the arrow
(
11h
).
11. Remove the LCD front panel
from the LCD assembly (
).
12. The CCD module will be visible at point
).
13. Disconnect cable
).
14. Remove the CCD module
(
).
Figure 11
CCD Removal
(cont’d)
h. Carefully lift the LCD front
panel forward from the
bottom of the frame.
i. Remove the LCD front
panel and the CCD mo-
dule will be visible at
point .
k. Disconnect cable.
l. Remove the CCD mo-
dule.
38
36. LCD Front Panel
40. CCD Module
36
37
36
38
39
40
h.
i.
36
36
37
38
j.
k.
40
39
Summary of Contents for S3100
Page 1: ...S3100 S3100M ...
Page 2: ......
Page 3: ...Preface I Preface Notebook Computer S3100 S3100M Service Manual ...
Page 24: ...Introduction 1 12 1 Introduction ...
Page 42: ...Disassembly 2 18 Removing the LCD Back Cover S3100M 2 Disassembly ...
Page 43: ...Disassembly Removing the LCD Back Cover S3100M 2 19 2 Disassembly ...
Page 44: ...Disassembly 2 20 Removing the LCD Back Cover S3100M 2 Disassembly ...
Page 47: ...Part Lists Top A 3 A Part Lists Top Figure A 1 Top 藍 天 7互 億 凱 碩 ...
Page 48: ...Part Lists A 4 Bottom A Part Lists Bottom Figure A 2 Bottom ...
Page 49: ...Part Lists LCD S3100 A 5 A Part Lists LCD S3100 Figure A 3 LCD S3100 ...
Page 50: ...Part Lists A 6 LCD S3100M A Part Lists LCD S3100M Figure A 4 LCD S3100M ...
Page 51: ...Part Lists HDD A 7 A Part Lists HDD Figure A 5 SATA Blu Ray Combo ...
Page 52: ...Part Lists A 8 A Part Lists ...


