background image


28 


Internet function 

1


Operating Environment 

Operating System: Windows 2000/2003/XP/ 

vista/7/8 

Network Protocol: TCP/IP 

Client PC: P4/128MRAM/40GHD/ support scaled 

graphics card, support DirectX8.0 or more advanced 

version. 

2


Equipment Installation 

1)  Connect  internet  camera  to  your  internet  or  to 

your PC directly via internet cable. 

2) Turn on DC12V power. 

3) The orange light of internet port lit on, green light 

flashing, and the physical connection finished. 

3


Internet Connection 

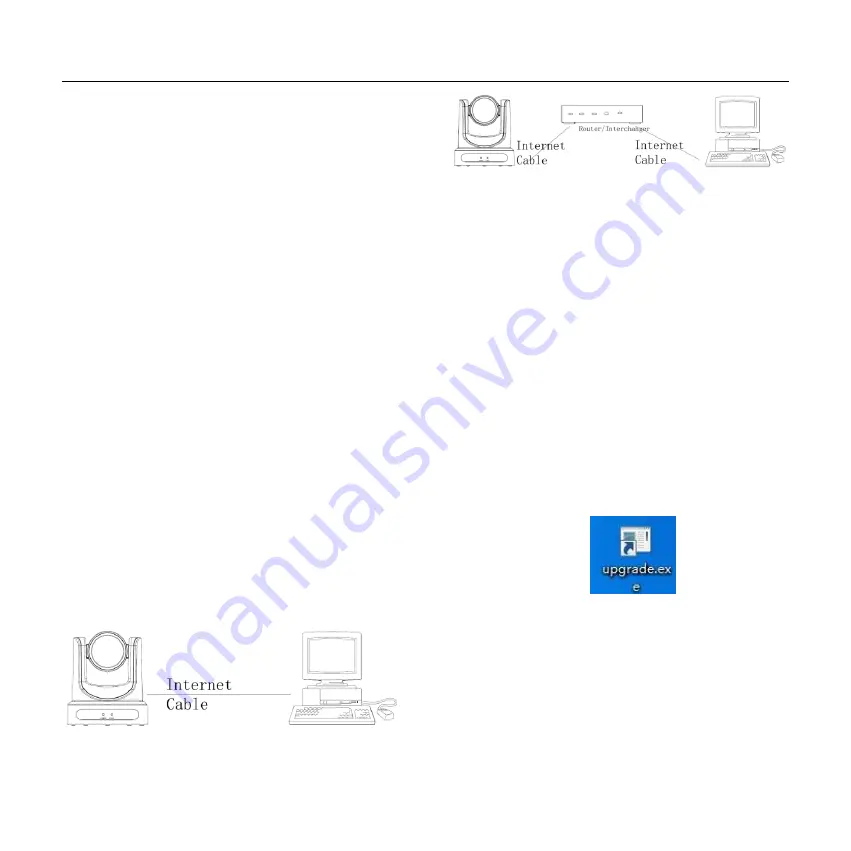
Connection  ways  between  internet  camera  and 

computer, as picture 1.1 and picture 1.2 shown: 


Picture 1.1 connect by internet cable 


Picture 1.2 Connect by router /interchanger 

4


IP  camera  visited/  controlled  by 

LAN 

4.1


Setup IP address 

IP  camera  default  IP  address"192.168.100.88", 

Unknow camera IP, view as below: 

Method  1:  press  *  and  #  and  4  on  remote 

controller one by one, the camera IP address will be 

shown on screen. 

Method  2:  connect  camera  to  PC  with  ethernet 

cable, use “upgrade_En.exe” to search for IP address 


Change IP address,2 methods as below: 

Method  1:  On  web  control  page,  find 

“Network”--->Change  IP---->Click  “Apply”----> 

Restart camera 

Summary of Contents for 1212UHN

Page 1: ...CleverMic 1212UHN PTZ camera User Manual V1 2 English...

Page 2: ...mera to rain or moisture Don t remove the cover Otherwise you may get an electric shock In case of abnormal operation contact the authorized engineer Never operating under unspecified temperature humi...

Page 3: ...cation 8 Main Unit 11 Size 12 IR Remote Controller Explanation 13 USE IR Remote Controller 16 RS 232 Interface 19 VISCA Network Configuration 20 Serial Communication Control 21 VISCA Command List 22 M...

Page 4: ...installation Do not grasp the camera head when carrying the camera Don t turn camera head by hand Doing so may result in mechanical damage Don t apply in corrosive liquid gas or solid environment to...

Page 5: ...plied Accessories When you unpack check that all the supplied accessories are included Camera 1PCS AC power adaptor 1PCS Power cord 1PCS RS232 cable 1PCS Remote controller 1PCS User manual 1PCS USB3 0...

Page 6: ...5 Quick Start Step1 Please check connections are correct before starting...

Page 7: ...need to restart the camera to take effect b 720 p30 and 720 p25 only under the HDMI output Step3 Press the Switch ON OFF button on the rear of the camera the power lamp light Step4 Pan Tilt will rotat...

Page 8: ...dwith 1080P Full HD Apply Panasonic s 1 2 7 inch 2 07 million effective pixels high quality HD CMOS sensor can reach maximum 1920 x 1080 high resolution and achieve quality image Ultra high Frame Rate...

Page 9: ...Digital Zoom 32x optional Minimal Illumination 0 05 Lux F1 8 AGC ON Shutter 1 30s 1 10000s White Balance Auto Indoor Outdoor One Push Manual Backlight Compensation Support Digital Noise Reduction 2D 3...

Page 10: ...ion H 265 H 264 MJEPG Video Stream Main Stream Sub Stream Main Stream Resolution 1920x1080 1280x720 1024x576 Sub Stream Resolution 720x576 720x480 320x240 Video Bit Rate 128Kbps 8192Kbps Bit Rate Type...

Page 11: ...in DIN Max Distance 30m Protocol VISCA network use only 1xRS 485 2pin phoenix port Max Distance 1200m Protocol VISCA Pelco D Pelco P Power Connector JEITA type DC IN 12V Generic Specification Input Vo...

Page 12: ...it 1 Line in Interface 7 POWER switch 2 CVBS Interface 8 DC IN 12V jack 3 System select switch 9 HDMI interface 4 RS485 Interface 10 USB2 0 5 RS232 IN Interface 11 USB3 0 6 RS232 out Interface 12 Rj45...

Page 13: ...12 Size...

Page 14: ...ons Set preset Store a preset position SET PRESET Numeric button 0 9 Setting a corresponding numeric key preset position Clear preset Erase a preset position CLEAR PRESET Numeric button 0 9 Or CLEAR P...

Page 15: ...cus Focus on far object and Focus Focus on near object 6 Camera Select Buttons Press the button corresponding to the camera you want to operate with the remote controller 7 Button 8 Pan Tilt Control B...

Page 16: ...ss F4 key and then can return to normal display Unfreeze on the left upper corner after 5 seconds display disappear automatically Recalling the Preset image Freeze By the OSD Menu Setting Recalling th...

Page 17: ...required 2 When a button combination is required do it in sequence For example F1 means press first and then press and press F1 at last 1 Pan Tilt Control Move up Press Move down Press Move left Pres...

Page 18: ...t Switch BLC ON OFF Press this button to enable the backlight compensation Press it again to disable the backlight compensation Note Backlight is only effective in full auto exposure mode 5 Presets Se...

Page 19: ...tored 7 Camera Selection Press the button corresponding to the camera you want to operate 8 Camera IR Address Set F1 Address1 F2 Address2 F3 Address3 F4 Address4 9 Shortcut Set 1 OSD menu default Engl...

Page 20: ...RXD 3 TXD 3 TXD 4 GND 4 DTR 5 RXD 5 GND 6 GND 6 DSR 7 IR OUT 7 RTS 8 NC 8 CTS 9 RI Camera Mini DIN 1 DTR 1 DTR 2 DSR 2 DSR 3 TXD 3 TXD 4 GND 4 GND 5 RXD 5 RXD 6 GND 6 GND 7 IR OUT 7 NC 8 NC 8 NC No F...

Page 21: ...20 VISCA Network Configuration...

Page 22: ...rity bit none RS485 Communication Control The camera can be controlled via RS485 Half duplex mode Baud rate 2400 4800 9600 bit s Start bit 1 bit Data bit 8 bits Stop bit 1bit Parity bit none Pan Tilt...

Page 23: ...camera serial standard VISCA Pelco D Pelco P if the need for the secondary development According to standard protocol to control the camera If you need VISCA Pelco D Pelco P protocol command list in d...

Page 24: ...Mode Exposure mode Optional items Auto Manual SAE AAE Bright ExpCompMode Exposure compensation mode Optional items On Off Effective only in Auto mode ExpComp Exposure compensation value Optional items...

Page 25: ...350 1 500 1 725 1 1 000 1 1500 1 2000 1 3000 1 4000 1 6000 1 10000 Effective only in Manual SAE mode 3 COLOR Move the cursor to the Color item in the main menu and press home button COLOR menu appears...

Page 26: ...lip Vertical Optional items On Off B W Mode Image color Optional items On Off Gamma Optional items Default 0 45 0 5 0 56 0 63 Style Optional items Norm Clarity Bright Soft 5 P T Z SpeedByZoom The dept...

Page 27: ...se reduction Optional items Off 1 8 D HotPixel Dynamic bad points Optional items Off 1 5 7 SETUP Move the cursor to the Setup item in the main menu and press home button SETUP menu appears as shown in...

Page 28: ...d Net Mode Set the serial port control networking Optional items Serial Paral Baudrate Serial port baud rate Optional items 2400 4800 9600 8 RESTORE DEFAULT Move the cursor to the Restore Default item...

Page 29: ...shed 3 Internet Connection Connection ways between internet camera and computer as picture 1 1 and picture 1 2 shown Picture 1 1 connect by internet cable Picture 1 2 Connect by router interchanger 4...

Page 30: ...be restart NOTE IP camera default IP address 192 168 100 88 user admin password admin 4 2 Visit Access IP Camera Input http 192 168 100 88 to IE better With IE web browser others will cause little la...

Page 31: ...5 1 Setup IPC accessed controlled by dynamic DNS 2 dynamic DNS available Dyndns org 3322 org Router Port Mapping Take TP LINK router for example enter Router Home Page interface page select Transit co...

Page 32: ...ccess link should be http youdomain 3322 org 554 NOTE If camera port default as 80 then unnecessary to input port number use host name can access camera directly 5 3 VLC stream media player monitoring...

Page 33: ...e resolution is the bigger the playing area is Double click viewing window will show full screen double click again will return to initialized size Status bar in viewing window shown as below 1 Video...

Page 34: ...ut Focusing on distant objects or Focusing on close objects 5 Set Call When PTZ turn to expected position can set up a number of preset that user want click Set button when PTZ turn to other position...

Page 35: ...s too narrow and the allocated bit flow is too big will cause video signal flow not to be transmitted normally the video effect will be worse 7 Frame rate User can specify the size of the frame rate g...

Page 36: ...rical Default 6 4 Sharpness Sharpness0 15 slider control on the right shows the corresponding numerical Default 1 5 Hue Hue 0 14 slider control on the right shows the corresponding numerical Default 7...

Page 37: ...R The volume of the right channel 7 ADTS Options Optional items On Off 8 Button Press apply button to save parameters press cancel button to cancel parameter 6 5 System Setting please click System 1 W...

Page 38: ...port mapping need to be consistent with the port number default port 80 B RTSP Port Network camera support RTSP protocol use the VLC tools broadcast C PTZ Port Support PTZ protocol default port 5678 3...

Page 39: ...network parameters 6 7 Device Information please click information Show the current device information as shown below Note Software version may not be the latest version of the current please release...

Page 40: ...river and VLC media player etc Mac OS FaceTime iChat Photo Booth and Debut Video Capture etc Notice Recommend making AMCAP version 8 0 in Windows which software performance is more relatively stable W...

Page 41: ...etc No operating in unstable lighting conditions otherwise image will be flickering No operating close to powerful electromagnetic radiation such as TV or radio transmitters etc Troubleshooting Image...

Page 42: ...ect IP Camera with network IP Camera and PC are connected according to the proper operations to re set the IP address 3 Check the server s IP address and subnet mask and gateway address 4 MAC addresse...

Page 43: ...to our Corporation Cannot be cloned copied or translated without the permission of the company Product specifications and information which were referred to in this document are for reference only an...

Reviews: