


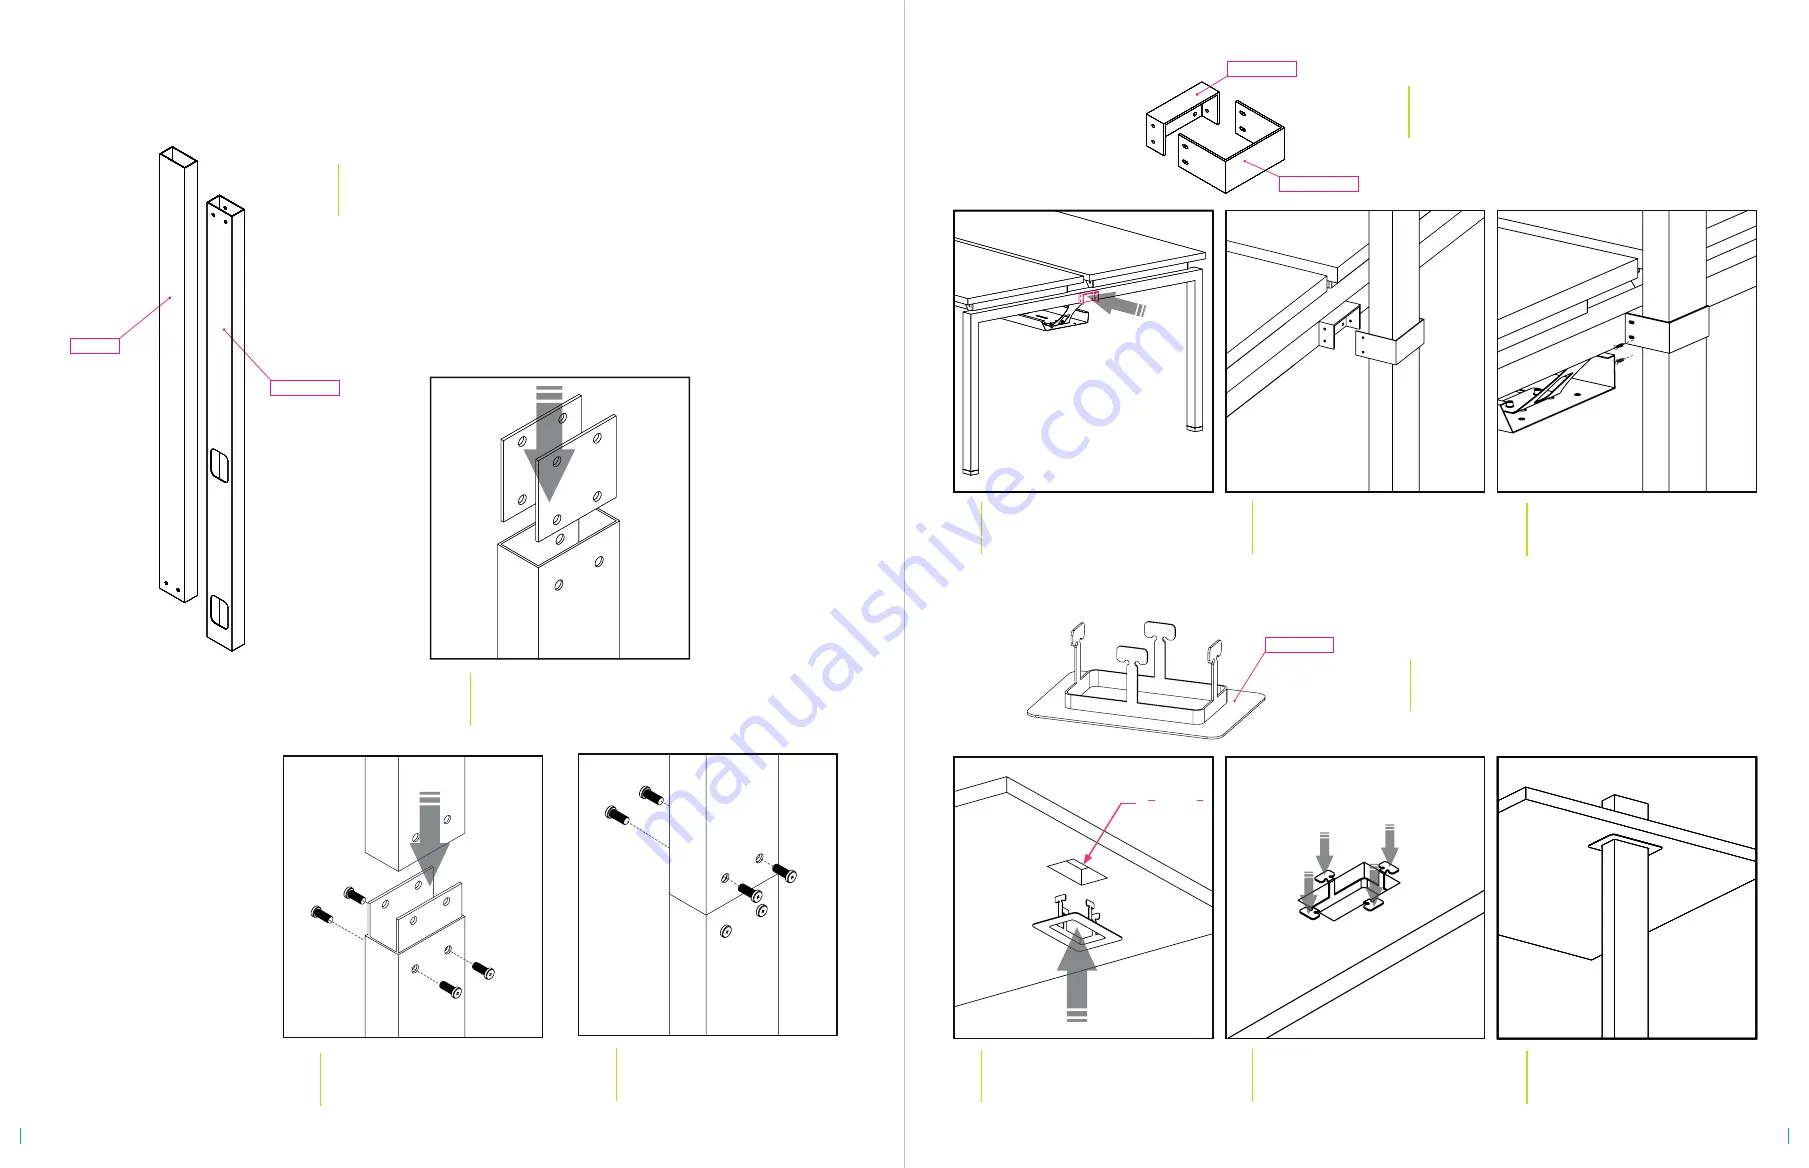
POWER POLE
#1
Insert Connecting Plates
Lower the connecting plate into the
bottom half of the power pole,
#2
Bolt on Connecting Plates
Tighten 4 bolts to secure the plates.
Align the top half of the power pole.
#3
Bolt on Top Half
Slide top half of the power pole onto
the exposed plates and insert 4 bolts.
Power Pole
Join the top and bottom halves with
2 connecting plates and 8 bolts.
Bottom Half
Top Half
#1
Mount Power Pole Bracket
Insert 4 screws to secure the bracket box.
Attach to an end leg whenever possible.
#2
Position Power Pole
Slide bracket collar around the power pole.
Push the bracket halves together.
#3
Secure the Bracket
Attach the bracket halves with 4 bolts.
The power pole will be clamped in place.
Bracket Box
Bracket Collar
BPPBRK
Power Pole Bracket
2 part bracket with 4 bolts
and 4 tapping screws.
#1
Insert Trim Plate
Cut a hole in the appropriate ceiling tile.
Insert trim plate, tabs first into the hole.
#2
Secure Trim Plate
Press on each tab to bend them down.
The tabs will grip the ceiling tile.
#3
Insert Power Pole
Slide power pole into the opening.
The trim plate provides a finished look.
Trim Plate
BPP2
BPPCTP
Power Pole Ceiling Trim Plate
Ceiling tile attachment with
bendable tabs
For installation questions call
210.648.2095
or email
8
1
7
"
16
3
7
"
x
18
19


