background image

3. GETTING STARTED    |  9

ACTIvATE EFFECTS 

Activate the reverb by pressing the Reverb 

ON

 button.

Adjust the 

DRY/WET

 balance with the knob above the reverb 

selector.

Activate the delay effect by pressing the Delay 

ON/OFF

 button once.

The LEDs above the button indicate which sound engine is routed 
to the effect (

O

 = Organ, 

P

 = Piano and 

S

 = Sample Synth). Press 

SHIFT

 and the Delay 

SOURCE

 button until the 

P

 LED is lit, if it is not 

already.


 Double-clicking the On Off / Source button is a shortcut for quickly 
changing the source for any effects unit.

Try the 

RATE

FEEDBACK 

and 

DRY/WET

 controls, to alter the charac-

ter and intensity of the Delay effect.

ACTIvATING THE ROTARY SPEAKER

The Rotary Speaker – being most commonly used with the Organ – has 
its speed controls located next to that section. The effect itself is located 
in the 

SPKR/COMP

 unit however, and is activated and assigned just as 

the Delay effect described above.


Pressing the Rotary Speed control when the effect is Off will auto-
matically turn on the Rotary Speaker and assign it to the left-most 
of the currently active sound engines. 

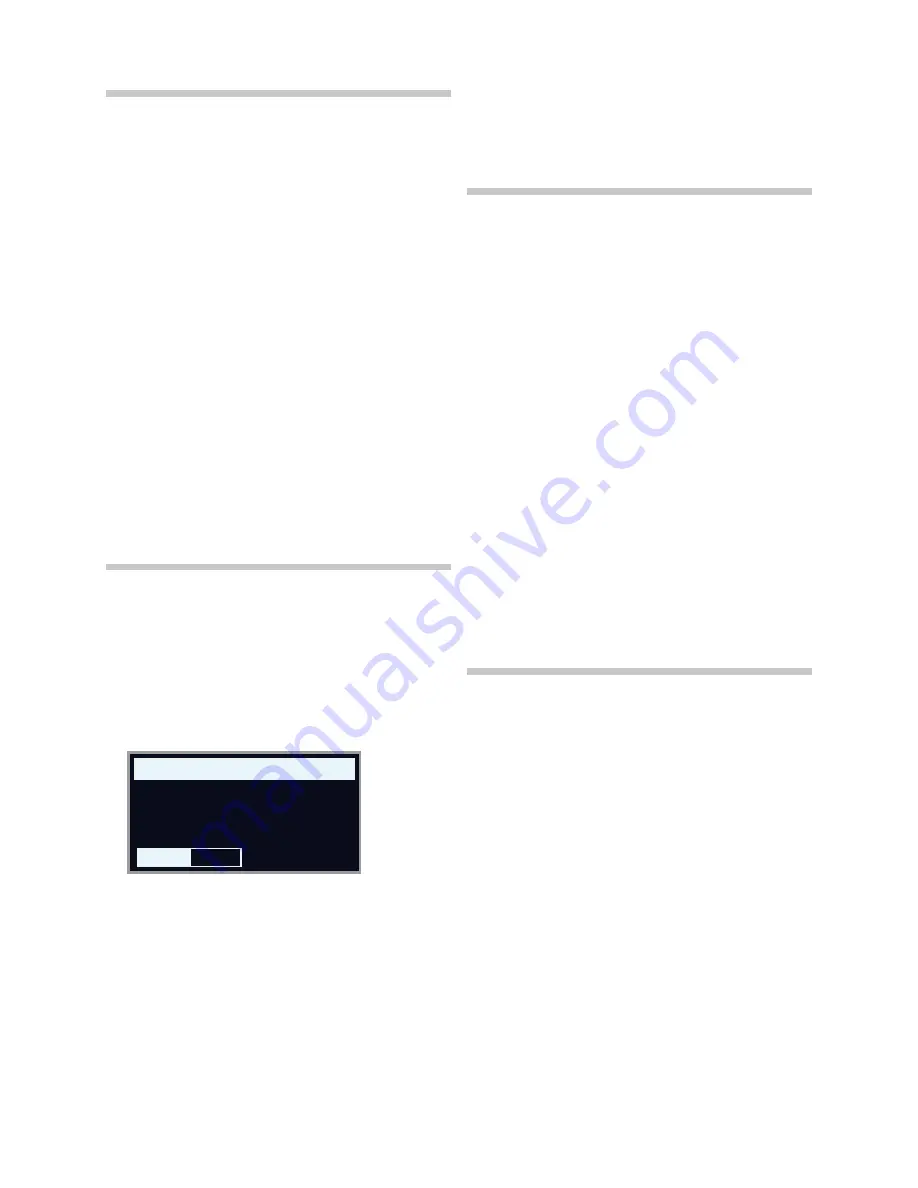
CREATE A SPLIT 

Make sure that the Piano section is turned on. 

To activate Split mode, press the 

KBD SPLIT

 button, located in the 

top row above the Program area display.

To adjust the 

position

 of the Split point, press and 

hold

 the 

KBD 

SPLIT

 button.


M

The “

6

“ symbol indicates that this button has functions which are 

accessed by keeping the button pressed down.

There are two settings for the split point; 

position

 and 

width

. Make 

sure that the Position setting is focused (by pressing the 

Pos

 soft 

button) and set the split point to C4 using the dial.

The keyboard is now divided into two zones, the split point being indi-
cated with a green LED above the keyboard.

ASSIGN THE PIANO TO THE UPPER ZONE 

Hold 

SHIFT

 and press the Piano 

ZONE SELECT

 button so that only 

the 

UP

 LED is lit.

This assigns the Piano to the upper zone of the keyboard. Feel free 
to use the 

OCTAVE SHIFT

 buttons in the Piano section for accessing a 

different range of the piano sound.

SET THE SAMPLE SYNTH TO THE LOWER ZONE

Turn 

ON

 the Sample Synth section. Hold 

SHIFT

 and press Sample 

Synth 

ZONE SELECT

 so that the 

LO

 LED is lit. This will assign the 

Sample Synth to the lower half of the keyboard.

LOAD A SAMPLE

Turn the 

SAMPLE SELECT

 dial and select a sample from the Sample 

bank, perhaps a bass sound. The location and name of the sample 
are shown at the bottom of the display.

When a sample is selected, 

preset

 settings for the Sample Synth 

envelope, Dynamics and Filter settings are also loaded. These parame-
ters can subsequently be adjusted manually as desired. Descriptions of 
these controls are found in the Sample Synth reference chapter, starting 
on page 19.

SET UP A SPLIT CROSS-FADE (SPLIT WIDTH)

As a final step, let’s adjust the split point so that the split Sample Synth 
and Piano sounds will transition gradually between one another:

Again, press and hold the 

KBD SPLIT

 button, located in the top row 

above the Program area display.

Press the 

Width

 soft button. The Split 

width

 for each split point can 

now be adjusted.

Set the width value to “Lrg” (large) by turning the dial. Let go of the 

KBD SPLIT

 button.  

Playing across the Split point will now “cross-fade” between the lower 
and the upper sound. Note that the split LED above the keyboard is lit 
with a 

red

 light, indicating that a large split width is being used. With a 

small width the LED will be yellow, and with width set to “off” the LED 
will be green.

CREATE A TWO MANUAL B3

Setting up an Organ split, with two independent manuals, can be done 
very quickly. Let’s try out the Program Init feature which will configure the 
Organ section correctly, and turn off other active sound engines:

Press 

PROG INIT

 (Shift + Program 3 button). The display now pres-

ents four initialize options to choose from.

Press the 

Dual Org

 soft button (Program 2 button).

Make sure the 

ORGAN MODEL

 selector is set to 

B3

 and press the 

ROTARY

 Slow/Fast control to automatically turn on the Rotary 

Speaker effect.

A keyboard split has now been created, providing one Organ manual to 
the 

left

 of the split point – referred to as the 

Lower

 manual – and another 

to the 

right 

which is referred to as 

Upper

. Both Organ KB Zone LEDs are 

now lit with a yellow color, meaning that the Organ is active across the 
whole keyboard, in a Dual Organ split configuration.

Set the drawbars, Percussion, and other Organ settings for the 
Upper manual as desired.

Press the 

EDIT LOWER

 button to focus the Lower manual for editing 

and adjust the drawbars. Note that the display shows drawbar set-
tings for both manuals, but that the non-focused ones are “grayed 
out”. 


M

A two manual B3 using an external keyboard for one of the man-
uals can also be easily set up, by using the External KBD to Lo 
function. Read more about this on page 17. 

KEYBOARD SPLIT          

Split Position

C4 Off

Width

Pos

Summary of Contents for Nord Electro 6

Page 1: ...USER MANUAL Nord Electro 6 English OS version 1 1x Edition C Part number 50482 Copyright Clavia DMI AB Edition C...

Page 2: ...flash with the arrowhead symbol within an equilateral triangle is intended to alert the user to the presence of uninsulated voltage within the products en closure that may be of sufficient magnitude t...

Page 3: ...Percussion 11 Key click control 11 The Vox model 12 Vox drawbars 12 Vibrato 12 The Farf model 12 Farf registers 12 Vibrato 13 Pipe Organs 13 Pipe 1 13 Pipe 2 13 Pipe 1 2 Chorus 13 Pipe 1 2 registers...

Page 4: ...ENUS 26 System Menu 26 1 Memory Protect 26 2 NumPad Program Select 26 3 Seamless Program load 26 4 Global Transpose 26 5 Fine Tune 26 6 Output Routing mode 26 7 Sustain Pedal 26 Type 26 Func Function...

Page 5: ...and drivers Nord Piano Library sounds for free download Nord Sample Library sounds for free download Nord World Nord releated news stories and videos User Manuals for download Tutorials can be found a...

Page 6: ...ntrols are buttons for activating the Advanced String Resonance feature for acoustic pianos adjusting the keyboard velocity response or quickly altering the sound character using the Piano and Clavine...

Page 7: ...urce or zone M M The On Off buttons of the Effects shown here also have a selector functionality Press once to turn the Effect on and press immedi ately again to select the next source THE SHIFT BUTTO...

Page 8: ...is play shows a different setting use the Page3button to navigate to the Memory Protect setting 3 Change this setting to Off by turning the PROGRAM dial 4 Press EXIT Shift button to exit the System me...

Page 9: ...e from the Sample bank perhaps a bass sound The location and name of the sample are shown at the bottom of the display When a sample is selected preset settings for the Sample Synth envelope Dynamics...

Page 10: ...n section With the B3 B3 Bass models it functions as a traditional Swell pedal which also changes the character of the sound when the Rotary Speaker Drive is used Read more about how to configure peda...

Page 11: ...and chorus scanner in a tonewheel organ consists of a modulated delay line in combination with a rotating scanner For the Vibrato effect phase shift is applied to the signal For the Chorus effect the...

Page 12: ...ato section The V3 setting is the one that is modeled after the original instrument THE FARF MODEL The typical buzzy sound of this vintage instrument is one of the most distinct and easily recognizabl...

Page 13: ...Preset is active In order to modify the Preset press down on the button as indicated by the 6 symbol while adjusting the drawbars and other settings When in the non Preset mode the current drawbar pos...

Page 14: ...d matching the original models as closely as possible The available memory size for piano sounds is 1 Gigabyte M M When you download piano instruments with the Nord Sound Manager these will always aut...

Page 15: ...NG RES AND SOFT RELEASE STRING RESONANCE String Resonance refers to the acoustic phenomenon that occurs when strings or parts of strings resonate at their fundamental or harmonic frequencies when othe...

Page 16: ...NAMING A PROGRAM STORE AS 1 To store and name your program press STORE AS Shift Store 2 The ABC soft button brings up a row of alphanumeric characters Use the dial to set the character for the current...

Page 17: ...u The Shift button is also used to EXIT menus or for cancelling Store operations LIVE PROGRAMS The Nord Electro 6 has eight easy to access Live pro grams These programs are special in that edits to th...

Page 18: ...e ORGANIZE Shift Program 4 view allows for moving or swap ping programs within the program banks This can be done either on a per program basis when the Prog view is focused or an a page basis handlin...

Page 19: ...when a Store operation is performed LIST VIEW Pressing SHIFT while turning the SAMPLE SELECT dial allows for brows ing all samples in a list The Abc and Cat soft buttons can be used for displaying sa...

Page 20: ...e Wah Wah modulation is a lowpass type of filter that can be swept across the frequency range using the Effect 1 knob During the sweep the filter s characteristics also changes The Wah effect uses the...

Page 21: ...to sync to a number of times and the delay time will be adjusted automatically SPKR COMP The SPKR COMP unit combines sophisticated ampli fier and speaker cabinet simulations including the Rotary Speak...

Page 22: ...be set between 200 Hz to 8 kHz using its FREQ knob The boost cut range is 15 dB Select which sound engine the Equalizer should be assigned to by pressing SOURCE Shift On Off until the LED for the des...

Page 23: ...are stored per program which makes it an ideal feature for live usage Below is an example of how to set it up 1 Press EXTERNAL KBD TO LO Shift KBD Split 2 Connect an external MIDI keyboard to the MID...

Page 24: ...nt values depends on the number of pianos samples in memory M M A Program Change message that reaches the Nord Electro 6 unaccompanied by Bank Select messages will take effect in the currently selecte...

Page 25: ...the Piano partition Downloading new Samples to the Sample partition Uploading Programs from the Nord Electro 6 to a computer Uploading bundles containing programs and their associated piano and sample...

Page 26: ...e value stored with a program Range 6 semitones default value is none 5 FINE TUNE Fine Tune can be used to fine tune the pitch of the Nord Electro 6 in finer increments Range 50 Cents half a semitone...

Page 27: ...not applied to outgoing MIDI but only to incoming MIDI data In Out mode sent MIDI notes are transposed but not incoming ones Range In Default Out SOUND MENU 1 PIANO STRING RES LEVEL Sets the level of...

Page 28: ...The 5 pin MIDI In connection is used for receiving MIDI data sent from external devices such as controller keyboards sequencers and comput ers MIDI OUT The 5 pin MIDI Out connection will send MIDI dat...

Page 29: ...al 8 Piano Enable 33 Piano Level 34 Piano Octave Shift 35 Piano Sustain Pedal 49 Piano Ctrl Pedal 50 Piano Type 36 Piano Model 37 Piano Variation 38 Nord Electro 6 Parameter MIDI CC Piano EQ 40 Sample...

Page 30: ...ord Piano Library 14 Nord Sound Manager 25 Numeric Pad program selection mode 18 26 O Organ 10 Organize 18 Organ Keyboard Trigger Point 27 Output Routing 26 P Page Based navigation mode 18 Page Based...

Page 31: ...terference to radio or television reception which can be determined by turning the equipment off and on the user is encouraged to try to correct the interference by one or more of the following measur...

Page 32: ......

Reviews: