


18/EN
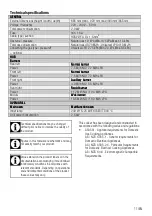
4. Check all connections for secure fitting and
tightness.
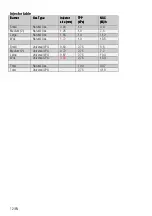
New injectors have their position marked
on their packing or injector table on
Injector table, page 12
can be referred to.
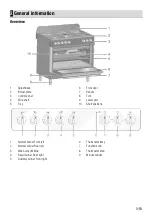
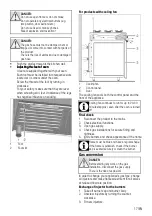
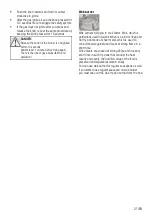
1
Flame failure device (model dependant)
2
Spark plug
3
Injector
4
Burner
Unless there is an abnormal condition, do not
attempt to remove the gas burner taps. You
must call an Authorised service agent if it is
necessary to change the taps.
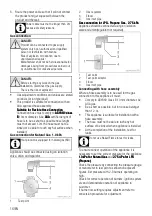
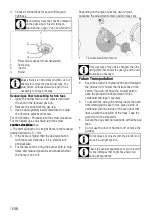
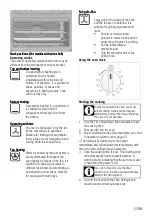
Reduced gas flow rate setting for hob taps
1. Ignite the burner that is to be adjusted and turn
the knob to the reduced position.
2. Remove the knob from the gas tap.
3. Use an appropriately sized screwdriver to adjust
the flow rate adjustment screw.
For LPG (Butane - Propane) turn the screw clockwise.
For the natural gas, you should turn the screw
counter
counter
counter
counter----clockwise
clockwise
clockwise
clockwiseonce.
»
The normal length of a straight flame in the reduced
position should be 6-7 mm.
4. If the flame is higher than the desired position,
turn the screw clockwise. If it is smaller turn
anticlockwise.
5. For the last control, bring the burner both to high-
flame and reduced positions and check whether
the flame is on or off.
Depending on the type of gas tap used in your
appliance the adjustment screw position may vary.
1
Flow rate adjustment screw
If the gas type of the unit is changed, then the
rating plate that shows the gas type of the unit
must also be changed.
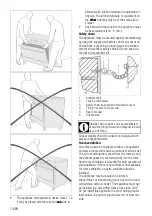
Future Transportation
•
Keep the product's original carton and transport
the product in it. Follow the instructions on the
carton. If you do not have the original carton,
pack the product in bubble wrap or thick
cardboard and tape it securely.
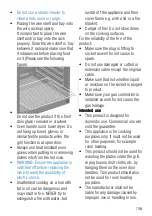
•
To prevent the wire grill and tray inside the oven
from damaging the oven door, place a strip of
cardboard onto the inside of the oven door that
lines up with the position of the trays. Tape the
oven door to the side walls.
•
Secure the caps and pan supports with adhesive
tape.
•
Do not use the door or handle to lift or move the
product.
Do not place any objects onto the product and
move it in upright position.
Check the general appearance of your product
for any damages that might have occurred
during transportation.
Summary of Contents for CLFG95SS
Page 30: ...30 EN...