6
OPERATION
POSITIONING
Ensure the load is chocked and stable and on firm level ground.
1. Position the jack so that the saddle is directly beneath the lifting point and
that there are no obstacles to prevent a clean lift, also, make sure that all
personnel are well away from the area, before raising the vehicle.
• Consult the vehicle handbook to determine the correct lifting points.
TO LIFT
1. Turn the handle, fully clockwise to close the release valve and pump the
handle up and down to raise the saddle.
• Make sure that the saddle is in full contact with the lifting point and
that there are no obstacles to prevent a clean lift.
2. Place axle stands beneath the vehicle.
• Ensure the axle stands are centred about the support point and
perfectly stable before full weight is taken.
• Ensure that the axle stands are in good condition and fully capable
of supporting the load.
• Ensure that the axle stands cannot move when supporting the load.
• DO NOT jerk the handle, ensure it lowers slowly and under complete
control on to the axle stands which must be correctly positioned and
take the weight evenly.
TO LOWER
1. Lift the vehicle slightly to remove the weight from any supports,
2. Remove any supports from beneath the vehicle.
3. VERY GENTLY turn the handle anticlockwise.
• This action will open the release valve to lower the load.
NOTE:
Ensure this operation is carried out under complete control. DO
NOT allow the load to drop suddenly as this could damage
internal components.
4. Remove the jack from beneath the vehicle.
NOTE:
The jack may move slightly during operation. It is important
therefore that the immediate vicinity is clean and completely
free from debris.
Summary of Contents for 7623050
Page 4: ...4 PARTS IDENTIFICATION...
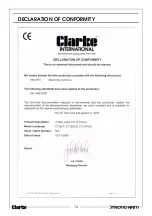
Page 10: ...10 DECLARATION OF CONFORMITY...
Page 11: ...11 NOTES...
Page 12: ......


