background image

16

MP3 Disc Replay

Supported CD-R/RW
Standards:

- Disk at once
- Track at once

Supported File Formats:

- ISO9660, level 1 and level 2
- Joliet
- Romeo

 File System:

- Max. 8 levels of folders
- 31 files in each folder
- Max. 255 folders
- Max. 255 files

Supported Bit Rates:

- @fs = 32, 44.1, 48, 96 kHz
- 32 kbit/s – 320 kbit/s

Supported ID3V1 Tags:

- Song name: 30 characters
- Artist: 30 characters

Supported ID3V2 Tags:

- Song name: 30 Characters
- Artist: 30 Characters
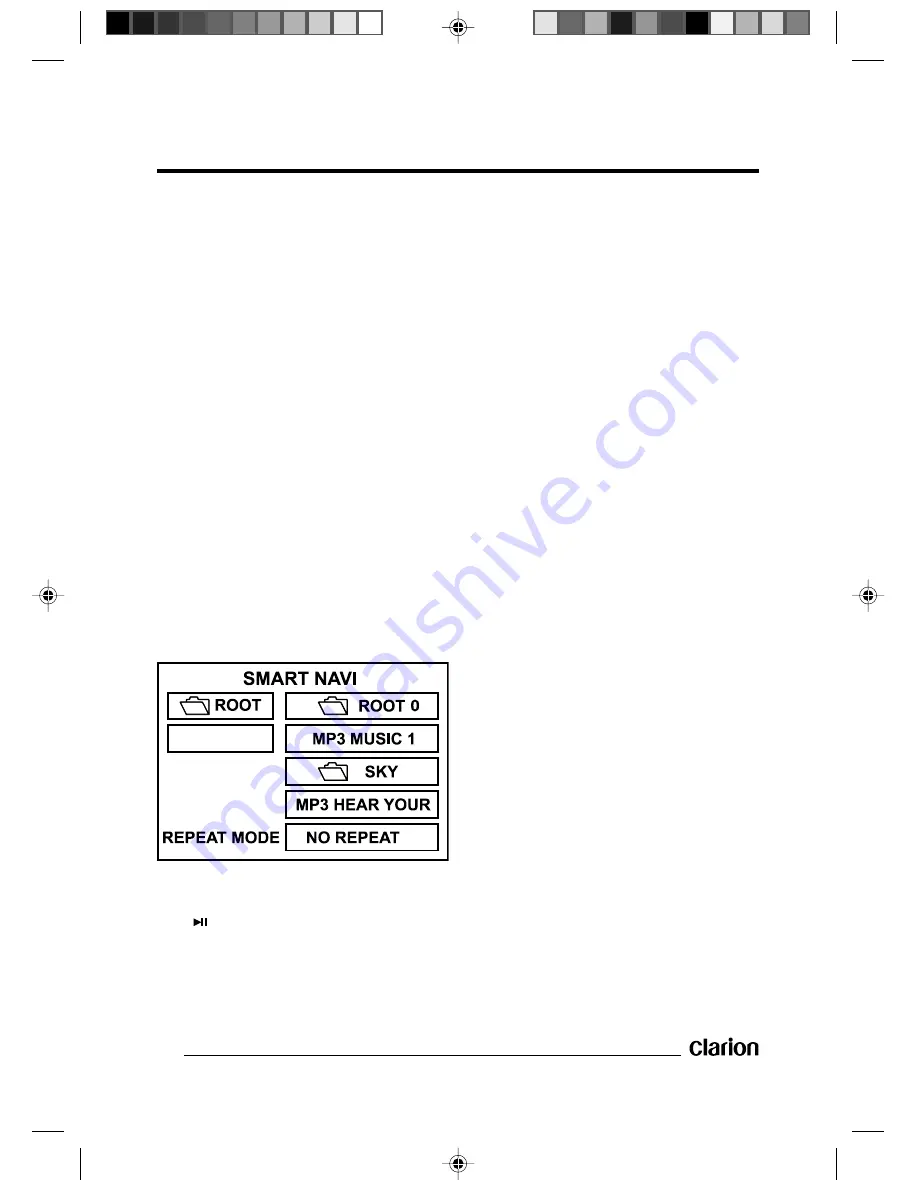
Example:

- Use 

]

[

1

 and 

¡

 to select an

item or folder, then press the 

ENTER

or 

 PLAY

 button.

- Pressing the 

REPEAT

 button

repeatedly can select three kinds of
play modes.

REP-ONE:

 Plays the same song over

and again.

FOLDER REPEAT:

 Plays all songs in

the current directory in sequence, over
and again.

NO REPEAT:

 Plays all songs in the

current directory once.
During playback, use 

]

/

[

 to skip an

item ahead or back.

1

: Fast rewind, 

¡

: Fast forward.

Note:

The folder cannot be selected during
playback. This can only be done after
pressing the 

7

 STOP

 button. During

play, the screen will display the MP3-
ID3 instead of REPEAT MODE. In this
case, it only displays the song name
and artist.

Special Functions

- Volume, color, contrast and

brightness can be adjusted when in
the stop mode.

-

ANGLE:

 Selects the volume, color,

contrast and brightness:

1

: Softer/Weaker

¡

: Louder/Stronger

-

DISPLAY:

 Returns to normal values

(except for volume).

Notes:

- For MP3 discs, the above modes

cannot be adjusted.

- When the total value of the contrast

and brightness is 29, further increase
is impossible.

- Do not select excessively high values

for the contrast and brightness.

Summary of Contents for VS738

Page 1: ...DIENUNGSHANDBUCH INSTALLATIONSANLEITUNG MODE D EMPLOI GUIDE D INSTALLATION MANUALE DELL UTENTE GUIDA PER L INSTALLAZIONE MANUAL DEL USUARIO GUÍA DE INSTALACIÓN GEBRUIKS EN INSTALLATIEHANDLEIDING BRUKSANVISNING INSTALLATIONSGUIDE MANUAL DO PROPRIETÁRIO GUIA DE INSTALAÇÃO ...

Page 2: ...in direct sunlight can produce very high temperatures inside your vehicle Give the interior a chance to cool down before starting playback Use the Proper Power Supply This product is designed to operate with a 12 volt DC negative ground battery system the regular system in a normal car Protect the Disc Mechanism Avoid inserting any foreign objects into the slot of this player Failure to observe th...

Page 3: ...trol 11 Preparing the Remote Control Unit for Use 12 Inserting a DVD VCD CD 12 Removing a Disc 12 Basic Operation 13 On screen Display Function 14 Multiple Language Audio Function for DVD 15 Menu Function 15 Multilingual Subtitles DVD Only 15 Multi angle Function DVD Only 15 MP3 Disc Replay 16 Special Functions 16 Initial Setup 17 General Setup 17 Speaker Setup 19 Audio Setup 19 Preferences Setup ...

Page 4: ...ES THIS DEVICE IS INTENDED FOR CONTINUOUS OPERATION This product incorporates copyright protection technology that is protected by method claims of certain U S patents and other intellectual property rights owned by Macrovision Corporation and other rights owners Use of this copyright protection technology must be authorized by Macrovision Corporation and is intended for home and other limited vie...

Page 5: ...om damage Do not place discs in the following places 1 Direct sunlight 2 Dirty dusty and damp areas 3 Near car heaters 4 On the seats or dashboard Disc Cleaning Use a dry soft cloth to wipe the surface If the disc is quite dirty use a soft cloth slightly moistured with isopropyl rubbing alcohol Never use solvents such as benzine thinner or conventional record cleaners as they may mar the surface o...

Page 6: ... proper setting will not be performed and the player will not play the disc Therefore remove the rough edges in advance by using a ball point pen or pencil as shown below To remove the rough edges press the side of the pen or pencil against the inside and outside edges of the disc ROUGH SPOTS ON OUTSIDE EDGE BALL POINT PEN OR PENCIL ROUGH SPOTS ON INSIDE EDGE ...

Page 7: ...ght not give optimum performance Avoid installing the unit where it will be subject to high temperature such as from the heater or where it will be subject to dust dirt or excessive vibration DIN Front Rear mount This unit can be properly installed either from the Front conventional DIN Front mount or Rear DIN Rear mount installation utilizing threaded screw holes at the sides of the unit chassis ...

Page 8: ... the dashboard DIN Rear mount Method B Installation using the screw holes on the sides of the unit Fastening the unit to the factory radio mounting bracket 1 Select a position where the screw holes of the bracket and the screw holes of the main unit become aligned and tighten the screws at 2 places on each side Uses truss head machine screws M4 6 depending on the shape of the screw holes in the br...

Page 9: ...ative installation locations using the supplied mounting brackets 1 Use flat head machine screws M5 5 to fix the installation brackets to the unit on both sides in the desired direction 2 Align the unit on the place of installation and secure it with Hex washer head tapping screws M5 18 1 Flat head machine screws M5 5 2 Hex washer head tapping screws M5 18 ...

Page 10: ...unction and the LCD display may not light some segments In this case press the OPEN button and then re install the front panel again Precautions During Handling 1 Do not drop the front panel 2 Do not put pressure on the display or control buttons when detaching or re installing the front panel 3 Do not touch the contacts on the front panel or on the main unit body It may result in poor electrical ...

Page 11: ...IT VIEW FROM REAR OUT IN SPDF DIGITAL OUT IR WHITE WHITE RED RED YELLOW YELLOW YELLOW RED BLACK TO POWER SUPPLY AUDIO L AUDIO L AUDIO R AUDIO R VIDEO VIDEO AV OUT AV IN EXTERNAL REMOTE RECEIVER MEMORY BACK UP GROUND B IGNITION SWITCH B ...

Page 12: ...s 8 SETUP Calls the SETUP MENU 9 TITLE Opens the title contained on the DVD disc 10 DISPLAY Button for hiding or displaying the status line during play 11 REPEAT Switches between repeat modes 12 Button for pausing and restarting play 13 A V Switches between DVD player and external AUDIO VIDEO 14 ENTER Button for confirming sections chapters selected using the number or cursor buttons in combinatio...

Page 13: ...e remote control towards the player front face IR mark remote control signal receiver Operation angle About 30 in front of the IR mark To prevent damage to the unit be sure to follow the connection diagram page 10 Inserting a DVD VCD CD 1 Turn the vehicle s ignition key to the ACC position 2 Press the POWER button 1 3 Press the OPEN button 2 so that the front panel opens slowly forward Removing a ...

Page 14: ... 1 VCD The repeat function is not available for VCD2 0 with PBC ILL Illumination Press the ILL button to adjust the illumination of the VFD display in the following sequence Selecting a higher level will increase the brightness of the VFD display Skipping a Section Press the skip buttons during play The button takes you to the next section while the button returns you to the previous section Note ...

Page 15: ... the unit when all wiring is completed If the function buttons do not operate If an error symbol is shown on the display Open Press the OPEN button to open the front panel Remote Sensor IR Point the remote control at the IR sensor for receiving the remote control signals Turn Off the Player Press the POWER button on the front panel or press POWER on the remote control unit On screen Display Functi...

Page 16: ...s displayed 2 Press the cursor button shown on the screen select the preferred title using the cursor buttons and confirm by pressing the ENTER button Multilingual Subtitles DVD Only Press the SUBTITLE button during play Each time the button is pressed the number of the subtitle language changes in sequence Notes The language numbers vary from one disc to another Only one language is available on ...

Page 17: ...he current directory in sequence over and again NO REPEAT Plays all songs in the current directory once During playback use to skip an item ahead or back 1 Fast rewind Fast forward Note The folder cannot be selected during playback This can only be done after pressing the 7 STOP button During play the screen will display the MP3 ID3 instead of REPEAT MODE In this case it only displays the song nam...

Page 18: ...eaker Setup Menu III AUDIO SETUP This setup page includes all the items for AUDIO setup Please refer to Audio Setup Menu IV PREFERENCES This setup page includes all the configuration items for supported features For details please refer to Preferences Setup Menu TV Display Setup This is to select the appropriate TV aspect ratio 4 3 or 16 9 according to the connected TV set NORMAL PS for 4 3 TV Pla...

Page 19: ...the DVD disc format SETUP GENERAL PIC MODE PIC Mode Setup With AUTO the player PIC MODE will depend on DVD disc Select HI RES format for the best image resolution Select N FLICKER format to suppress picture noise ANGLE MARK Display Setup If it is set to ON when a multi angle DVD disc is playing the angle mark will appear on the screen if set to OFF the mark will not appear SETUP GENERAL OSD LANG O...

Page 20: ...e audio output from DOLBY AC3 5 1 DOWNMIX to 2 channel mode Select the preferred SPEAKER connection by using the cursor buttons Select LT RT to activate the Dolby surround compatible output Select STEREO to activate the normal stereo mode Audio Setup SETUP AUDIO SPDIF SPDIF Setup Turns the SPDIF optical output ON OFF SETUP AUDIO OP MODE OP Mode There is only one operating mode for the Dolby Digita...

Page 21: ...O Reproduces CH2 channel in both Left Right output MIX MONO Reproduces CH1 CH2 in both Left Right output SETUP AUDIO DRC DRC Dynamic Range Control Select DRC to adjust the dynamic range of a Dolby Digital encoded program There are 8 steps between full compression and no compression OFF SETUP AUDIO LPCM OUTPUT LPCM Output Sets the LPCM output sample rate Preferences Setup SETUP PREFERENCES AUDIO Au...

Page 22: ...Menu Language Setup Select the preferred DISC MENU language by using the cursor buttons SETUP PREFERENCES LOCALE Locale Select the preferred city by using the cursor buttons The player will depend on this setting to choose a related film grade SETUP PREFERENCES PARENTAL Parental Select suitable parental guidance by using the cursor buttons and confirm by pressing the ENTER button ...

Page 23: ...to use and retype again to confirm the new password SETUP PREFERENCES SMART NAV Smart NAV Sets the playing style of MP3 discs The factory settings are as following GENERAL SETUP SPEAKER SETUP AUDIO SETUP PREFERENCES TV DISPLAY TV TYPE PIC MODE ANGLE MARK OSD LANGUAGE CAPTIONS DOWNMIX SPDIF OP MODE DUAL MONO DRC LPCM OUT AUDIO SUBTITLE DISC MENU LOCALE PARENTAL PASSWORD SMART NAV WIDE PAL AUTO ON E...

Page 24: ...JIS 3 Wow and Flutter Below measurable limits Note The technical data and the design of the equipment are liable to be changed for the sake of technical improvements without prior notice Supplied Accessories VS738 Digital Media Player DCP case IR remote control 2 AAA alkaline batteries Trim bazel escutcheon DIN mounting frame and release levers 4 M4 6 truss head machine screws 4 M5 5 truss head ma...

Reviews: