background image

11

English

UDB275MP

Adjusting the volume

Turning the [

ROTARY

] knob clockwise increases 

the volume; turning it counterclockwise decreas-

es the volume.
"

VOLUME:XX

" will be shown in the display while 

VXX

”  will  be  displayed  in  the  message  knob 

indication where“

XX

” is the volume level from 0 

(minimum) to 33 (maximum).

∗ 

The factory default setting for volume is "

17

".

  Radio/CD (CD-DA)/AUX Mode:

Main display     Clock display     Main display

Note:

 Be sure to read this chapter referring to the front diagrams of 

chapter “

2. CONTROLS

” on page 3 (unfold).

7. OPERATIONS

 CAUTION 

!

Basic Operations

Be  sure  to  lower  the  volume  before  switch-

ing off the unit power or the ignition key. The 

unit  remembers  its  last  volume  setting.  If 

you switch the power off with the volume up, 

when you switch the power back on, the sud-

den loud volume may hurt your hearing and 

damage the unit. 

Turning on/off the power

Note:

  Be  careful  about  using  this  unit  for  a  long  time 

without running the engine. If you drain the car’s 

battery too much, you may not be able to start the 

engine and this can reduce the service life of the 

battery.

1.  Press the [

SRC

] button.

2.  The illumination of the display on the unit light 

up. The unit automatically remembers its last 

Operation mode and will automatically switch 

to display that mode.

3.  Press and hold the [

SRC

] button for 1 second 

or longer to turn off the power for the unit.

Selecting a mode

1.  Press the [

SRC

] button to change the Opera-

tion mode.

2.  Each time you press the [

SRC

] button, the Op-

eration mode changes in the following order: 


Radio mode      CD mode      (USB mode)                    

     AUX mode      Radio mode...

  Once selected, the preferred display becomes the 

display default. When a function adjustment such 

as volume is made, the screen will momentarily 

switch to that function’s display, then revert back 

to the preferred display several seconds after the 

adjustment.

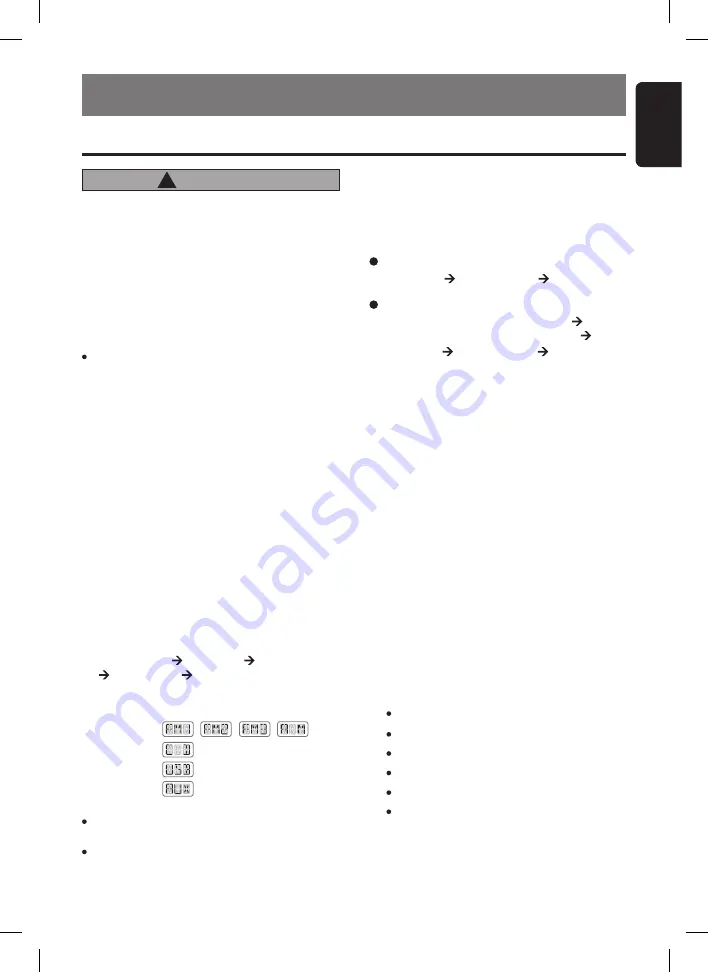
The 3-digit message knob indication will display 

the correspondence mode as the following:

Radio mode :
CD mode   :
USB mode   :
AUX mode   :

Notes:


If the CD mode is selected when no disc is inserted, 

the display shows “

NO DISC

”.


If no USB drive is inserted, USB mode will not be 

displayed.

Switching the display

1.  Press the [

DISP

] button to select the desired 

display.

2.  Each time you press the [

DISP

] button, the 

display switches in the following order:

  MP3/WMA (Disc and USB) Mode:

Main-1 display

 (Track No., play time)


Main-2 Display 

(Folder No., Track No.)


Title Display     Clock Display     

Main-1 Display...

Displaying additional buttons

1.  Push  the  [

PUSH  OPEN

] cover to open the 

flip down cover that consists of the following 

buttons:

      [

DIRECT

      [

BAND

      [

A-M

      [

Z-EHCR

      [

ADJ

        [

ISR

]

,

,

,

Summary of Contents for UDB275MP

Page 1: ...on Co Ltd Be sure to unfold and read the next page Veuillez déployer et vous référer à la page suivante Cerciórese de desplegar y de leer la página siguiente 1 FEATURES Contents CLARION PRODUCT REGISTRATION INFORMATION For USA and Canada only Dear Customer Congratulations on your purchase of a Clarion mobile electronic products We are confident that you ll enjoy your Clarion experience There are ma...

Page 2: ...on Co Ltd Be sure to unfold and read the next page Veuillez déployer et vous référer à la page suivante Cerciórese de desplegar y de leer la página siguiente 1 FEATURES Contents CLARION PRODUCT REGISTRATION INFORMATION For USA and Canada only Dear Customer Congratulations on your purchase of a Clarion mobile electronic products We are confident that you ll enjoy your Clarion experience There are ma...

Page 3: ...y Track No Play time button Perform preset scan while in the Radio mode Press and hold the button for 2 seconds or longer to perform auto store Play or pause a track while in the CD USB mode SENSOR Receiver for remote controller Operating range 30 in all directions USB PORT USB memory device insertion port AUX input Auxiliary jack insertion PUSH OPEN cover Push to open the flip down cover SCN butto...

Page 4: ...y Track No Play time button Perform preset scan while in the Radio mode Press and hold the button for 2 seconds or longer to perform auto store Play or pause a track while in the CD USB mode SENSOR Receiver for remote controller Operating range 30 in all directions USB PORT USB memory device insertion port AUX input Auxiliary jack insertion PUSH OPEN cover Push to open the flip down cover SCN butto...

Page 5: ...er Press and hold for 1 second or longer to turn on or off the M B EX mode Z EHCR button Press the button to select one of the 3 types of sound characteristics already stored in memory ADJ button Press the button to switch to the ADJ mode ISR button Recall ISR radio station in memory Press and hold for 2 seconds or longer Store current station into ISR memory Radio mode only DIRECT buttons Store a...

Page 6: ...6 English UDB275MP Display Items In extreme cold the screen movement may slow down and the screen may darken but this is normal The screen will recover when it returns to normal temperature LCD Screen ...

Page 7: ...US RADIATION EXPOSURE THECOMPACTDISCPLAYERSHOULDNOT BE ADJUSTED OR REPAIRED BY ANYONE EXCEPT PROPERLY QUALIFIED SERVICE PERSONNEL CHANGES OR MODIFICATIONS TO THIS PRODUCT NOTAPPROVED BY THE MANU FACTURER WILL VOID THE WARRANTY AND WILL VIOLATE FCC APPROVAL INFORMATION FOR USERS This equipment has been tested and found to comply with the limits for a Class B digital device pursuant to Part 15 of th...

Page 8: ...s handle the compact disc by the edges Never touch the surface To remove fingermarks and dust use a soft cloth and wipe in a straight line from the center of the compact disc to the circumference New discs may have some roughness around the edges The unit may not work or the sound may skip if such discs are used Use a ball point pen etc to remove roughness from the edge of the disc Do not use any s...

Page 9: ...he compart ment 4 Replace the cover and slide in until it clicks into place Notes Misuse may result in rupture of the battery produc ing leakage of fluid and resulting in personal injury or damage to surrounding materials Always follow these safety precautions Use only the designated battery When replacing the battery insert properly with polarities oriented correctly Do not subject battery to heat...

Page 10: ...n into ISR memory Radio mode only Switch among main display and clock display Preset scan Press and hold the button for 2 seconds or longer Auto store Scan play No function No function No function No function MUTE ISR DISP SCN RPT RDM Some of the corresponding buttons on the main unit and remote control unit have different functions Switch among main display title display and clock display Switch ...

Page 11: ...tically remembers its last Operation mode and will automatically switch to display that mode 3 Press and hold the SRC button for 1 second or longer to turn off the power for the unit Selecting a mode 1 Press the SRC button to change the Opera tion mode 2 Each time you press the SRC button the Op eration mode changes in the following order Radio mode CD mode USB mode AUX mode Radio mode Once select...

Page 12: ...over further after flipping down 2 Close the cover properly when not in use Note If you accidently push down the cover further after flipping down you can close the cover back and push 2 sides of the cover to return to normal condi tion Adjusting the bass 1 1 Press the A M button and select BASS 0 2 1 Turning the ROTARY knob clockwise em phasizes the bass turning it counterclock wise attenuates the ...

Page 13: ...he A M button for 1 second or longer to turn off the MAGNA BASS EX effect goes off from the display AUX function This system has an external jack input in the front panel where you can listen to sounds and music from external devices connected to this unit 1 Connect the external music player to the AUX input Display will automatically switch to AUX mode Alternatively user can press the SRC button ...

Page 14: ... manual tuning is now available 2 Tune into a station Quick tuning Press and hold the button for 1 second or longer to begin station tuning Step tuning Press the button to perform manual tuning Preset memory function Preset memory function can store up to 24 stations six stations for each of FM1 FM2 FM3 and AM Manual memory function 1 Press the BAND button to select a band you want to store in the...

Page 15: ...etrated into PC users and become a standard format This MP3 features the original audio data compres sion to about 12 percent of its initial size with a high quality sound This means that about 10 music CDs can be recorded on a CD R disc or CD RW disc to allow a long listening time without having to change CDs What is WMA WMA is the abbreviation of Windows Media Au dio an audio file format develope...

Page 16: ...ways CD DA files CD extra or mixed CD If there is no MP3 WMAfiles in CD extra mixed CD the unit may mute for a while and start to play from top CD DA files 1 Press the F UP button will move to the next folder and MP3 WMA files to be played 2 Press the F DN button will move to the previous folder if it is first folder and CD DA files to be played File extensions Always add a file extension MP3 or WMA to M...

Page 17: ...ficulties of loading ejecting the disc even if it is detected CAUTION Listening to a disc already loaded in the unit Press the SRC button to select the CD mode When the unit enters the CD mode play starts automatically If there is no disc loaded the indication NO DISC appears in the title display Radio CD USB AUX Radio Loading a CD Insert a CD into the center of the CD SLOT with the labeled side fa...

Page 18: ...he manufacturer of your USB memory device for information regarding whether it is supported by USB Mass Storage Class stan dards Please take note that iPod shuffle nano and harddisk drive HDD is not supported To prevent the accidental loss of data always back up important data to your computer This unit does not support connections to a computer In addition connections made through a USB hub device...

Page 19: ...mplete connections may cause the USB memory device not be recognized Depending on the number of tracks recorded some amount of time may be required until all tracks are read into the unit USB memory devices may have different shape depends on brands Some USB memory de vices may not be able to plug into the port due to the shape design Please use an extension cable instead Please reconnect the USB ...

Page 20: ... for less than 1 second The arrangement is shown below 3 The displayed item can be scrolled by pressing the TITLE button for more than 1 second 4 If a MP3 WMAfile encode with ID3 TAG header but not consist of any TAG information the following will be displayed respectively NO ALBUM NAME for Album Tag NO ARTIST NAME for Artist Tag NO SONG NAME for Title Tag Notes For MP3 supports ID3 Tags V2 4 2 3 2...

Page 21: ...rd Press and hold the button for 1 second or longer MP3 WMA playing order When selected for playing folder up down func tions files and folders are accessed in the order in which they were written by the CD ROM writer or USB memory device Because of this the or der in which they are expected to be played may not match the order in which they are actually played You may be able to set the order in w...

Page 22: ...s in current folder 1 Press the SCN button to perform scan play The indicator lights in the display Scan play starts from the next track after the track currently being played CD USB Common Operations Repeat play CD DA MP3 WMA This function allows you to play the current track repeatedly 1 Press the RPT button to perform repeat play The indicator lights in the display All repeat play MP3 WMA This ...

Page 23: ...ally OFF To scroll just 1 time when the title was changed or the TITLE button was pressed for 1 second or longer Turning the screen saver function on or off This unit is provided with the screen saver function which allows you to show various kinds of patterns in a random order in the operation status indication area of the display You can turn on and off this function If the button operation is p...

Page 24: ...ne is used ON You can listen to your telephone calls from the speakers connected to this unit MUTE The sound from this unit is muted during tele phone calls Notes When the TEL SW is set to ON or MUTE and telephone is connected system will automatically power ON Initially power OFF When telephone is disconnected system will return to power OFF This unit requires hands free kit that supports AUX inp...

Page 25: ... from 0 to 8 4 Press the button to store the color in memory and cancel setting mode Note Since R0 G0 B0 will not display anything thus all values are prevented from setting to 0 at the same time INDIGO BLUE SURF BLUE SILKY WHITE AQUA GREEN FRESH GREEN LEAF GREEN WARM AMBER PASSION RED VIVID PINK PALE PINK DARK VIOLET PURE PURPLE U COLOR1 U COLOR2 U COLOR3 COLOR R G B 0 0 8 0 0 3 8 8 8 8 3 6 8 8 8...

Page 26: ...excessive current required No sound output when operating the unit with amplifiers or power an tenna attached No sound heard The speaker protection circuit is operating Consult your store of purchase Replace with a fuse of the same amperage If the fuse blows again consult your store of purchase 1 Turn down sound volume Function can also be restored by turning the power off and on again Speaker volu...

Page 27: ...y Water droplets may form on the internal lens when the car is parked in a humid place File system is not cor rect Write MP3 WMA files onto the disc properly Use MP3 WMA files encoded properly Use ISO9660 level 1 2 or JOLIET or Romeo file system Clean the disc with a soft cloth Replace with a disc with no scratches Use MP3 WMA files encoded properly Let dry for about 1 hour with the power on Use ISO96...

Page 28: ...y device with the correct direction USB memory device con nector is in bad condi tion The USB memory device connector is damaged USB card reader cannot be detected USB card reader is con nected to main unit first before inserting memory card to the card reader Insert the memory card to USB card reader first before connecting to the main unit iPod shuffle nano or USB harddisk drive HDD cannot playback...

Page 29: ...eplace with audio contents loaded DISC ERROR 2 Error Display Cause Measure A DISC is caught inside the CD deck and is not ejected A DISC cannot be played due to scratches loaded upside down inside the CD deck etc No audio file is detected in the DISC CD MP3 WMA DISC ERROR 3 NO FILE 9 ERROR DISPLAYS 10 SPECIFICATIONS FM tuner Frequency Range 87 9 MHz to 107 9 MHz Usable Sensitivity 11 dBf 50 dB Quie...

Page 30: ... Power Supply Voltage 14 4 V DC 10 8 V to 15 6 V allowable nega tive ground Current Consumption Less than 15 A Speaker Impedance 4 Ω 4 Ω to 8 Ω allowable Weight 2 42 lb 1 7 kg Dimensions 178 mm Width X 100 mm Height X 156 mm Depth Specifications Audio Maximum Power Output 200 W 50 W X 4 ch Power Output 4 X 19 W DIN 45324 B 14 4 V Bass Control Action 100 Hz 14 dB Treble Control Action 10 kHz 14 dB L...

Page 31: ...on Co Ltd Be sure to unfold and read the next page Veuillez déployer et vous référer à la page suivante Cerciórese de desplegar y de leer la página siguiente 1 FEATURES Contents CLARION PRODUCT REGISTRATION INFORMATION For USA and Canada only Dear Customer Congratulations on your purchase of a Clarion mobile electronic products We are confident that you ll enjoy your Clarion experience There are ma...

Reviews: