background image

34 Clarion NX807 English 


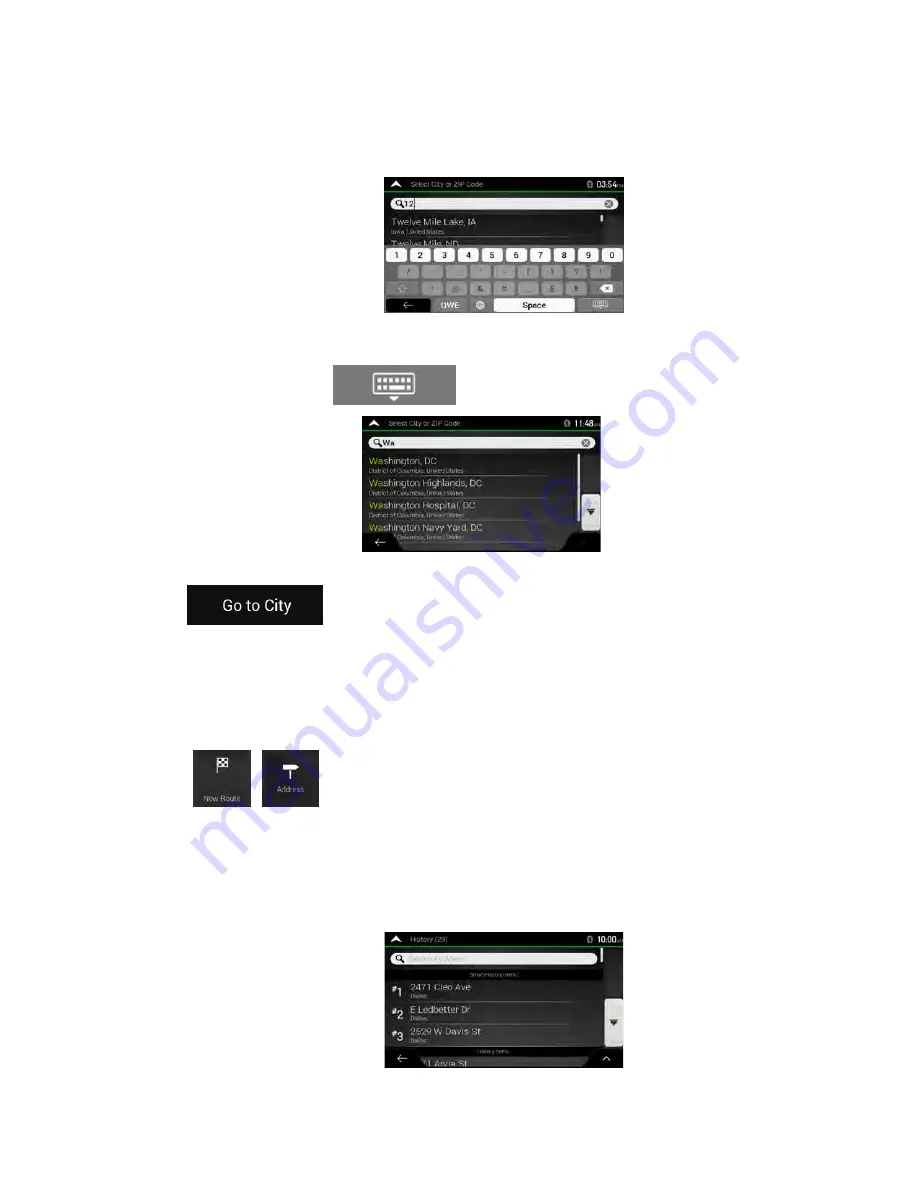
b.  (optional) On the Town of ZIP code screen, you can select a town from the list of 

suggestions.  


c.  Otherwise, start entering the first few letters of the town. The names that match the string 

appear in a list. 

d.  To open the list, tap 

 and select the town. 


3.   Tap 

. This way the center of the displayed town becomes the destination of 

the route.  

3.1.2.4 Selecting the midpoint of a street 

To navigate to the midpoint of a street without entering the house number, perform the following steps: 

1.  Go to 

 , 

 , and select the country and town as described earlier. The Select Street 

screen appears. 

2.  Enter the street name by performing the following steps: 

a.  Tap the Street name field. 

b.  (optional) On the Select Street screen, you can immediately select a street from the list of 

suggestions.  


Summary of Contents for NX807

Page 1: ...DVD MULTIMEDIA STATION WITH BUILT IN NAVIGATION 7 TOUCH PANEL CONTROL Owner s Manual NX807...

Page 2: ...m des informations important de produits Enregistrer www clarion com c est facile de mettre jour votre produit Clarion Querido Cliente Felicitaciones por su compra de producto electr nico m vil de Cla...

Page 3: ...Audio 23 Tag Display Function 23 Playback MP3 WMA AAC menu 24 9 USB AUDIO OPERATIONS 25 Notes on Using USB Memories 25 Select USB Audio Mode 25 Playing Audio Files in USB Memory 26 10 USB VIDEO OPERAT...

Page 4: ...lay 41 SmartFavorites 41 TuneStart 41 TuneMix 41 17 HDMI MODE 42 Wire Connection of HDMI Mode 42 Select HDMI Source 43 18 Apple CarPlay 43 To start Apple CarPlay 43 To go to Apple CarPlay screen 44 To...

Page 5: ...A 771 CCA 802 Sold separately Apple CarPlay Optical Digital Output Latest Map Guarantee iPod Expanding Visual Features Rear Monitor Rear Vision Camera Expanding Audio Features External Power External...

Page 6: ...UP CF SFHBSEFE BT B TVHHFTUJPO POMZ 5IFSF NBZ be times when the navigation system displays the vehicle s location incorrectly fails to suggest the shortest route or fails to direct you to your desired...

Page 7: ...rient or relocate the receiving antenna Increase the separation between the equipment and receiver Connect the equipment into an outlet on a circuit different from that to which the receiver is connec...

Page 8: ...to skip 3 This unit uses a precision mechanism Even in the event that trouble arises never open the case disassemble the unit or lubricate the rotating parts This device complies with Industry Canada...

Page 9: ...ntly wipe off the dirt For tough dirt apply some neutral detergent diluted in water to a soft cloth wipe off the dirt gently then wipe again with a dry cloth Do not use benzene thinner car cleaner etc...

Page 10: ...ion or damage t 5P SFNPWF B EJTD GSPN JUT TUPSBHF DBTF press down on the center of the case and lift the disc out holding it carefully by the edges t P OPU VTF DPNNFSDJBMMZ BWBJMBCMF EJTD protection s...

Page 11: ...ndards Apple is not responsible for the operation of this device or its compliance with safety and regulatory standards Please note that the use of this accessory with iPod or iPhone may affect wirele...

Page 12: ...utton s 0RESS THIS BUTTON TO HARDWARE RESET THE UNIT Note When the RESET button is pressed frequencies of radio stations titles etc stored in memory are cleared IR 3 3 2 s 2ECEIVER FOR THE REMOTE CONT...

Page 13: ...SURE THE TRAY IS INSERTED IN THE CORRECT DIRECTION s EEP THE BATTERY OUT OF THE REACH OF CHILDREN 3HOULD THE BATTERY BE SWALLOWED CONSULT A DOCTOR IMMEDIATELY s ATTERIES BATTERY PACK OR BATTERIES INST...

Page 14: ...ECT YOUR DESIRED SOURCE OR CHANGE YOUR SETTINGS ENT Button s 0RESS TO lX THE ENTERED DATA IN THE KEY PAD SCREEN OR SELECT THE ITEM THE CURSOR IS ON MENU Button s 0RESS THIS BUTTON TO ENTER THE MAIN ME...

Page 15: ...SET 5P OWN 4RACK 5P OWN 4UNE IX IN 3IRIUS8 MODE UTTONS s 0RESS TO MANUALLY SELECT THE NEXT LOWER OR HIGHER STATION IN 4UNER MODES s 0RESS TO PERFORM FAST BACKWARD OR FAST FORWARD SEARCHING 0RESS AGAIN...

Page 16: ...THE BUTTON TO DISPLAY THE 0ANDORA MODE 4 UDIO 4OUCH THE BUTTON TO DISPLAY THE LUETOOTH UDIO MODE 58 4OUCH THE BUTTON TO DISPLAY THE 58 MODE AMERA 4OUCH THE BUTTON TO DISPLAY THE AMERA MODE 3ETTING BUT...

Page 17: ...cks dust dirt dust dirt on player s lens etc t If a CD R or CD RW disc that has not been nalized is played it will take a long time to start playing Also it may not be possible to play depending on it...

Page 18: ...HE PARENTAL LEVEL ID 3AFE ID 3AFE G ENERAL UDIENCES PG 0ARENTAL UIDANCE 3UGGESTED 0 0ARENTS 3TRONGLY AUTIONED 0 2 0ARENTAL UIDANCE 2ESTRICTED 2 2ESTRICTED O NE ND 5NDER DMITTED Adult NLY DULT s 4HE CO...

Page 19: ...TTON DURING PLAYBACK HAPTERS ARE SKIPPED DOWN OR UP FROM CURRENT LOCATIONS AS MANY TIMES AS THE BUTTON IS TOUCHED AND THEN PLAYBACK STARTS Skip use seek bar 4OUCH THE SPHERICAL ON SEEK BAR AND DRAG IT...

Page 20: ...WITCH AMONG AUDIO LANGUAGES EPENDING ON THE DISC UP TO KINDS OF AUDIO LANGUAGES MAY BE RECORDED OR DETAILS SEE THE MARK OF THE DISC NDICATES THAT AUDIO LANGUAGES HAVE BEEN RECORDED 7HEN THE POWER IS T...

Page 21: ...ration 4HE FAST FORWARD AND FAST BACKWARD SPEED MAY DIFFER depending on the disc Repeat Playback 4HIS OPERATION PLAYS BACK VIDEO lLES RECORDED ON THE DISC REPEATEDLY 2EPEAT LL IS THE FACTORY DEFAULT R...

Page 22: ...DEO lLES STORED ON DISC AVI lLES s FORMAT 0 6ISUAL 3IMPLE s 0ICTURE SIZE X s UDIO FORMAT 0 s UDIO SAMPLING FREQUENCY Z MP lLES s FORMAT 0 6ISUAL 3IMPLE s 0ICTURE SIZE X s UDIO FORMAT s UDIO SAMPLING F...

Page 23: ...ON STARTS PLAYBACK FROM THE BEGINNING OF THE NEXT TRACK s 4OUCHING BUTTON STARTS PLAYBACK FROM THE BEGINNING OF THE CURRENT TRACK 7HEN THIS BUTTON IS TOUCHED AGAIN WITHIN SECONDS PLAYBACK STARTS FROM...

Page 24: ...S LWAYS ADD A lLE EXTENSION h 0 v OR h MP v TO AN 0 lLE AND h 7 v OR h WMAv TO A 7 AND h M Av TO A lLE BY USING SINGLE BYTE LETTERS F YOU ADD A lLE EXTENSION OTHER THAN SPECIlED OR FORGET TO ADD THESE...

Page 25: ...ER 2EPEAT LL AND 2EPEAT 4RACK 2EPEAT OLDER AND 2EPEAT LL URRENT FOLDER LIST s 3HOWING TITLE OF CURRENT FOLDER s 4HE NUMBER ON THE FOLDER SYMBOL IS THE NUMBER OF lLES AND FOLDERS IN THE CURRENT FOLDER...

Page 26: ...E FOLDER STRUCTURE s 4HE FOLDER HIERARCHY MUST BE WITHIN HIERARCHICAL LEVELS THERWISE PLAYBACK MAY BE IMPOSSIBLE s 4HE MAXIMUM ALLOWABLE NUMBER OF FOLDERS IS INCLUDING ROOT DIRECTORY AND FOLDERS WITH...

Page 27: ...N CURRENT LIST Album Art work F 0 AUDIO lLE CONTAINS ALBUM ART IMAGE IN THE PICTURE WILL BE DISPLAYED IN THIS AREA ID3 Information Area 4HIS AREA DISPLAY INFORMATION OF PLAYING lLE Skip Using Seek Bar...

Page 28: ...THE 53 6IDEO MODE 4HE SYSTEM CHANGES TO THE 53 6IDEO MODE AND STARTS PLAYBACK FROM THE PREVIOUS POSITION OR FROM THE BEGINNING Note 4HIS SYSTEM HAS TWO 53 CONNECTORS AND CAN CONNECT TWO 53 DEVICE 9OU...

Page 29: ...TTON TO RESUME PLAYBACK 4HE SCREEN WILL GO TO VIDEO SCREEN AUTOMATICALLY Switch to Previous Next le 4OUCH the or BUTTON DURING PLAYBACK TO PLAY PREVIOUS NEXT lLE s 4OUCH the BUTTON TO START PLAYBACK F...

Page 30: ...Note 4HIS SYSTEM HAS TWO 53 CONNECTORS PLEASE CONNECT TO THE 53 WITH THE LABEL OF hI0OD I0HONEv Y CONNECTING ANOTHER 53 CABLE I0OD I0HONE CAN T PLAY back the music 7HEN AN I 3 DEVICE IS CONNECTED VIA...

Page 31: ...GAIN TO TURN OFF THE FEATURE Album Art work F CURRENT AUDIO lLE CONTAINS ALBUM ART IMAGE IN THE PICTURE WILL BE DISPLAYED IN THIS AREA ID3 Information Area 4HIS AREA DISPLAYS INFORMATION OF THE PLAYIN...

Page 32: ...LAYBACK FROM THE BEGINNING OF THE NEXT TRACK Note s 3OME TRACK ARE NOT ABLE TO BE SKIPPED s F SKIP LIMIT HAS BEEN REACHED 3KIP TRACKS IN THIS FUNCTION WILL NOT AVAILABLE s 4RACK RATING 4OUCH THE OR BU...

Page 33: ...SLY CONNECTED DEVICE NDROID OR I 3 7HEN BOTH NDROID 4 I0HONE 4 OR 53 ARE CONNECTED AT THE SAME TIME AND THE h O NOT SHOW AGAINv SETTING IS NOT CHECKED A POPUP WILL DISPLAY TO SELECT THE DEVICE 3 When...

Page 34: ...READY ESTABLISHED YOU MAY SELECT THE USIC FUNCTION 0RESS THE 5 BUTTON ON THE PERATIONAL 0ANEL TO RETURN TO THE AIN ENU s 7HEN A CONNECTION WITH A LUETOOTH AUDIO PLAYER HAS BEEN ESTABLISHED THE ICON IS...

Page 35: ...EVICE 4OUCH THE DESIRED DEVICE BUTTON YOU WISH TO USE 4OUCH THE BUTTON TO SELECT IT AS YOUR ACTIVE DEVICE 4HE CORRESPONDING PHONE IS SET AS THE CURRENT TELEPHONE 4OUCH THE BUTTON TO RETURN TO THE PREV...

Page 36: ...ARE DISPLAYED AT THE TOP OF THE SCREEN Bluetooth Telephone Settings 9OU CAN CONlRM VARIOUS SETTINGS REGARDING ABOUT THE LUETOOTH INTERFACE FEATURES 4OUCH THE BUTTON TO DISPLAY THE INFORMATION ON THE S...

Page 37: ...NS TO THE 4ELEPHONE SCREEN s 4O DELETE THE PHONE REGISTRATION 4OUCH THE BUTTON TO DELETE THE DEVICE CONlRMATION SCREEN IS DISPLAYED 4OUCH THE BUTTON TO CONlRM DELETE Select the Phone 4O CHANGE THE CUR...

Page 38: ...UNCTION THE 0HONE OOK DATA MUST be sent from the phone s NLY THE 0HONE OOK ITEMS WITH AT LEAST ONE TELEPHONE NUMBER REGISTERED IN THE CAPTURED 0HONE OOK DATA ARE DISPLAYED ON THE 0HONE OOK SCREEN 4OUC...

Page 39: ...R PRESET TUNING 4OUCH AND HOLD THE DESIRED 0RESET BUTTON YOU WANT TO STORE FOR ABOUT SECONDS Auto Store 4HE UTO 3TORE IS A FUNCTION FOR STORING UP TO STATIONS THAT ARE AUTOMATICALLY SEARCHED SEQUENTIA...

Page 40: ...ns please contact s 6ISIT WWW SIRIUSXM CA ACTIVATEXM s ALL 8 CUSTOMER ARE AT As part of the activation process the SiriusXM satellites will send an activation message to your tuner When your radio det...

Page 41: ...et touch and hold a preset button for more than 2 seconds to save the channel to that preset button Tuning to Channels from the Category List Satellite Radio allows you to select broadcast channel cat...

Page 42: ...r later tuner models 2 SXM1 band only is assigned as Smart Favorites for SXV200 and SXM1 SXM2 SXM3 bands for SXV300 or later TuneStart With the TuneStart feature turned ON you will hear the beginning...

Page 43: ...0HONE I0HONE 0LUS I0HONE S I0HOE S 0LUS I0HONE 3 I0HONE AND I0HONE 0LUS CAN BE CONNECTED BY USING THE CONNECTOR CABLE SUPPLIED WITH THE RESPECTIVE DEVICE AND CABLE SOLD IN THE MARKET AND DIGITAL 6 ADA...

Page 44: ...epending on the application and model of the mobile phone a black frame may appear around the screen 18 Apple CarPlay PPLE AR0LAY IS IMMEDIATELY STARTED WHEN YOU CONNECT I0HONE TO I0OD I0HONE 53 CABLE...

Page 45: ...nd start playback music The indicator displays as follows To go to Apple CarPlay screen by Main menu and Shortcut menu 1 When you press and hold MAP button for 2 seconds CarPlay maps screen is display...

Page 46: ...MENU button Main menu screen is displayed 2 Press MAP button original navigation screen is displayed 3 Press AV button original screen is displayed if original audio source is active The indicator di...

Page 47: ...ILL DISPLAY THE EXTERNAL CAMERA VIDEO 4HE SCREEN WILL DISPLAY h O 6IDEO 3IGNALv MESSAGE IF A VALID CAMERA IS NOT CONNECT TO THIS DEVICE 0RESS 5 BUTTON ON PERATIONAL 0ANEL TO RETURN TO THE AIN ENU Sett...

Page 48: ...button to close the Rear Source Note F THE SOURCE IS SELECTED AS THE FRONT THE SOURCE IN REAR CAN T BE SELECTED F THE SOURCE IS SELECTED AS THE REAR THE SOURCE IN FRONT CAN T BE SELECTED 4OUCH THE RON...

Page 49: ...SPEAKER THUS DELIVERING AN UNCOMPROMISED HIGH lDELITY EXPERIENCE OR MORE INFORMATION VISIT OUR WEBSITE AT WWW CLARION COM 4HE FOLLOWING ARE COMPONENTS OF THE LARION ULL IGITAL 3OUND 3YSTEM ULL IGITAL...

Page 50: ...S RESTARTED 4 UTO NSWER F A CALL COMES IN ANSWER AUTOMATICALLY AFTER SECONDS AIN 9OU CAN ADJUST THE INPUT LEVEL OF THE MICROPHONE IN LEVELS 4OUCH THE LEVEL INDICATOR BUTTON OF THE ICROPHONE AIN ITEM T...

Page 51: ...LTER OR THROUGH 4HE FREQUENCIES INCLUDE Z Z AND Z AGNA ASS 8 HOOSE THE LOUDNESS N OR FF MP ANCEL 3ELECTING TURNS OFF THE INTERNAL AMPLIlER IN THE 8 Note PTIONAL CABLE SOLD SEPARATELY IS NECESSARY WHEN...

Page 52: ...R NOT 3ET THE NTI 4HEFT ODE F YOUR UNIT IS UNLOCKED HOLD THE BUTTON MORE THAN SECONDS THEN THE NTI 4HEFT SETTING MODE WILL DISPLAY 5SERS CAN CHANGE ANTI THEFT CODE 4OUCH 9 3 BUTTON THE NUMERICAL KEYPA...

Page 53: ...nit it may not work The battery of the remote control unit is dead or there is no battery in the remote control unit Check the battery of the remote control unit Cause Measure Disc cannot be loaded A...

Page 54: ...Sound skips or is noisy encoded properly properly The video image of iPod iPhone is disturbed The TV Signal setting of the iPod iPhone is not set correctly Set the TV Signal setting NTSC PAL of the i...

Page 55: ...LATION MANUAL FOR MORE INFORMATION ON ANTENNA INSTALLATION 2EPLACE THE ANTENNA IF THE CABLE IS DAMAGED 3IRIUS8 PRODUCTS ARE AVAILABLE AT YOUR LOCAL CAR AUDIO RETAILER OR ONLINE AT WWW SHOP SIRIUSXM CO...

Page 56: ...djust the Dimmer properly The operating condition is not good The temperature inside the vehicle may be 0 C or lower Set to an appropriate temperature 25 C or so and check it again The headlight of th...

Page 57: ...ause Measure BAD DISC A disc cannot be played due to scratches etc Replace with a non scratched non warped disc Invalid Disc A disc is loaded upside down inside the DVD deck and does not play Eject th...

Page 58: ...UDIO INPUT SENSITIVITY AT 6 OUTPUT IGH M6RMS ID M6RMS OW 6RMS Audio Video output 6IDEO OUTPUT VOLTAGE 6P P 3CREEN 3IZE v WIDE TYPE 0IXELS 2ESOLUTION X X 2 Bluetooth 3PECIlCATION LUETOOTH 6ER 0ROlLE 0...

Page 59: ...58 NX807 English Owner s Manual 8 DIMENSIONS 8 WEIGHT KG...

Page 60: ...GR 9 H UULKX 9URJ YKVGXGZKR_ RR OMOZGR 9 H UULKX 9URJ YKVGXGZKR_ RR OMOZGR 9VKGQKX 9URJ YKVGXGZKR_ RR OMOZGR 9VKGQKX 9URJ YKVGXGZKR_ RR OMOZGR 9U TJ 6XUIKYYUX OZN KKZKX 9URJ YKVGXGZKR_ Lightning cable...

Page 61: ...IW 9 DFFHVVRU 5HYHUVH JHDU FRUG 3DUNLQJ EUDNH FRUG 2 Pink 6SHHG SXOVH Note 1 Connecting the PHONE INTERRUPT terminal The phone interrupt will mute the audio if the lead receives a negative or ground s...

Page 62: ...Clarion Co Ltd All Rights Reserved Copyright 2017 Clarion Co Ltd 2016 10...

Page 63: ...allation Guia de iniclo rapldo y manual de lnstalaci6n NXB07 DVD MULTIMEDIA STATION WITH BUILT IN NAVIGATION 7 0 TOUCH PANEL CONTROL STATION MULTIMEDIA DVD AVEC NAVIGATION INTEGREE ET ECRAN TACTILE DE...

Page 64: ...roduit Clarion INFORMACION DEL REGISTRO DE PRODUCT 0 DE CLARION Querida Cliente Para USA y Canada nomas www clarion com Felicitaciones por su compra de producto electr6nico m6vil de Clarion Estamos se...

Page 65: ...o original screen 25 17 START USING Clarion MOBILE MAP 26 INSTALLATION 30 1 Before Starting 30 2 Package Contents 30 3 General Cautions 30 4 Cautions on Installation 30 iPod Audio ID3 Mode Screen 13 i...

Page 66: ...t route or fails to direct you to your desired destination In such instances rely on your own driving judgment taking into account the driving conditions at the time Do not use the navigation system t...

Page 67: ...must follow the specific operating instructions for satisfying RF exposure compliance This transmitter must not be co located or operating in conjunction with any other antenna or transmitter The por...

Page 68: ...its compliance with safety and regulatory standards Please note that the use of this accessory with iPod or iPhone may affect wireless performance iPhone iPod and Siri are trademarks of Apple lnc regi...

Page 69: ...econds to turn off the monitor Press anywhere on the touch screen to turn on the monitor again RESEll Button Press this button to hardware reset the unit Note When the RESET button is pressed frequenc...

Page 70: ...supplied to this unit Press MAP button on the panel to turn on the unit Press MENU button on the PANEL to show main source menu Change page by dragging left or right or touching other buttons Touch th...

Page 71: ...12 Pandora Touch the button to display the Pandora mode 13 BT Audio Touch the button to display the Bluetooth Audio mode 14 AUX Touch the button to display the AUX mode 15 Camera Touch the button to...

Page 72: ...button 4 Play Pause button 5 Next Chapter Fast Forward button 6 Elapsed playing time 7 Seek bar 8 Total time 9 Menu List button 10 System time 11 Bluetooth status indicator 12 DVD playback information...

Page 73: ...e Screen 10 NX807 1 Option button 2 Previous Track Fast Backward button 3 Play Pause button 4 Next Track Fast Forward button 5 Elapsed playing time Seek bar 6 List Mode button 7 System time 8 Bluetoot...

Page 74: ...2 Current Folder Showing title of current folder The number on the folder symbol is the number of files and folders number in current folder Touch the title of current folder play list will show files...

Page 75: ...ERATIONS This system can play USB video files MP4 3GP etc stored in an USB memory which is recognized as USB Mass Storage Class device You can use your USB memory as an audio device by simply copying...

Page 76: ...2 Repeat button 3 Shuffle button 4 Previous Track Fast Backward button 5 Play Pause button 6 Next Track Fast Forward button 7 103 information 8 Next Page I Previous PageS button 9 Category list 10 Sys...

Page 77: ...ain 6 Next track button 7 Thumbs up 8 System time 14 NX807 9 List button Touch this button to show list screen 10 Current station name 11 Current title Touch icon to store current title to track favor...

Page 78: ...r may operate improperly with some 81uetooth audio players For detailed information on the playable 81uetooth audio players see our home page www clarion com Selecting the Bluetooth Audio Mode 1 Touch...

Page 79: ...o display the Device Select screen 3 Touch the 1111 button to display the Inquiring Device screen 16 NX807 And select a type of this device When the pairing operation completes the registered Bluetoot...

Page 80: ...n to return to the previous screen Controlling the Bluetooth Audio Player Note Occasionally depending on the environment playback sounds may be fragmented or switch noises may be generated Playing Mus...

Page 81: ...the main menu When no Bluetooth Telephone connected the icon 1111 is displayed at the top of the screen When the connection with a Bluetooth Telephone has been established the icon IIIJ and signal le...

Page 82: ...ut level of the microphone can be affected by its surroundings Adjust the level if the person on the other end of the telephone has a reception problem Registering Your Cellular Phone Pairing You can...

Page 83: ...ent cellular phone to the other device which is already registered perform the following operation 1 Touch the 1111 button to display the Device Select screen 2 Touch the currently connected device th...

Page 84: ...stored automatically to the preset list Notes 1 After auto store the previous stored stations will be overwritten 2 The unit has 4 bands but FM3 andAM can store by AS function Preset Scan The Preset...

Page 85: ...ou can activate online or by calling SiriusXM Listener care Visit www siriusxm comlactivatenow Call SiriusXM Listener Care at 1 866 635 2349 For Canadian Subscriptions please contact Visit www siriusx...

Page 86: ...e 5c iPhone 6 1Phone 6 Plus iPhone 6s iPhone 6s Plus 1Phone SE 1Phone 7 and IPhone 7 Plus oCJ Llghtn1ng cable Lightn1ng Dig1tal AV adapter supplied with iPhone made by Apple Inc 2 Connection with the...

Page 87: ...CarPiay screen is displayed 2 When you touch TEL icon CarPiay telephony screen is displayed 3 When you touch iPod Audio icon CarPiay now playing screen is displayed and start playback music The indica...

Page 88: ...n to original screen 1 Press MENU button Main menu screen is displayed 2 Press MAP button original navigation screen is displayed 3 Press AV button original screen is displayed if original audio sourc...

Page 89: ...on the country and state of the last known position 4 If needed select a new city 5 Enter the street name 6 Enter the house number 7 A full screen map appears with the selected point in the middle 8 T...

Page 90: ...and check route parameters and route alternatives 8 Delete your route Setting menu You can configure the navigation settings and modify the behavior of NX807 by tapping 1 1 and liJ II A ct nn 0 04 26...

Page 91: ...ult in injury or material damage Installation Precautions WARNING s 7HEN INSTALLING THE UNIT TO A VEHICLE WITH AN AIRBAG SYSTEM NEVER INSTALL it in a place where it may affect the operation of the air...

Page 92: ...grommets If the coatings of the cables are worn out by RUBBING THIS MAY CAUSE AN ACCIDENT lRE OR A SHORT CIRCUIT s FTER WIRING CABLES lX THEM WITH INSULATION TAPE s E SURE TO SWITCH OFF THE VEHICLE W...

Page 93: ...tap 2 Flush mount bolts 8 Hexagon Head Screw 8 12 pin AV cable 1 20 pin AV cable 1 Lead clamp 1 Trim ring 1 3 General Cautions 1 Do not open the case There are no user serviceable parts inside If you...

Page 94: ...es use the parts attached to the vehicle and follow the instructions in Figure 6 2 Wire as shown in Section 7 3 Reassemble and secure the unit in the dashboard and set the face panel and center panel...

Page 95: ...crews M5x8 Mounting bracket 1 pair for the left and right sides Center Panel 1 2 1 Some panel openings are too small for the unit depending on the vehicle type and model In such a case trim the upper...

Page 96: ...s may reduce the performance of the GPS antenna s Install THE 03 antenna at least 10 cm away from the windshield s 7IPE OFF the dirt of the mounting surface before installing the GPS antenna GPS anten...

Page 97: ...of the arrow Parking brake signal cord Connecting the parking brake cord Connect the cord to parking brake lamp ground in the meter panel Note s ONNECTING THE PARKING BRAKE CORD TO LAMP GROUND ALLOWS...

Page 98: ...Clarion Co Ltd All Rights Reserved Copyright 2017 Clarion Co Ltd 2016 10 NX807 7 8288 2017 00 01...

Page 99: ...NX807 English Owner s manual...

Page 100: ...you read this manual to fully understand the screens and features Easy map updates It is easy to keep the navigation system up to date Simply download new map data from Clarion s portal site store th...

Page 101: ...ts 19 2 3 7 Junction view 19 2 3 8 Tunnel view 20 2 3 9 Freeway services 20 2 3 10 3D object types 21 2 4 Navigation menu 21 3 Using the navigation 24 3 1 Selecting a destination 24 3 1 1 Using combin...

Page 102: ...native for an existing route 59 3 3 8 Pausing guidance 60 3 4 Saving a location 60 3 4 1 Editing a saved location 61 3 5 Adding an Alert Point 62 3 6 Running a Simulation 63 3 7 Off road navigation 64...

Page 103: ...s 78 4 3 4 Navigation View settings 79 4 3 5 Regional settings 82 4 3 6 Display settings 82 4 3 7 Trip Monitor settings 83 4 3 8 Usage Reports settings 83 5 Troubleshooting 84 5 1 GPS signal cannot be...

Page 104: ...cessed anonymously no one is able to track any personal information If you change your mind later you can enable or disable the log collection in Settings page 83 It is important to look at the displa...

Page 105: ...ap to confirm your selection Later you can change it in Regional settings page 82 2 Read the end user license agreement and tap if you agree with the terms of use 3 You are now asked whether you allow...

Page 106: ...e 77 Tap to continue 6 If needed modify the time format and unit settings Later you can change them in Regional settings page 82 Tap to continue 7 If needed modify the default route planning options L...

Page 107: ...confirmation as soon as you use the controls 2 2 2 Using the cursor You can select a map location in the following ways By tapping the map when navigating By tapping the map when you are asked to con...

Page 108: ...ple between a first name and a family name or in multi word street names Tap the button at the bottom center of the screen Entering upper and lower case letters By default when entering a text the fir...

Page 109: ...e tilt or scale the map continuously Tap and hold the following button on keyboard screens to quickly delete several characters Tap and hold the following buttons in long lists to scroll pages continu...

Page 110: ...much of the map is displayed on the screen NX807 uses maps that let you examine the locations at various zoom levels always with optimized content It always displays street names and other text with...

Page 111: ...ap faces North Checking the compass The direction of the compass shows North Returning to normal navigation Move the map back to follow the current GPS position Automatic map rotation is also re enabl...

Page 112: ...plays the following screen buttons data fields and route information on the map during navigation Note Some buttons fields or icons may not be available in your product version Number Name Description...

Page 113: ...tion By tapping it you can check the trip summary find Places around your final destination save the current location or suspend the navigation 11 Lane information On multi lane roads it shows the lan...

Page 114: ...mall street 2 3 2 GPS position markers When your GPS position is available NX807 marks your current position By default this marker is a red arrow The dot near the arrow shows the GPS position as perc...

Page 115: ...nt Waypoint intermediate destination It is an intermediate destination of the route before reaching the final destination Destination end point It is the final destination of the route Route color The...

Page 116: ...is displayed in the top left corner Most of the maneuver icons are intuitive The following table lists some of the frequently shown route events Icon Function Turn left Turn right Turn back Bear righ...

Page 117: ...ides They show the available destinations and the road numbers All signposts look similar when cruising when there is no planned route During navigation only the signpost that points to the lane s to...

Page 118: ...leaving the tunnel the original map view returns Tunnel view can be turned off in See page 79 2 3 9 Freeway services When you are driving on a freeway the button appears at the top right corner of th...

Page 119: ...ts 3D buildings 3D buildings are block representations of full town building data containing actual building sizes and positions on the map 2 4 Navigation menu On the Navigation view tap to open the N...

Page 120: ...te alternatives Tap to access additional options like Simulation or Route Preferences Delete your route Delete the next waypoint or the whole route In the navigation menu you have the following additi...

Page 121: ...he More button appears on the screen to display additional features Tap it to open the list of additional features on certain screens Tap it to return to the map from any menu screen Tap the Back butt...

Page 122: ...estination You can choose your destination by selecting one of the following options Using combined search to search among different destination types at once see page 24 Entering a full address or a...

Page 123: ...the input field with the search area and start entering the name of the new search area on the keyboard You only need to enter a few letters to get a result The most likely result appears below the i...

Page 124: ...sition Tap to see the list of matching Places ordered by their distance from your current location optional If your product contains Places from different data providers you can further narrow the lis...

Page 125: ...ives Tap to modify the route parameters or tap to start your journey 3 1 2 Selecting an address If you know at least a part of the address this is the quickest way to select your destination Using the...

Page 126: ...u can immediately select a country from the list below the input field or tap the button and start entering the first few letters of the country on the keyboard If you select a country without a state...

Page 127: ...a street from the list of suggestions c Otherwise start entering the street name on the keyboard the names that match the string appear in a list d Tap to open the list of results Select the street f...

Page 128: ...oad types and change them if necessary Tap to enable or avoid freeways tap for roads with Period Charge or Per use Toll tap for ferries or tap for carpool lanes 9 Tap to confirm the destination You ca...

Page 129: ...here you are If needed change the country Tap a In the Select Country screen you can immediately select a country from the list below the input field or tap the button and start entering the first few...

Page 130: ...t of results Select the street from the list 6 Enter the house number by performing the following steps a Tap the House number or crossing street field b Enter the house number on the keyboard To ente...

Page 131: ...route information and route alternatives Tap to modify the route parameters or tap to start your journey 3 1 2 3 Selecting a town center The town center is not the geometric center of the town but an...

Page 132: ...nter of the displayed town becomes the destination of the route 3 1 2 4 Selecting the midpoint of a street To navigate to the midpoint of a street without entering the house number perform the followi...

Page 133: ...as the destination 3 1 2 5 Selecting an intersection in a town To navigate to an intersection perform the following steps 1 Go to and select the country and city as described earlier 2 Enter the stree...

Page 134: ...6 Using the ZIP code to select a destination You can also select any kind of destination by entering the ZIP code instead of the city name To select the ZIP code perform the following steps 1 Go to an...

Page 135: ...ons Finding frequently searched types of Places with the Quick search categories see page 37 Searching for a Place by its name see page 41 Searching for a Place by its category see page 39 In case of...

Page 136: ...et an instant list of Places 4 The Places in the list can be ordered by their distance from the current or last known position from the destination or by the length of the necessary detour If you need...

Page 137: ...ormation and route alternatives Tap to modify the route parameters or tap to start your journey 3 1 3 2 Searching by category To search for Places by their categories and subcategories perform the fol...

Page 138: ...nation of the planned route The result list is ordered by the distance from the destination Tap to search for a place within a selected town The result list is ordered by the distance from the center...

Page 139: ...To search for a Place by name browse the various Place categories or use the mixture of the two search types perform the following steps 1 Tap on the Navigation view to access the Navigation menu 2 Ta...

Page 140: ...The result list is ordered by the length of the necessary detour 5 optional If you have selected select the town to search in You can search for the name of a Place in all categories by performing th...

Page 141: ...ccess the Navigation menu 2 Tap and Places in the following pre set search categories can be searched for around the current position or around the last known position if the current position is not a...

Page 142: ...he Navigation menu 2 Tap and 3 The list of saved locations is displayed It contains two pre set categories Home and Work 4 Tap the location that you want to set as your destination If necessary browse...

Page 143: ...ire route where you can check route information and route alternatives Tap to modify the route parameters or tap to start your journey 3 1 5 Selecting a History item The destinations that you have use...

Page 144: ...the time they were last selected If necessary scroll the list to see earlier destinations 4 Select a destination from the list 5 A full screen map appears with the selected point in the middle If nece...

Page 145: ...journey 3 1 6 Selecting a saved route The routes that you have saved earlier appear in a list To select a previous route perform the following steps 1 Tap on the Navigation view to access the Navigat...

Page 146: ...rameters or tap to start your journey 3 1 7 Entering coordinates To select a destination by entering its coordinates perform the following steps 1 Tap on the Navigation view to access the Navigation m...

Page 147: ...ings for road types and change them if necessary Tap to enable or avoid freeways tap for roads with Period Charge or Per use Toll tap for ferries or tap for carpool lanes 6 Tap to confirm the destinat...

Page 148: ...The cursor appears there 3 optional If needed tap to list the Places near the selected point or to save this location Tip If you already have a planned route tap and to add the selected location to y...

Page 149: ...nly one line in the list of route points the starting point of the route which is normally the current GPS position 4 Tap to select the destination 5 The New Route to screen appears where you can sele...

Page 150: ...ints tap and the planned route is automatically calculated 3 2 Checking Route Information and Alternatives To get a map overview of the planned route and check different parameters of the planned rout...

Page 151: ...es or display the itinerary 3 3 Editing the route When navigation has already started there are several ways to modify the planned route You have the following options Setting a new starting point see...

Page 152: ...ent GPS position 1 Tap on the Navigation view to access the Navigation menu 2 In the Navigation menu tap 3 The first line from the bottom is the start of the route normally the current GPS position Ta...

Page 153: ...nd you select a new destination as described in the above sections the route to the previous destination is deleted and a new route is calculated To add a new intermediate destination to the planned r...

Page 154: ...ns or optimize the waypoints or the route Tap the name of the intermediate destination to move it up or down in the list to save the location or to delete it from the list If you have a route with at...

Page 155: ...e the following two options to delete the navigated route If you already have a planned route and you select a new destination as described in the above sections the route to the previous destination...

Page 156: ...n as explained earlier and go to the route confirmation screen 2 Tap 3 You can see the basic details of route alternatives Tap any of them to see it on the map 4 To view more suggestions tap and scrol...

Page 157: ...d 3 You can see the basic details of a few route alternatives Tap any of them to see it on the map If there are suitable alternatives calculated with the route planning method that is selected in Rout...

Page 158: ...esume guidance 3 4 Saving a location To add any location to the saved locations the list of frequently used destinations perform the following steps 1 Select a destination as described before It can b...

Page 159: ...page 44 3 4 1 Editing a saved location To edit a location that you have already added as a Saved Location perform the following steps 1 On the Navigation view tap and 2 The list of Saved locations is...

Page 160: ...safety cameras is disabled when you are in a country where road safety camera warning is prohibited However you must make sure that using this feature is legal in the country where you intend to use...

Page 161: ...ation menu tap 3 Tap 4 Tap The simulation starts from the starting point of the route and leads you through the whole planned route using a realistic speed optional You have the following controls dur...

Page 162: ...On the Navigation view tap and 2 Tap and select Most of the procedures described for on road navigation also apply to off road navigation However there are some that are not available in this navigati...

Page 163: ...rest road There is no turn by turn navigation just a recommended direction You can see an orange line drawn between your current position and the next destination to reach The Turn Preview field in th...

Page 164: ...al voices are the traditional type of voice instructions Every phrase that occurs in voice guidance messages is recorded in a studio with a real person The advantage of pre recorded voice is that it s...

Page 165: ...ach the destination The route contains one starting point and one or more destinations The starting point is the current or last known position by default If you need to see a future route the startin...

Page 166: ...the time 4 1 7 Intelligent navigation With the help of intelligent navigation the planned route can adapt to traffic and other changes during navigation The following sections describe these features...

Page 167: ...ing or you can check the suggested route by tapping You can accept the recommended detour by tapping 4 1 7 3 Parking around destination If you leave the planned route by exiting a freeway NX807 tries...

Page 168: ...ovides various additional functions It can be found in the Navigation menu You need an Internet connection via your cell phone to access online services like parking and weather information Button Des...

Page 169: ...You can access it the following two ways By going to the Navigation menu and tapping and By tapping the current street name if it is displayed below the current position marker on the map The followin...

Page 170: ...wing options Button Function By selecting a recorded trip you can delete rename or change the color of the recorded route You can export all logs into the sdmmc folder You can access the Trip Monitor...

Page 171: ...igation view or adjust how the software helps you navigate with different kinds of route related information on the Navigation view Change the voice guidance language set the time zone the measurement...

Page 172: ...changing the planning method See page 75 Select on road or off road navigation See page 64 Select your preferred road types for the route See page 76 4 3 1 1 Vehicle profile You can select the follow...

Page 173: ...rom the following route planning method types Button Description Gives a quick route if you can travel at or near the speed limit on all roads Usually the best selection for fast and normal cars Resul...

Page 174: ...Charge roads are pay roads where you can purchase a pass or vignette to use the road for a longer period of time They can be enabled or disabled separately from toll roads Per use toll roads are pay r...

Page 175: ...he related sound The slider becomes inactive Tap again to re enable it Button Function Disable verbal instructions This function is enabled by default Choose from the following options Announce the st...

Page 176: ...utton Description NX807 is able to warn you if you exceed the current speed limit This information may not be available in your region or may not be fully correct for all roads on the map The maximum...

Page 177: ...above the given speed limit Only when speeding The audio warning is only played when you exceed the given speed limit When approaching The audio warning is always played when approaching one of these...

Page 178: ...he map while navigating Too many Places make the map crowded so it is a good idea to keep as few of them on the map as possible Tap the name of the Place category to show hide it or to open the list o...

Page 179: ...Tap it to turn this feature on or let the map be displayed for the whole route When entering tunnels the surface roads and buildings can be disturbing Tap it to show a generic picture of a tunnel inst...

Page 180: ...ames not announced These pre recorded sounds can only tell you basic information about turns and distances TTS Voice street names announced These computed voices can read out complex instructions stre...

Page 181: ...ip database the sum of all trip and track logs saved 4 3 8 Usage Reports settings If you enable it when first using the application it collects usage information and GPS track logs that may be used fo...

Page 182: ...n is farther away from your current position Solution 2 Wait a few minutes for the GPS signal 5 2 Address cannot be found Issue NX807 cannot find the address you entered Cause The digital map data may...

Page 183: ...rent location Solution Disable the speed warning by performing the following steps 1 Tap and 2 Tap and 5 5 Keyboard buttons are grayed out Issue Some keyboard buttons are grayed out and cannot be used...

Page 184: ...y exit or a complex intersection and the needed information exists the map is replaced with a 3D view of the junction The lanes you need to take are displayed with arrows Solution If you want to hide...

Page 185: ...Easy route 75 Editing the route 53 F Fast route 75 Favorites Saved Locations 44 60 61 G GPS Information 71 Green route 75 H Help Nearby 43 History 45 Home address 44 60 I Intelligent navigation 68 In...

Page 186: ...settings 74 Sound settings 77 Trip Monitor settings 83 Usage Reports settings 83 Warning settings 78 Short route 75 Simulation 63 Smart zoom 67 Sound settings 77 Speed camera 66 79 85 Speed limit 78 8...

Page 187: ...ween You as the end user hereinafter User and the business entity distributing selling the Device together with the Navigation Product under its own name and or branding hereinafter Licensor This Agre...

Page 188: ...coding or any medium thereof shall be deemed parts of the Navigation Product 4 3 Error corrections updates or upgrades or any other modifications to the Navigation Product used by the User following...

Page 189: ...avigation Product is for the User s personal purposes only 6 2 In the event that the Navigation Product comes preinstalled on or otherwise licensed together with the Device or acquired from Licensor b...

Page 190: ...t assume any responsibility for damages incurred due to the Navigation Product not being applicable for any defined purpose or due to the error or incompatibility of the Navigation Product with any ot...

Page 191: ...he relevant terms at the website and the User is obliged to use the services in line with those terms In the event of conflict between this Agreement and such additional terms the additional terms sha...

Page 192: ...ntent servers The Navigation Product may allow the User to access and communicate third party servers directly In such cases use of such servers is for User s own risk entirely Licensor shall not unde...

Page 193: ...process the geographic position of the User s device may be used for providing better search results Also the search result chosen by the User may be processed anonymously by the Service supllier for...

Page 194: ...pying and recording without the express written consent of Clarion 2016 Clarion 2006 2016 TomTom All rights reserved This material is proprietary and the subject of copyright protection database right...

Page 195: ...CautionII Please don t press on LCD screen or button panel while installing Please connect the speed pulse cable when installing...

Page 196: ......

Page 197: ...ion ou au remplacement du produit qui est sujet uniquement aIa discretion de Clarion 6 Ce produit doit est retourne dans son emballage d origine ou equivalent Le colis doit etre entierement assure et...

Page 198: ...r of the product or replacement of the product at the sole discretion of Clarion 6 Product must be shipped in its original carton or equivalent carton fully insured with shipping charges prepaid Clari...

Reviews: