English
NX409/NZ409
Radio Operations
Preset Scan
The Preset Scan receives the stations stored in
the preset memory in order. This function is
useful when searching for the desired station in
memory.
1. Touch the
[Band]
key to select the desired
band. (FM or AM)
. Touch the
[PS]
key to start the Preset Scan.
The unit starts scanning each station for 10
seconds sequentially.
. When the desired station is tuned in, touch
the
[PS]
key again to continue receiving that
station.
LOC/DX Setting
The DX / LOC setting changes the tuner
sensitivity in order to seperate closely spaced
stations. This feature is useful in areas that
have many radio stations in close proximity.
1. Touch the
[DX]
key to switch to LOCAL
tuner sensitivity.
. Touch the
[LOC]
key to switch to DX tuner
sensitivity.
DVD Video Player Operations
Change DVD System Settings
Note:
If the set up operation is performed in
the middle of DVD video play, the disc
will restart from the beginning.
Selecting DVD Set Up Menu
1. Press the
[SETUP]
button on the Main Menu
to access the Video set up menu.
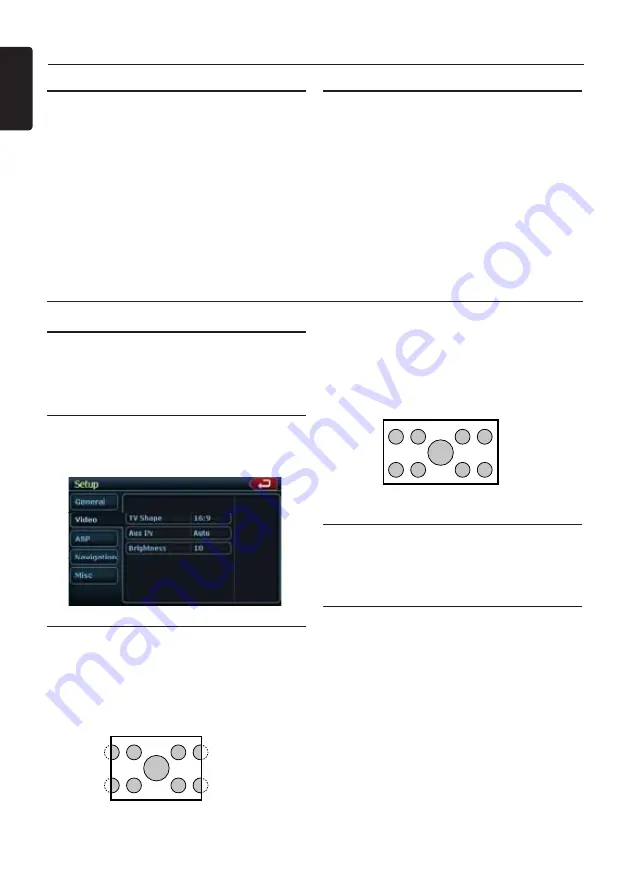
. Press the
[Video]
. The video menu is
displayed.
Setting up the Screen Size
Press the
[TV Shape]
button on the display in
to change the sceen size
4:3
or
16:9
.
The factory default setting is “ 16:9 ”.
• When watching a wide type through a
conventional type of the rear view monitor
(4:), the leftmost and rightmost areas of the
screen are cut off.
This function allows displaying the important
part of image fully on the screen. In some
cases, image is displayed while being panned
(scrolled).
• When watching a wide type through a wide
type of the rear view monitor (16:9),
the leftmost and rightmost areas of the screen
are not cut off.
Setting up the Video System Format
Press the
Aux IN
button on the display to set up
the video system format :
Auto
,
PAL
or
NTSC.
The default setting is
Auto.
Touch the required system format on the screen.
Setting up the Video Brightness
Press the brightness button. Touch the desired
video brightness displayed, on scale from 0 to
0.


