Doc ID - 336 • REV 06
Network Camera Installation Guide
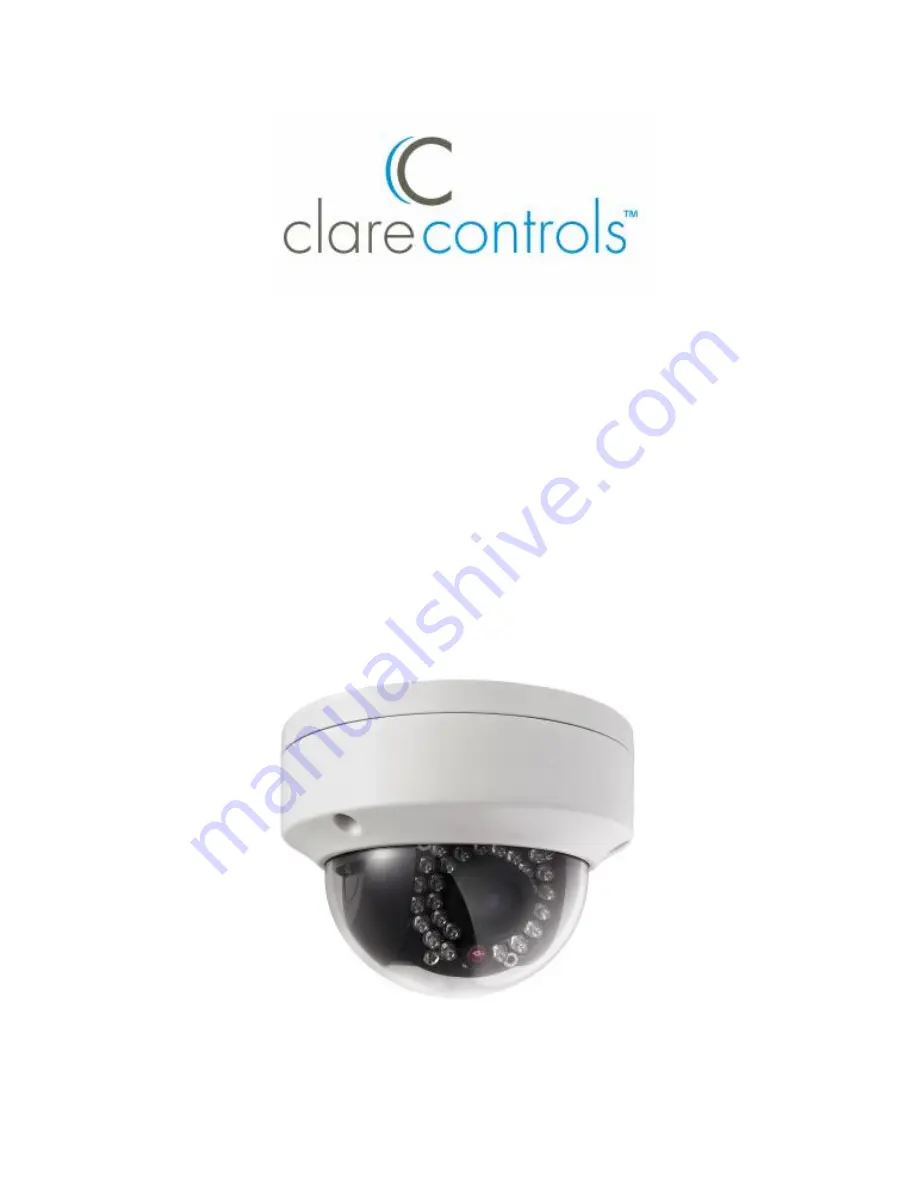
1.3 MP Budget Mini-Dome Camera
Model CV-B13D10-ODI
Last modified: 09/28/16
Page 1: ...Doc ID 336 REV 06 Network Camera Installation Guide 1 3 MP Budget Mini Dome Camera Model CV B13D10 ODI Last modified 09 28 16...
Page 2: ......
Page 3: ...e specifically permitted under US and international copyright law Trademarks and patents The 1 3 MP Budget Mini Dome Camera name is a trademark of Clare Controls LLC Other trade names used in this doc...
Page 4: ......
Page 5: ...afety instruction 1 Overview 4 Installation 5 Before you start 5 Setting the network camera over LAN 9 Accessing via web browser 14 System requirement 14 Specifications 17 Regulatory information 19 Wa...
Page 6: ...ii...
Page 7: ...rable backlight compensation and a vandal resistant housing Package contents 1X 12 VDC power supply 3X anchor screws 3X plastic anchors 1X hex tool 90 degree wrench 1X drill template 1X Ethernet weath...
Page 8: ...not connect several devices to one power adapter as adapter overload may cause over heating or a fire hazard Make sure that the plug is firmly connected to the power socket When the product is mounte...
Page 9: ...he same time The CMOS may be burned out by laser beams When using laser equipment make sure that the surface of the CMOS is not exposed to the laser Do not expose the camera to high electromagnetic ra...
Page 10: ...4 Overview Figure 1 Camera overview 1 Mounting base 2 Horizontal stand 3 Vertical stand 4 Bubble 5 Cables 6 IR LED 7 Lens 8 Black liner 9 Safety rope 1 2 3 4 5 6 7 8 9...
Page 11: ...ipment is powered off during installation To determine the proper environmental operating conditions refer to Specifications on page 17 Make sure the power supply matches the required voltage to avoid...
Page 12: ...6 To mount the camera to the ceiling 1 Drill the cable hole and the screw holes in the ceiling according to the supplied drilling template Screw Hole Screw Hole Screw Hole Ceiling Mounting...
Page 13: ...oosen the set screws with a hex tool supplied to remove the bubble 3 Connect the corresponding cables Note If required you can route cables through the opening on the side of the mounting base Side Op...
Page 14: ...a Loosen the tilt adjusting screws and adjust the tilt angle 0 to 65 and tighten the tilt adjusting screws b Hold the black liner and rotate it to adjust the pan position 0 to 360 c Remove the black l...
Page 15: ...he bubble and tighten the screws Setting the network camera over LAN To view and configure the camera via LAN Local Area Network you will need to connect the network camera in the same subnet as your...
Page 16: ...ubnet mask port number device serial number and device version See the figure below 2 Change the IP address and subnet mask to match subnet of your PC After launching the SADP software it automaticall...
Page 17: ...15s to refresh the online device list manually Click or on each column heading to change the order of the displayed information Click to show the device table and hide the network parameter panel or c...
Page 18: ...twork Parameters panel as shown below 3 Edit the network parameters as necessary 4 Enter the password of the device s admin account in the Password field and then click Save 5 Enter the network camera...
Page 19: ...13 Notes The default user name is clareadmin and password is secure7 Set the gateway for the network camera after you log in when accessing the network camera from different subnets...
Page 20: ...tel Pentium IV 3 0 GHz or higher RAM 1 G or higher Display 1024 768 resolution or higher Web browser Apple Safari 5 02 and above and Mozilla Firefox 3 5 and above To access the camera via the web brow...
Page 21: ...video and manage the camera Notes You may need to close the web browser to finish the installation of the plug in Mac s require the plug in to be downloaded manually See the Clare Controls ClareVision...
Page 22: ...ext 7 Click Finish 8 Reopen the web browser after installing the plug in and repeat steps 2 and 3 to login Note For detailed instructions of further configuration refer to the Network Camera User Guid...
Page 23: ...Angle adjustment Horizontal 0 to 355 vertical 0 to 65 Day and night ICR Video Compression format H 264 MJPEG Number of streams Dual stream Frame rate 50 Hz 25 fps 1280 960 25 fps 1280 720 60 Hz 30 fps...
Page 24: ...RTP IPv6 optional Electrical Power source 12 V DC 10 Power over Ethernet PoE 802 3 af Power consumption 5 W max Environmental Temperature 22 F to 140 F 30 C to 60 C Relative humidity 0 to 95 nonconden...
Page 25: ...WHATSOEVER REGARDING THE PERFORMANCE OR RELIABILITY OF ANY SECURITY OR SIGNALING RELATED FUNCTIONS OF THIS PRODUCT FCC This device complies with part 15 of the FCC Rules Operation is subject to the f...
Page 26: ...r more information see www recyclethis info 2006 66 EC battery directive This product contains a battery that cannot be disposed of as unsorted municipal waste in the European Union See the product do...
Page 27: ...Clare Controls To view complete limited warranty details including limitations and exclusions www clarecontrols com warranty Scan the code to view product warranty details Contact information Clare Co...
Page 28: ......