Claas JAGUAR 830 Information And Basic Field Settings Download Page 3

03

04

Introduction

This quick reference guide has
been produced to aid operator’s with 
familiarisation and settings of CLAAS JAGUAR 
forage harvesters.

CLAAS forage harvesters are designed for output 

and efficiency but this can only be achieved 

with correct operation and maintenance of the 
machine.

This guide is not designed to replace
the Operator’s Manual but purely as
a reference document.

More in depth information is available
in the Operators Manual.

Downtime costs output
To get the most from the machine, the wheels must be turning. 
In order to keep downtime to a minimum, it’s vital that routine 
maintenance is not neglected.
As well as servicing the machine according to the operator’s 
manual, a good check of the machine is essential. It is false 
economy to put off the replacement of worn  parts until they 
break.

Abbreviations
Throughout this guide the following abbreviations are used:
‘LHS’ and ‘RHS’ refer to the Left Hand Side and Right Hand 
Side of the machine respectively, taken from the rear of the 
machine facing in the direction of travel.

•  Make sure you are familiar with the controls and operation 
of the machine and have read the Operator’s Manual.

•  The forage harvester has many moving parts, guards are 
designed to keep you safe, please ensure that all guards are 
kept in place and in good condition when operating 
the machine.

•  When doing any maintenance work or making 
adjustments outside of the machine make sure that the 
engine is switched off and the battery isolator key is 
removed.

•  Some of the maintenance has to be carried out at height, 
please asses the risks that this poses and ensure that the 
task is carried out safely.

•  When operating the machine be aware of the presence 
of people particularly in farmyards, always get someone to 

help you when reversing in confined areas.

•  Be aware of the size of your machine, particularly the 
height, you may be at risk from contact with overhead 
power lines and overhead obstructions particularly but not 
exclusively when the spout is in the working position and if 

extra aerials have been fitted to your machine.

ALWAYS READ THE OPERATORS MANUAL BEFORE 
OPERATING YOUR FORAGE HARVESTER.

The information is therefore not complete for the purpose of 
working on the machine. This document does not replace the 
relevant operators manual and repair documentation! Subject to 
changes due to continued technical developments.

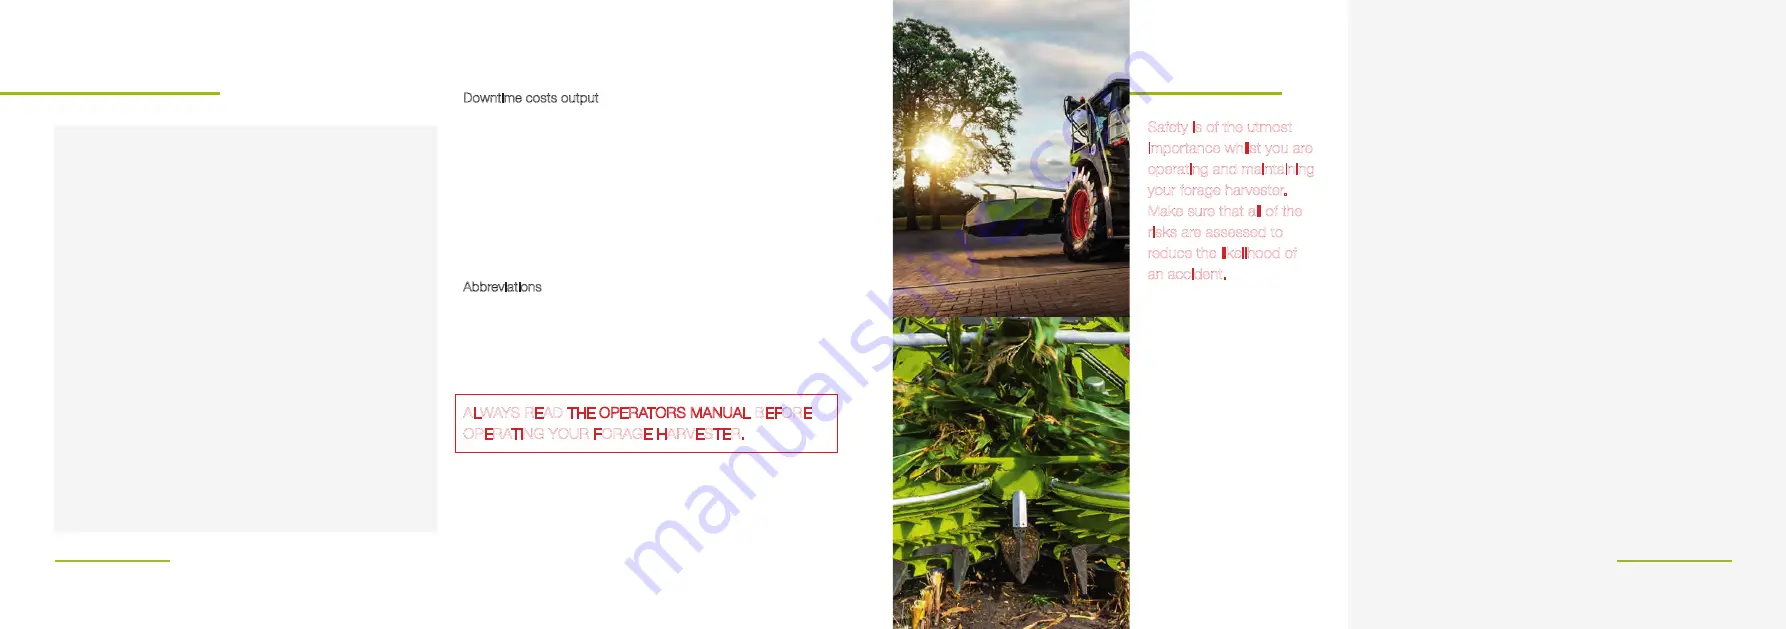
Safety is of the utmost 
importance whilst you are 
operating and maintaining
your forage harvester. 
Make sure that all of the 
risks are assessed to 
reduce the likelihood of 
an accident.

For more in depth safety 
information please consult 
your operators manual.
Always read the Operator’s 
Manual before using any new 
machine.

Safety

Summary of Contents for JAGUAR 830

Page 1: ...JAGUAR 830 880 500 Information and Basic Field Settings...

Page 2: ...ening Feed Rollers Chopping Cylinder Sharpening Cylinder Concave Shear Bar Corn Cracker Removing the Corn Cracker Accelerator Discharge Other Machine Features Front Attachment PICK UP DIRECT DISC ORBI...

Page 3: ...nsure that all guards are kept in place and in good condition when operating the machine When doing any maintenance work or making adjustments outside of the machine make sure that the engine is switc...

Page 4: ...t transmits the power to the right side via the third power band belt 6 driving the front attachment drive 7 and the feed rollers The feed rollers are reversed using the hydraulic motor 8 1 2 3 4 5 6...

Page 5: ...Additive system switch 10 4 Trac on off switch 11 Gear selection switches 1 2 3 5 6 7 8 9 10 4 11 Multi Function Lever 1 Lower Front Attachment 2 Raise Front Attachment 3 AUTOCONTOUR On Off 4 Cutting...

Page 6: ...BIS Road Travel Display 09 1 Main Menu 2 AUTOCONTOUR Height Control 3 Pre Set Cutting Height 4 Message Fields 5 Gear Selection 6 Engine Speed 7 Ground Speed 8 Engine Load 9 Performance Monitor 10 Came...

Page 7: ...ns activate the hot key button 1 on the arm rest or CMOTION drive stick and select the required function for change The HOTKEY menu 2 will be displayed for 5 seconds when activated and when the desire...

Page 8: ...s from falling out under the machine This needs to be removed for grass harvesting Plastic Strips It is advisable to remove the Teflon strips off the upper feed roller during maize harvest This will a...

Page 9: ...itivity Adjustment 0 10 It is recommended to deactivate Stop Rock when harvesting maize using sensitivity setting 0 Stop Rock is used to detect stones entering the feed rollers by monitoring the movem...

Page 10: ...feeder housing until the hooks become free 5 Remove the electrical lubrication and air connections on the machine RHS and the hydraulic motor connections on the LHS 6 Slacken the bolt and swing out th...

Page 11: ...It should now be possible to gain access as can be seen above Chopping Cylinder 20 The chopping unit has the task of cutting the material compressed by the feeder housing to the pre set chopping lengt...

Page 12: ......

Page 13: ...ed Refer to section 9 12 3 in the operators manual for instructions on how to carry out adjustment The sharpening stone readjusts automatically during the sharpening process however after approx 450 c...

Page 14: ...mum chopping quality maximum efficiency and long service lives of knives and shear bar 1 Readjust the shear bar after every sharpening process 2 If needed the shear bar should be readjusted without kn...

Page 15: ...moving the Corn Cracker In crops where the corn cracker is not needed it is recommended that the corn cracker is completely removed from the machine During this time the filler housing needs to be fit...

Page 16: ...e L chute has 2 sections added Mechanical Adjustment On the standard machine the gap between the housing and the accelerator can be adjusted manually both LHS and RHS Why change the clearance in the a...

Page 17: ...to road travel position Automatic swivelling from one side to the other AUTO FILL Optional AUTO FILL is an option which allows fully automatic control of the discharge spout This consists of an additi...

Page 18: ...he attachment must be in the working position Dosing Options Constant dosing mode 20 400 L hour Throughput dependant dosing 500 2000 ml tonne up to 200tonne hour throughput ACTISILER Optional The inde...

Page 19: ...r drive from the factory this is recommended for medium to long chop lengths Two further sprockets are included in the shipping package for adjusting the auger speed These are 33 and 15 toothed sprock...

Page 20: ...intake auger Check pick up chain tension Change all gearbox oils Check clutches Check all chain tensions Check all connections Check all connections are tight and correctly seated 50 hours 500 hours...

Page 21: ...ddle Roller Height For the DIRECT DISC the hydraulic paddle roller adjustment is available as an option to suit crop conditions Alternatively if this option is not fitted the paddle roller height can...

Page 22: ...8 row working width 6m 4 ORBIS 450 6 row working width 4 5 m Adjustments The intake speed of crop from the ORBIS must also be matched to the feed roller speed This is essential to ensure consistent c...

Page 23: ...ould be adjusted as close as possible to the discs without touching These ensure any cobs which fall off the stalks are transported to the feed rollers The scrapers on the feeder discs should be adjus...

Page 24: ...lines Check clutch adjustment Check all connection elements Service Tension cables Daily 500 hours annually Check all oil levels Lubricate all grease points inc under Christmas tree top covers Check a...

Page 25: ...the front attachment and on the JAGUAR during road travel To activate this feature set the road travel master switch to the road travel position and briefly hit the cutting height control function on...

Page 26: ...to check Knife Condition Sharpness Shear Bar Position Too far from knife Points to check If grains unbroken reduce corn cracker clearance If the grains are becoming crushed Increase cracker clearance...

Page 27: ......

Page 28: ...art Number 00 0998 1011 00 0998 1021 00 0984 6900 00 0984 6910 00 2614 2700 00 0495 2743 00 0495 8321 00 0984 3185 00 1312 4424 00 0123 8620 00 0123 8660 Part Number 00 1322 6160 00 0973 2790 00 2616...

Page 29: ...Notes...

Page 30: ...Notes Notes...

Page 31: ...Jaguar 830 880 500 Information and Basic Field Settings www claas co uk...

Reviews: