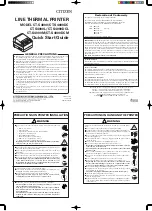
7 Error Indication
1 Unpacking
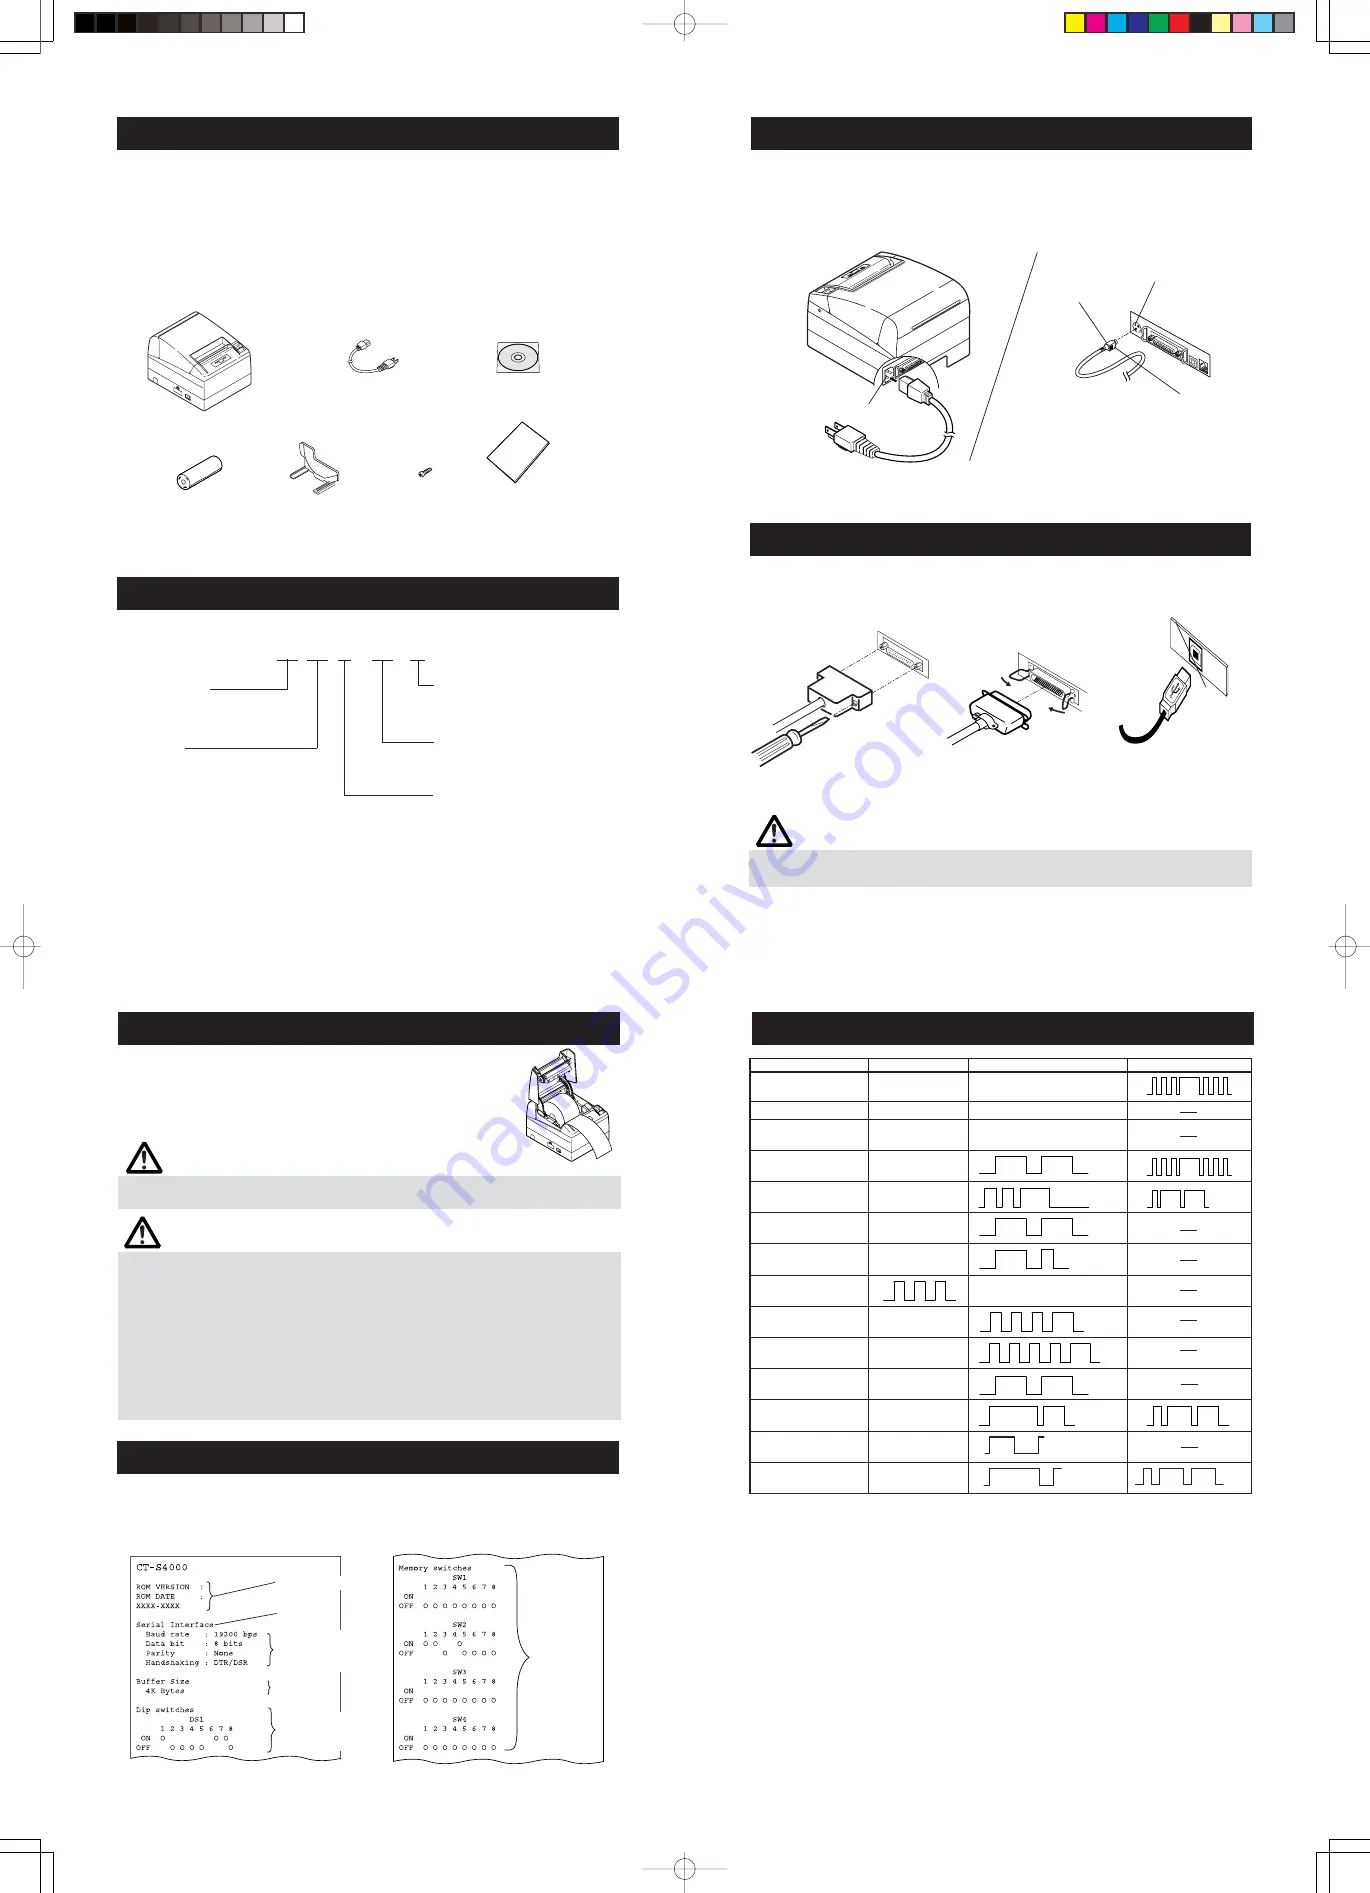
When unpacking the printer, confirm that the following are provided:
●
Printer:
1
●
AC power cord :
1 (for CT-S4000, CT-S4000L, CT-S4000M)
●
CD-ROM:
1
●
Sample paper roll: 1 roll
●
Partition:
1
●
Screw:
1
●
Quick start guide:
1
CT-S4000
Sample paper roll
CD-ROM
AC power cord
2 Model Classification
The printer models are classified by the following designation method:
CT - S4000 RS E - BK -
Label/Black mark
No marking: Standard
L: Label
M: Black mark
Body case color
WH: Cool white
BK: Black
Interface
PA: IEEE1284 & USB
RS: RS-232C & USB
UB: USB only (Option)
Character set, AC cable,
E: Europe
U: USA
Partition
Screw
Power supply
No marking: AC power type
(built-in power supply)
DC: DC power supply type
Quick start guide
3 Connecting the AC Power Cord
1.
Turn off the printer power switch.
2.
For AC power type (with built-in power supply), connect the AC power cord
to the AC inlet at the back of the printer and plug the AC power cord into the
wall outlet.
AC inlet
AC power cord
Cable connector
Power connector
Flat side
4 Connecting Interface Cables
Confirm that the power switch is OFF and connect the interface cable.
Orient the interface cable terminal correctly and insert it into the interface connector.
CAUTION!
■
When disconnecting the cable, always hold the connector.
■
Be careful not to insert the USB interface cable into the cash drawer kick-out connector.
Serial Interface
Parallel Interface
USB Interface
5 Setting/Replacing the paper roll
CAUTION!
■
Always use the specified types of paper roll.
■
Confirm that the paper roll is set correctly.
■
When the paper is skewed and not extended straightforward from under the printer
cover, open the printer cover and adjust the paper correctly.
■
When the printer cover is opened after setting the paper, be sure to pull the paper
straightforward several cm (or inches) out of the printer, and then close the printer cover.
■
When closing the printer cover, press on the center part of the cover to close it firmly.
■
When setting paper, be careful not to have your finger injured by the manual cutter or
paper edge.
■
In the case of selecting "Valid" with memory SW4-3, the paper is fed and cut
automatically when the printer cover is closed.
1.
Pull the cover open button forward.
2.
Open the printer cover.
3.
Insert a paper roll with its print area facing down as shown
in the figure and pull out the paper end straightforward
several cm (or inches) out of the printer.
4.
Firmly close the printer cover until a click can be heard.
WARNING
When opening the printer cover, DO NOT touch the print head or cutter blade. Otherwise,
burning or injury of hand may result.
6 Self-printing
Insert paper into the printer. With the FEED button pressed and held, turn the printer
power on, keep the FEED button held for about 1 second, and then release the FEED
button. The printer starts self-printing. The printer prints model name, version, DIP
switch setting, memory switch setting, and built-in fonts.
Memory
switch
setting
Serial communication
condition (Only serial
interface model)
DIP switch setting
(Only serial interface
model)
Firmware version
Interface
Buffer size
Status
POWER LED
ERROR LED
Buzzer
Paper-end
Lights
Lights
Paper near-end
Lights
Lights
Printer cover open
Lights
Lights
Printer cover open
Lights
error *1
Cutter lock error
Lights
Head overheat error
Lights
Paper jam error
Lights
Memory check error
Lights
Low voltage error
Lights
High voltage error or
Lights
Power switch operation error
Macro execution
Lights
wait *2
Black Mark detection
OFF
error
Waiting for paper
OFF
(label) cutting*L, *M
Paper (label)
OFF
detection error*L, *M
*1: When the printer is printing.
*2: The ERROR LED may blink even in the execution of macro function.
USB connector


