background image

5

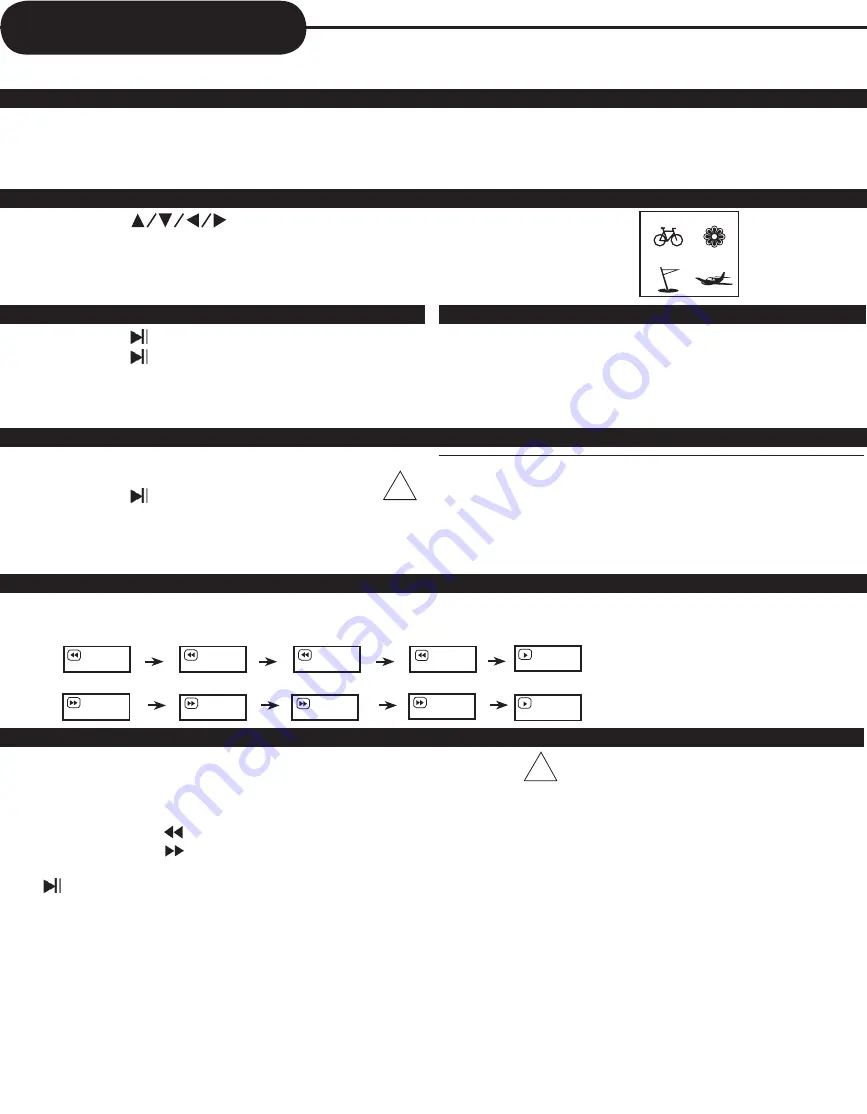
Playing Back a Disc

Continued

ABOUT DVD, CD

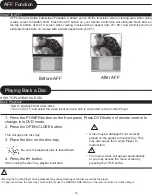
DVD, CD  icons  will appear depending on the disc being played back.

DVD: DVD video discs

CD:   Audio CDs

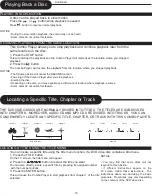
 HOW TO START PLAyBACK FROM THE MENU SCREEN

. Press                        or the number buttons to select the title.

. Press  the ENTER button.

The Combo Player will start playback from the title selected.

Title 

Title 3

Title 

Title 4

HOW TO PAUSE PLAyBACK (STILL PLAyBACK)

Press the 

 during playback. 

Press the 

 button to resume normal 

playback.

HOW TO STOP PLAyBACK

Press the STOP button once.

The Combo Player is stopped.

Press the 

 button to replay.

Press the STOP button twice.

The Combo Player is stopped completely.

HOW TO REMOVE THE DISC

Press the OPEN/CLOSE button.

Wait until the disc tray is completely open before removing any 

discs.

After removing the discs, press the OPEN/CLOSE button to 

close the disc tray.

At the completion of each movie a menu screen will appear.  Be 

aware that the on-screen setup menu may damage your TV by 

permanently burning that image onto the screen if it is left on 

the screen for to long. To avoid this, press the STOP button at 

the completion of each movie. you may also decide to setup the 

SCREEN SAVER function.

!

ADVANCED PLAyBACK

The Combo Player allows you to playback discs at various speeds. 

PLAyING AT X, 4X, 8X, OR 6X THE NORMAL SPEED

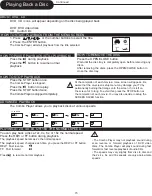
you can play back a disc at x, 4x, 8x, or 6x the normal speed.

Press the REW or FF button during playback.

The playback speed becomes x the normal speed.

The playback speed changes each time you press the REW or FF button.

REW:  Fast reverse 

FF:  Fast forward 

Press 

 to resume normal playback.

    x

    4x

    8x

    6x

TV SCREEN

    6x

    8x

    4x

    x

• The Combo Player may not playback sound during 

scan  reverse  or  forward  playback  of  DVD  video 

discs. The Combo Player will play sound during fast 

forward or fast reverse playback of audio CDs.

• The speeds may vary slightly from disc to disc and 

the x, 4x, 8x, and 6x speeds are only approximate 

speeds. 

!

Summary of Contents for C506DVC

Page 1: ...DVD and VCR Combination User s Manual C506DVC ...

Page 2: ...the Radio Interference Regulations of Industry Canada These limits are designed to provide reasonable protection against harmful interference in a residential installation This equipment generates uses and can radiate radio frequency energy and if not installed and used in accordance with the instruction may cause harmful interference to radio communications However there is no guarantee that inte...

Page 3: ...aratus 11 Only use attachments accessories specified by the manufacturer 12 Use only with the cart stand tripod bracket or table specified by the manufacturer or sold with the apparatus When a cart is used use caution when moving the cart apparatus combination to avoid injury from tip over 13 Unplug this apparatus during lightning storms or when unused for long periods of time 14 Refer all servici...

Page 4: ... The loaded disc may come off the proper position and cause damage to the player When you place this player near a TV or radio the playback picture may become poor and the sound may be distorted In this case place the player away from the TV or radio Notes on cleaning Use a soft dry cloth for cleaning For stubborn dirt soak the cloth in a weak detergent solution wring well and wipe Use a dry cloth...

Page 5: ...laces subject to moisture and dust store discs vertically in a case Stacking or placing objects on discs outside of their case may cause warping Playable discs This Combo Player can playback the following discs Introduction Your new VCR DVD PLAYER is designed for you to enjoy all forms of disc media and VHS Tape Your player will allow you to enjoy full length motion pictures with at the movies pic...

Page 6: ...laying in a Favorite order 20 MP3 Operation 20 WMA Operation 21 Playing Your JPEG Files 22 Memo On Output Sounds 22 Setting the Parental Lock 23 Customizing the Function Settings 24 Troubleshooting Guide 25 Specifications 26 REAR PANEL 1 DIGITAL AUDIO OPTICAL OUTPUT 2 S VIDEO OUTPUT 3 DIGITAL AUDIO COAXIAL OUTPUT 4 COMPONENT PROGRESSIVE VIDEO OUTPUT Y Pb Pr 5 ANALOG AUDIO OUTPUT L R 6 ANALOG AUDIO...

Page 7: ...y To release child lock press the power button of the remote control for about 8 seconds 18 SUBTITLE 19 OPEN CLOSE 20 clear reset 21 dvd 22 skip REVerse 23 skip ForWarD 24 ENTER 25 STOP 26 title 27 display 28 zoom 29 speed 30 search 31 tv vcr 32 PROGRAM 33 counter clock 34 ANGLE 35 input sel 1 POWER 2 NUMBER BUTTONs 3 vcr 4 fast REVERSE 5 fast forward 6 rec 7 direction BUTTONs 8 play Pause 9 menu ...

Page 8: ... CONTROL To operate the Combo Player you must first place the batteries in the remote control incorrect use of batteries might cause them to leak corrode or explode Do not place the batteries in the wrong direction It is dangerous to charge heat open or short circuit the batteries Do not leave dead batteries or mix new with old batteries in the remote control When not using the remote control for ...

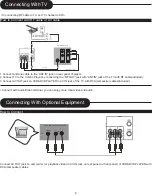
Page 9: ...RF OUT jack with ANT IN jack of the TV with RF cable included 3 Connect AV OUT jack on VCR DVD PLAYER to AV IN jack of the TV with RCA composite cables included Connect with Audio Video terminal you can enjoy more clear video and audio REAR PANEL OF CAMCORDER VIDEO L R AUDIO OUT Connecting With Optional Equipment Connect AV OUT jack on camcorder or playback video to AV IN jack on rear panel or fro...

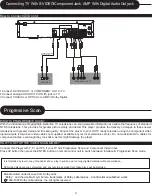
Page 10: ...the player to your HDTV ready television using the component video inputs outputs component video cables not supplied available at your local electronics store Do not substitute RCA cables for component cables eventough they look alike as this might damage the player Connect this Player with Y Pr and Pb if your TV has Progressive Scan and Component Video input Press I P button then press the ENTER...

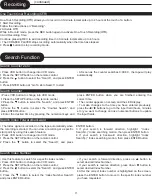
Page 11: ...tatus continues for five minutes the recording will be cancelled automatically 7 To stop recording press button If you want to playback DVD during recording with video insert a DVD disc Place the desired DVD disc on DVD tray press DVD button to switch into DVD mode and press button Then you can watch DVD Press DVD button to convert output into DVD mode 1 Insert the desired DVD disc you can t copy ...

Page 12: ...ion press down button to select desired Index Number 4 After the correct index number is highlighted on the screen press the ENTER button to move to the specific index number you have requested Press VCR button to change into VCR mode 1 Press the SETUP button on the remote control 2 Press the button to select the Search and press ENTER button 3 Press the button to select the Counter Search and pre...

Page 13: ...e next program entry form as the title at the top of the screen has changed to show PROGRAM 2 or higher If you want to exit the programming screen simply press the SETUP button Press NEXT and PREV button to scroll through the 8 event programming screens Press the POWER button to activate timer recording This function can only be accessed in STOP mode when there is no tape playing Press VCR button ...

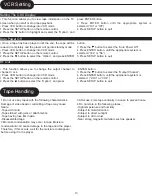
Page 14: ... screen when you start or stop tape playback Press VCR button to change into VCR mode 1 Press the SETUP button on the remote control 2 Press the button to highlight and select the Option and press ENTER button 3 Press ENTER button until the appropriate system is selected On or Off 4 Press SETUP button to quit VCR Setting Auto Power Off Setting The OSD Display RF Out Tape Handling 1 Do not use any ...

Page 15: ...ich is connected to the Combo Player 1 Press the POWER button on the front panel Press DVD button of remote control to change into DVD mode 2 Press the OPEN CLOSE button This will open the disc tray Be sure the playback side is faced down 3 Place the disc on the disc tray 4 Press the button After closing the disc tray playback will start Moving the Combo Player during playback may cause damage to ...

Page 16: ...each movie a menu screen will appear Be aware that the on screen setup menu may damage your TV by permanently burning that image onto the screen if it is left on the screen for to long To avoid this press the STOP button at the completion of each movie You may also decide to setup the SCREEN SAVER function advanced playback The Combo Player allows you to playback discs at various speeds playing at...

Page 17: ...IVIDED INTO TRACKS YOU CAN CONVENIENTLY LOCATE ANY SPECIFIC TITLE CHAPTER OR TRACK WITH THIS Combo Player TITLE 1 DVD Video Disc TITLE 2 Audio CD LOCATING A TITLE USING THE TITLE MENU You can locate a specific title using the title menu function if a DVD video disc contains a title menu 1 Press the TITLE button On the TV screen the title menu will appear 2 Press the button to select the title you ...

Page 18: ...ATUS AND DISC INFORMATION ON YOUR TV SCREEN checking the operational status With this function you can view on your TV the following Current title Track number Total playing time Press DISPLAY during playback Display Off Title Elapsed TT 01 12 CH 006 039 0 02 20 Chapter Elapsed TT 01 12 CH 006 039 0 03 50 Chapter Remain TT 01 12 CH 006 039 0 10 40 Current Title Total Title Current Chapter Total Ch...

Page 19: ... A B RPT button at the beginning of the segment in which you want to repeat playback point A 2 Press the A B RPT button again at the end of the segment point B The Combo Player will automatically return to point A and start to repeat playback of the selected segment A B 3 Press the A B RPT button to cancel the A B repeat function The Combo Player will resume to normal playback A AB Depending on th...

Page 20: ...ral different ANGLEs AND LANGUAGES how to change the camera angle Press the ANGLE button while playing back a scene recorded with multiple angles Each time you press the ANGLE button the angle will change NOTICE The angle function will not work on DVD video discs that do not contain recorded multiple angles The angle icon indicator will illuminate while playing back a title that contains at least ...

Page 21: ...mbo Player is turned off or if the disc is removed the program item will be removed Depending on the disc the programmed playback may not function The program function supports to play normal CD s it is not available while playing MP3 CD s and WMA To clear the numbers that you have programmed in just now press CLEAR button Program TT XX CH XX 01 TT CH 06 TT CH 02 TT CH 07 TT CH 03 TT CH 08 TT CH 0...

Page 22: ...d files to select which ones you want to play Insert a WMA CD the Combo Player will initialize the disc when the tray is closed and the directory folder will be shown in a WMA MENU on screen 2 Then press then the key to select and highlight a WMA file song Press ENTER to commence playback of a WMA file you have selected WMA Operation ...

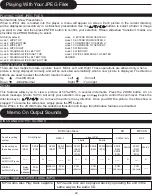
Page 23: ... or image you want to view and then press ENTER button to confirm your selection Fifteen slideshow transition modes are provided Use PROGRAM key to select IMAGE ROTATION zoom mode 9 EXTEND FROM CENTER H mode 10 EXTEND FROM CENTER V mode 11 COMPRESS TO CENTER H mode 12 COMPRESS TO CENTER V mode 13 WINDOW H mode 14 WINDOW V mode 15 WIPE FROM EDGE TO CENTER RANDOM NONE by default mode 1 WIPE TOP mode...

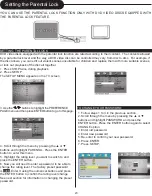
Page 24: ...ttons to highlight the PREFERENCE PAGE menu and then press ENTER button to go to this page 1 Follow steps 1 to 3 in the previous section 2 Scroll through the menu by pressing the or buttons and highlight PASSWORD and press the ENTER button Press the ENTER button again to select CHANGE option 3 Enter old password 4 Enter new password 5 Re enter to confirm your new password 6 Press ENTER 7 Press SET...

Page 25: ...Digital Setup Video Setup and Preferences The selected category will provide you the setting details on screen General Setup Page TV Display PS Angle Mark On OSD Lang ENG SPDIF Output RAW Captions Off Screen Saver On Speaker Setup Page Downmix Normal PS Normal LB Wide On Off English French Spanish SPDIF Off SPDIF RAW SPDIF PCM On Off On Off LT RT Stereo Dolby Digital Setup Dual Mono Dynamic Stereo...

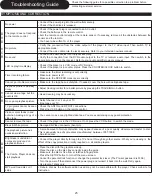
Page 26: ...re by pressing the TRACKING button Cannot view a tape but the audio is OK Head cleaning may be necessary No or poor playback picture Select channel 3 or 4 on your TV Fine tune your TV TV programs cannot be seen normally Check the ANT IN and RF OUT connections Press the VCR button on the remote control Video or color fades in and out when making a copy of a video tape You cannot copy a copyrighted ...

Page 27: ...balanced RCA JACK Audio input 8 8 dBm RCA JACK RF output 3 or 4 CH Video output 1 0 V p p 75 RCA JACK S video output Y 1 0 V p p 75 negative sync Mini DIN 4 pin x 1 C 0 286 V p p 75 Component video output Y 1 0V p p 75 Pb 0 7V p p 75 Pr 0 7V p p 75 Audio output DVD analog audio 1 8 0 2V p p rms 10k pin jack L R x 1 Audio output VCR analog audio 5 8 2 dBm RCA JACK Playable tape Very high dense tape...

Page 28: ...Guide de l utilisateur C506DVC Lecteur DVD avec magnétoscope ...

Page 29: ...quences radio et s il n est pas installé et installé selon les instructions peut nuire aux radiocommunications Toutefois rien ne garantit que des parasites ne surviendront pas dans une installation particulière Si cet appareil cause des interférences nuisibles à la réception du téléviseur ou de la radio ce que vous pouvez déterminer en ouvrant et en fermant votre appareil nous vous invitons à essa...

Page 30: ... murale désuète 10 Protection du fil d alimentation Vous devez acheminer les fils d alimentation de façon à ce qu ils ne soient pas pincés ni écrasés par des objets placés par dessus Portez une attention particulière aux fiches aux prises de courant et aux points précis où ils sortent de l appareil 11 N utilisez que les accessoires et fixations recommandés par le fabricant 12 Accessoires Ne dépose...

Page 31: ...né Le disque une fois chargé peut sortir de ses rainures guides et endommager le lecteur Lorsque vous installez ce lecteur près d un téléviseur ou d une radio l image peut devenir floue et le son peut distorsionner Si ceci se produit éloignez le lecteur du téléviseur ou de la radio Remarques relatives au nettoyage Utilisez un chiffon doux et sec pour nettoyer le boîtier de l appareil Pour les tach...

Page 32: ...DIFFUSION Ce combiné lecteur DVD magnétoscope doit être branché sur un téléviseur dont le système de télédiffusion est NTSC MANIPULATION DES DISQUES Ne touchez pas au côté de la lecture des disques Ne collez pas de papiers ni de rubans autocollants sur les disques REMARQUE Le fabricant n est pas responsable des dommages pouvant survenir aux disques qui sont lus dans cet appareil DISQUES COMPATIBLE...

Page 33: ...s titres 19 Lecture dans l ordre désiré 20 Fonctionnement MP3 20 Fonctionnement WMA 21 Lecture de fichiers JPEG 22 Sorties audio 22 Réglages du verrouillage parental 23 Personnaliser le réglage des fonctions 24 Guide de dépannage 25 Fiche technique 26 ENDOS DE L APPAREIL 1 SORTIE AUDIONUMÉRIQUE OPTIQUE 2 SORTIE S VIDÉO 3 SORTIE AUDIONUMÉRIQUE OPTIQUE 4 SORTIE VIDÉO À COMPOSANTES BALAYAGE PROGRESSI...

Page 34: ...ECTEUR DVD DVD 22 SAUT VERS L ARRIÈRE SKIP REVERSE 23 SAUT VERS L AVANT SKIP FORWARD 24 VALIDATION D ENTRÉE ENTER 25 ARRÊT STOP 26 TITRE TITLE 27 AFFICHAGE DISPLAY 28 ZOOM 29 VITESSE SPEED 30 RECHERCHE SEARCH 31 TÉLÉ MAGNÉTOSCOPE TV VCR 32 TÉLÉ MAGNÉTOSCOPE TV VCR 33 COMPTEUR HORLOGE COUNTER CLOCK 34 ANGLE 35 SÉLECTION DE L ENTRÉE INPUT SEL 1 MISE EN MARCHE ARRÊT POWER 2 TOUCHES NUMÉRIQUES 3 MAGNÉ...

Page 35: ...SER N insérez pas les piles dans le mauvais sens Il est dangereux de charger chauffer ouvrir ou court circuiter les piles Lorsque vous n utilisez pas la télécommande pendant une longue période de temps retirez les piles Lorsque la portée de fonctionnement est réduite remplacez les piles Si les piles laissent s échapper de l électrolyte essuyez le liquide à l intérieur du compartiment des piles pui...

Page 36: ...E A V du téléviseur à l aide des câbles RCA composites inclus En utilisant les prises de raccord AUDIO VIDÉO vous profitez d une image et d un son de qualité supérieure Raccorder une composante auxiliaire 1 Raccordez la prise de SORTIE A V du caméscope ou la sortie d image à la prise d ENTRÉE A V se trouvant sur le panneau arrière ou le panneau avant du COMBINÉ LECTEUR DVD MAGNÉTOSCOPE à l aide de...

Page 37: ...composantes ne sont pas inclus vous pouvez vous les procurer chez votre marchand électronique local N installez pas des câbles RCA standard à la place de câbles à composantes mêmes s ils se ressemblent les mauvais câbles peuvent endommager le lecteur Raccordez ce lecteur avec les prises Y Pr et Pb si votre téléviseur possède les entrées vidéo à balayage progressif composantes Appuyez sur la touche...

Page 38: ...vitesse désirée SP ou SLP à l aide de la touche de VITESSE SPEED 5 Appuyez sur la touche d ENREGISTREMENT REC 6 Appuyez sur la touche pour effectuer une pause de l enregistrement appuyez de nouveau pour reprendre la lecture Si la pause continue pendant cinq minutes l enregistrement sera annulé automatiquement 7 Pour arrêter l enregistrement appuyez sur la touche Si vous désirez visionner un disque...

Page 39: ...ent désiré Continuez d appuyer sur la touche REC afin d ajouter le temps d enregistrement désiré en incréments de 30 minutes jusqu à un maximum de 4 heures Le combiné lecteur DVD magnétoscope arrête automatiquement d enregistrer lorsque la durée prédéterminée est écoulée 4 Appuyez sur la touche afin d arrêter le mode d enregistrement Enregistrement suite Recherche du compteur à zéro Enregistrement...

Page 40: ...r au mode du magnétoscope et suivez la procédure ci dessous 1 Appuyez sur la touche des RÉGLAGES SETUP de la télécommande 2 Appuyez sur la touche pour mettre en surbrillance et choisir valider l entrée du Réglage des canaux 3 Choisissez le visionnement par le biais de la câblodistribution ou de l antenne Vous devez régler le mode de visionnement pour votre magnétoscope en choisissant soit le mode ...

Page 41: ...a touche VCR pour accéder au mode du magnétoscope 1 Appuyez sur la touche SETUP de la télécommande 2 Appuyez sur la touche pour mettre en surbrillance et sélectionnez Option et appuyez sur la touche ENTER 3 Appuyez sur la touche ENTER jusqu à ce que le système approprié soit sélectionné En fonction ou Hors fonction 4 Appuyez sur la touche SETUP pour quitter RÉGLAGES DU MAGNÉTOSCOPE Mise hors fonct...

Page 42: ...ctionnez la source d entrée vidéo raccordée à votre lecteur combiné 1 Appuyez sur la touche POWER sur le devant de l appareil Appuyez sur la touche DVD sur la télécommande pour accéder au mode DVD 2 Appuyez sur la touche OPEN CLOSE Ceci ouvrira le plateau à disques Assurez vous que la surface de lecture soit vers le bas 3 Déposez un disque sur le plateau des disques 4 Appuyez sur la touche Après a...

Page 43: ... rapide FF Avance rapide Appuyez sur la touche pour reprendre la lecture normale 2x 4x 8x 16x ÉCRAN DU TÉLÉVISEUR 16x 8x 4x 2x Le lecteur combiné peut ne pas vous permettre d entendre le son pendant l inversion ou l avance rapide des disques DVD Le lecteur combiné vous permettra d entendre des sons pendant l inversion ou l avance rapide des disques CD La vitesse peut varier sensiblement d un disqu...

Page 44: ...SONT DIVISÉS EN PISTES VOUS POUVEZ TROUVER N IMPORTE QUEL TITRE CHAPITRE OU N IMPORTE QUELLE PISTE À L AIDE DE CE COMBINÉ LECTEUR DVD MAGNÉTOSCOPE Titre 1 DVD vidéo Titre 2 CD Audio Lecture au ralenti Vous pouvez lire un disque au ralenti Appuyez sur la touche ou lorsque le disque est en mode de pause Appuyez sur la touche afin de reprendre la lecture normale AVIS Pendant la lecture au ralenti vou...

Page 45: ...ENT À l aide de cette fonction vous pourrez visionner ce qui suit à l écran de votre téléviseur Titre en cours Numéro de la piste Durée totale de lecture Appuyez sur la touche DISPLAY pendant la lecture Display Off Title Elapsed TT 01 12 CH 006 039 0 02 20 Chapter Elapsed TT 01 12 CH 006 039 0 03 50 Chapter Remain TT 01 12 CH 006 039 0 10 40 Titre en cours Total du titre Chapitre en cours Total du...

Page 46: ...EGMENT SPÉCIFIQUE 1 Appuyez sur la touche A B RPT au début du segment que vous désirez répéter point A 2 Appuyez de nouveau sur la touche A B RPT à la fin du segment point B Le lecteur combiné retournera automatiquement au point A et débutera la lecture répétée du segment sélectionné A B 3 Appuyez sur la touche A B RPT pour annuler la fonction de répétition A B Le lecteur combiné reprendra la lect...

Page 47: ...S SUR LE DISQUE CHOISIR LES ANGLES DE CAMÉRA LANGUE RÉGLAGES AUDIO CE LECTEUR COMBINÉ VOUS PERMET DE SÉLECTIONNER DIFFÉRENTS ANGLES ET LANGUES COMMENT CHANGER L ANGLE DE LA CAMÉRA Appuyez sur la touche ANGLE pendant la lecture d une scène enregistrée avec plusieurs angles L angle changera à chaque pression de la touche ANGLE AVIS La fonction d angle ne fonctionnera pas sur les disques DVD ne sont ...

Page 48: ...tion sera annulée La lecture programmée peut ne pas fonction selon le disque La lecture programmée supporte la lecture des CD normaux mais n est pas disponible pour les disques MP3 et WMA Pour annuler la programmation que vous venez d entrer en mémoire appuyez sur la touche CLEAR Programme TT XX CH XX 01 TT CA 06 TT CA 02 TT CA 07 TT CA 03 TT CA 08 TT CA 04 TT CA 09 TT CA 05 TT CA 10 TT CA Sortir ...

Page 49: ...ectionner celles que vous désirez écouter Insérez un disque WMA et le lecteur combiné l initialisera lorsque le plateau sera refermé et le répertoire sera affiché dans un menu WMA à l écran de votre téléviseur 2 Appuyez sur la touche puis pour sélectionner et mettre le fichier WMA chanson en surbrillance Appuyez sur ENTER pour débuter la lecture du fichier WMA chanson sélectionné FONCTIONNEMENT WM...

Page 50: ...uyez sur la touche ENTER pour confirmer votre sélection Un total de quinze transitions sont disponibles Utilisez la touche PROGRAM pour effectuer votre sélection ROTATION DE L IMAGE ZOOM mode 9 ÉTENDU DU CENTRE H mode 10 ÉTENDU DU CENTRE V mode 11 COMPRIMÉ VERS LE CENTRE H mode 12 COMPRIMÉ VERS LE CENTRE V mode 13 FENÊTRE H mode 14 FENÊTRE V mode 15 DÉROULANT DES REBORDS VERS LE CENTRE DANS L ORDR...

Page 51: ...enu PREFERENCE PAGE en surbrillance et appuyez sur ENTER pour y accéder 1 Procédez tel que décrit aux étapes 1 à 3 de la section précédente 2 Défilez à travers le menu en appuyant sur la touche ou et mettrez l option PASSWORD en surbrillance et appuyez sur la touche ENTER Appuyez de nouveau sur la touche ENTER pour sélectionner l option CHANGE 3 Entrez l ancien mot de passe 4 Entrez le nouveau mot...

Page 52: ...sélectionner une catégorie à partir du menu de réglages général des réglages des haut parleurs du réglage Dolby Digital des réglages vidéo et des préférences La catégorie sélectionnée vous permet de voir les détails affichés à l écran General Setup Page TV Display PS Angle Mark On OSD Lang ENG SPDIF Output RAW Captions Off Screen Saver On Speaker Setup Page Downmix Normal PS Normal LB Wide On Off ...

Page 53: ...ignement en appuyant sur la touche TRACKING L image de la vidéocassette n est pas visible mais le son est correct Un nettoyage de têtes peut être nécessaire Aucune image ou image de mauvaise qualité Sélectionnez le canal 3 ou 4 sur votre téléviseur Effectuez les réglages de l image sur votre téléviseur Les émissions ne peuvent être visionnées normalement Vérifiez les raccords ANT IN et RF OUT Appu...

Page 54: ... p p 75 Prise RCA Sortie S vidéo Y 1 0 V c à c 75 ohms à synchronisation négative Mini DIN à 4 broches x 1 C 0 286 V c à c 75 ohms Sortie vidéo à composantes Y 1 0 V c à c 75 ohms Pb 0 7 V c à c 75 ohms Pr 0 7 V c à c 75 ohms Sortie audio DVD audio analogique 1 8 0 2 V c à c RMS 10 kohms fiche femelle G D x 1 Sortie audio Magnétoscope audio analogique 5 8 2 dBm Prise RCA Vidéocassette compatible R...

Page 55: ......

Reviews: