3-67
Cisco UCS C240 Server Installation and Service Guide
OL-25761-01z
Chapter 3 Maintaining the Server
Replacing an Internal SD Card
f.
Press
F10
to save your settings and reboot the server.
Step 4
Verify that the TPM is now enabled.
a.
Watch during bootup for the F2 prompt, and then press
F2
to enter BIOS setup.
b.
Log into the BIOS Setup utility with your BIOS Administrator password.
c.
Select the
Advanced
tab.
d.
Select
Trusted Computing
to open the TPM Security Device Configuration screen.
e.
Verify that TPM SUPPORT is Enabled.
Note
If you want to use the Intel Trusted Execution Technology (TXT) feature, it must be enabled in
the server BIOS as described in
Enabling the Intel Trusted Execution Technology (TXT) Feature
.
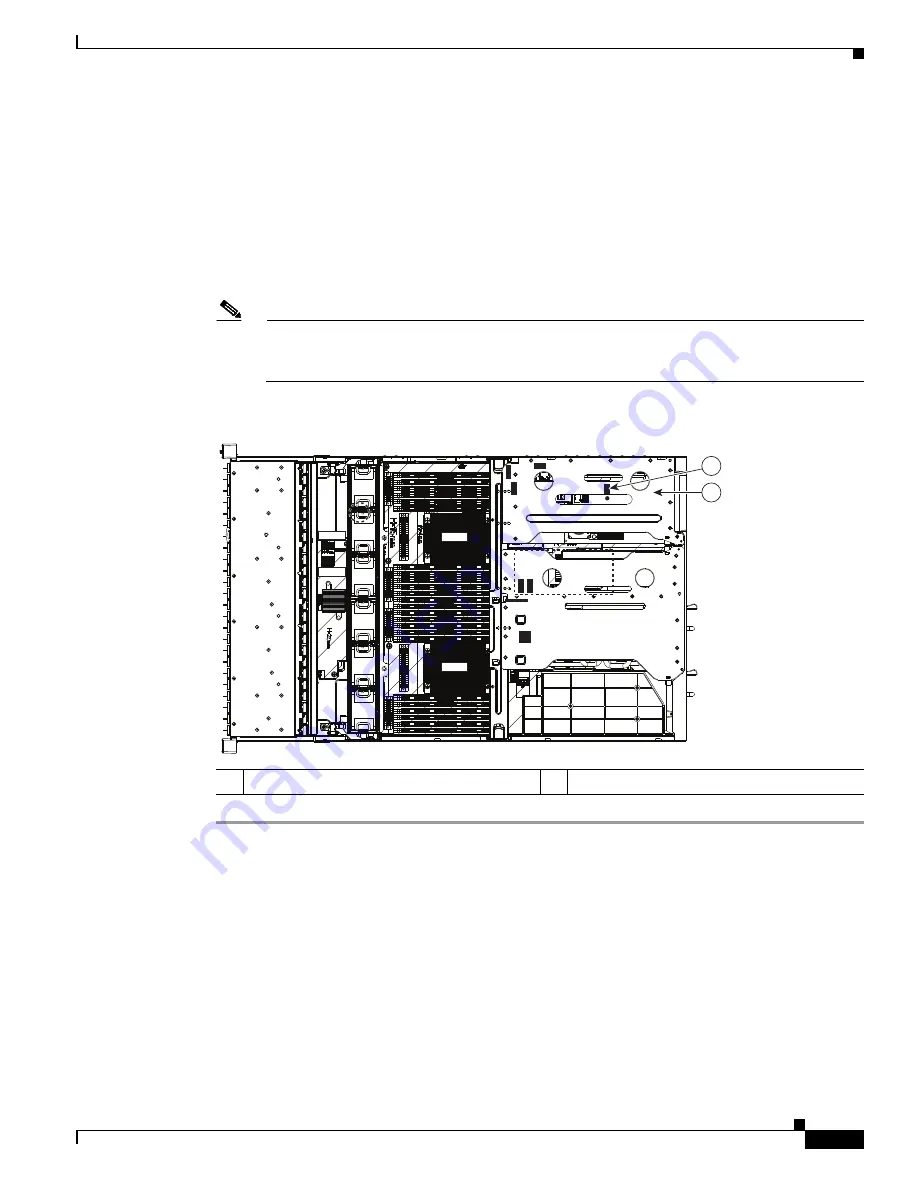
Figure 3-38
TPM Socket Location on Motherboard
Enabling the Intel Trusted Execution Technology (TXT) Feature For the TPM
Intel TXT provides greater protection for information that is used and stored on the business server. A
key aspect of that protection is the provision of an isolated execution environment and associated
sections of memory where operations can be conducted on sensitive data, invisibly to the rest of the
system. Likewise, Intel TXT provides for a sealed portion of storage where sensitive data such as
encryption keys can be kept, helping to shield them from being compromised during an attack by
malicious code.
To enable the TXT feature, follow these steps:
1
TPM socket and screw hole on motherboard
2
PCIe riser 1
SAS2
SAS1
FAN1
FAN2
FAN3
FAN4
FAN5
FAN6
CPU1
CPU2
SAS1
SAS2
Ri
s
er 1
Ri
s
er 2
SAS1
SAS2
1
2
331844


