Preparing for Installation 2-27
Preparing Network Connections
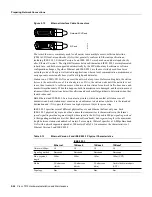
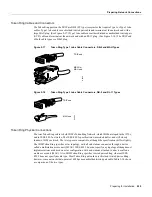
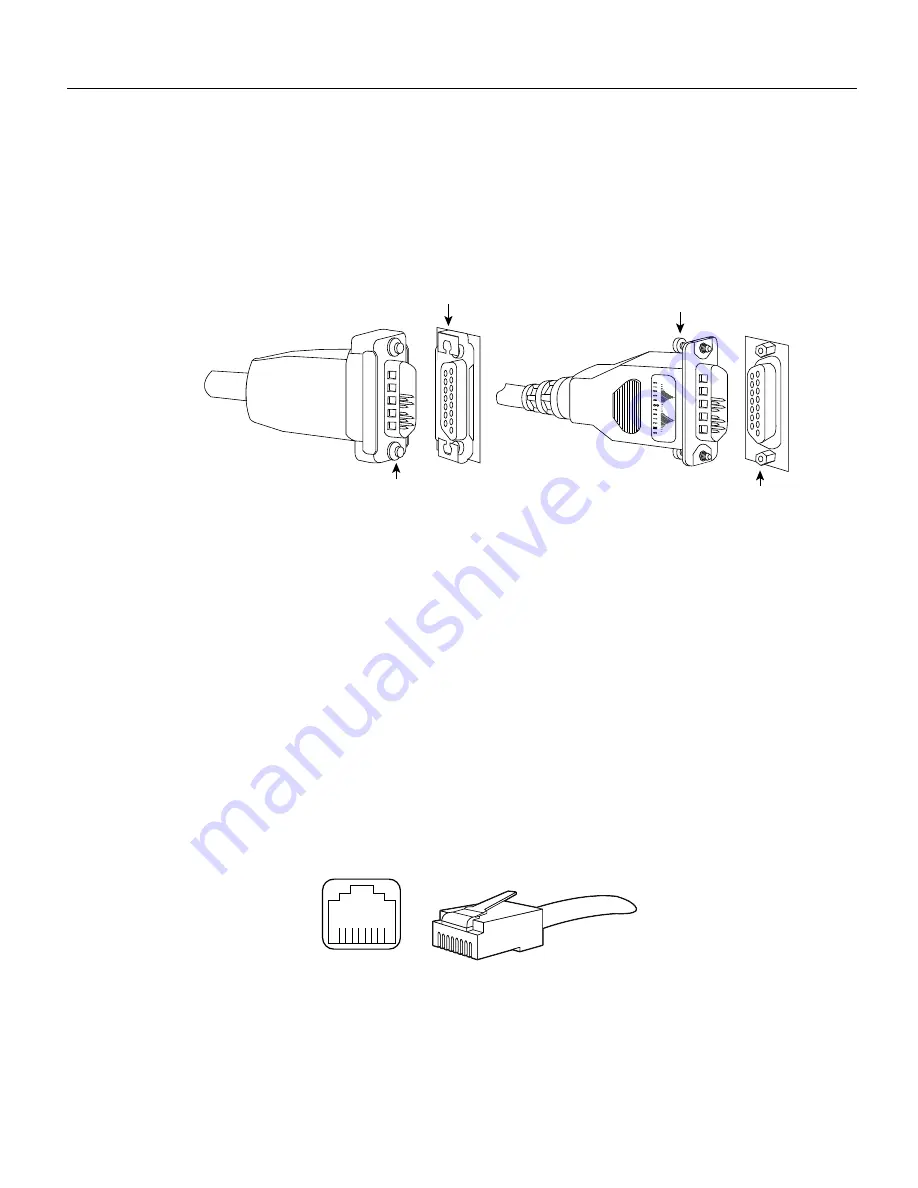
15-pin port, a metal bracket snaps up over two posts on the cable connector to secure it in the port
and provide strain relief. Instead of the posts and sliding bracket, the jackscrew-type lock (shown on
the right in Figure 2-14) uses two thumbscrews or jackscrews, which are usually attached to the
cable connector. When the cable is connected to the 15-pin port, you secure it by screwing the
thumbscrews into the jackscrews adjacent to the connector.
Figure 2-14
Ethernet Connector Locks, Slide-Type and Jackscrew-Type
The slide-type locks are standard on the EIP ports; however, conversion kits are included with each
EIP to replace the slide-type locks with jackscrews. For specific replacement instructions, refer to
the installation document that accompanies the jackscrew kit.
Fast Ethernet Connection Equipment
The two connectors on the FEIP port adapter are a single MII, 40-pin, D-shell type, and a single
RJ-45. You can use either one or the other. Only one connector can be used at one time. The FEIP
can have up to two port adapters installed. Each connection supports IEEE 802.3u interfaces
compliant with the 100BaseX and 100BaseT standards. The RJ-45 connection does not require an
external transceiver; however, the MII connection does, depending on the type of connection you
use.
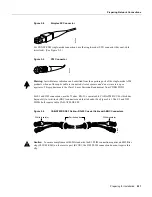
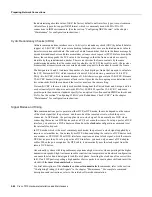
The RJ-45 modular connector (see Figure 2-15) has strain relief functionality incorporated into the
design of its standard plastic connector. Figure 2-15 and Figure 2-16 show the RJ-45 and MII
connectors.
Figure 2-15
RJ-45 Connections—Connector and Plug
Depending on the type of media you use between the MII connection on the port adapter and your
switch or hub, the network side of your 100BaseT transceiver should be appropriately equipped:
with ST-type connectors (for optical fiber), BNC connectors (for 10Base2 coaxial cable), and so
forth. Figure 2-16 shows the pin orientation of the female MII connector on the port adapter.
H1887
Sliding bracket
Post
Jackscrew
Thumbscrew
H2936
8 7 6 5 4 3 2 1
RJ-45 connector
Summary of Contents for TelePresence Server 7010
Page 10: ...x Cisco 7010 Hardware Installation and Maintenence ...
Page 14: ...iv Cisco 7010 Hardware Installation and Maintenance Document Conventions ...
Page 148: ...3 36 Cisco 7010 Hardware Installation and Maintenance Using the Flash Memory Card ...
Page 158: ...4 10 Cisco 7010 Hardware Installation and Maintenance Troubleshooting the Processor Subsystem ...
Page 242: ...5 84 Cisco 7010 Hardware Installation and Maintenance Replacing Internal Components ...
Page 258: ...A 16 Cisco 7010 Hardware Installation and Maintenance MIP Interface Cable Pinouts ...
Page 270: ...B 12 Cisco 7010 Hardware Installation and Maintenance Interface Processor LEDs ...
Page 274: ...C 4 Cisco 7000 Hardware Installation and Maintenance ...
Page 287: ...Index 13 ...

