


6-5
Firepower 7000 and 8000 Series Installation Guide
Chapter 6 Using the LCD Panel on a Firepower Device
Network Configuration Mode
Step 2
Press the right arrow (à) key on the top row to access Network Configuration mode.
The LCD panel displays the following:
IPv4
IPv6
Step 3
Press the right arrow key to select the IP address you want to configure:
•
For IPv4, the LCD panel might display the following:
IPv4 set to DHCP.
Enable Manual?
•
For IPv6, the LCD panel might display the following:
IPv6 Disabled.
Enable Manual?
Step 4
Press the right arrow key to manually configure the network:
•
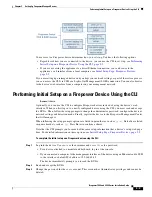
For IPv4, the LCD panel displays the IPv4 address. For example:
IPv4 Address:
- +
194.170.001.001
X
•
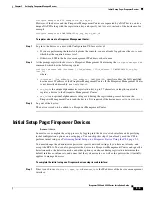
For IPv6, the LCD panel displays a blank IPv6 address. For example:
IPv6 Address:
- +
0000:0000:0000:00 X
The first line on the panel indicates whether you are editing the IPv4 or IPv6 address. The second line
displays the IP address you are editing. A cursor underlines the first digit, and represents the digit you
are editing. The two symbols correspond with the multi-function keys to the right of each row.
Note that the IPv6 address does not fit completely on the display. As you edit each digit and move the
cursor to the right, the IPv6 address scrolls to the right.
Step 5
Edit the digit underlined by the cursor, if needed, and move to the next digit in the IP address:
•
To edit the digit, press the minus (-) or plus (+) keys on the top row to decrease or increase the digit
by one.
•
To move to the next digit in the IP address, press the right arrow key on the bottom row to move the
cursor to the next digit to the right.
With the cursor on the first digit, the LCD panel displays the cancel and right arrow symbols at the end
of the IP address. With the cursor on any other digit, the LCD panel displays the left and right arrow
symbols.
Step 6
When you finish editing the IPv4 or IPv6 address, press the right arrow key again to display the check
mark ( ) key to accept the changes.
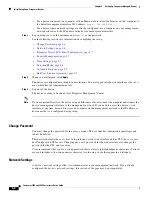
Before you press the right arrow key, the function symbols on the display looks like the following
sample:
IPv4 Address:
- +
194.170.001.001
X
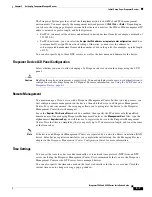
After you press the right arrow key, the function symbols on the display looks like the following sample:
IPv4 Address:
X
194.170.001.001
Step 7
Press the check mark key to accept the changes to the IP address.


