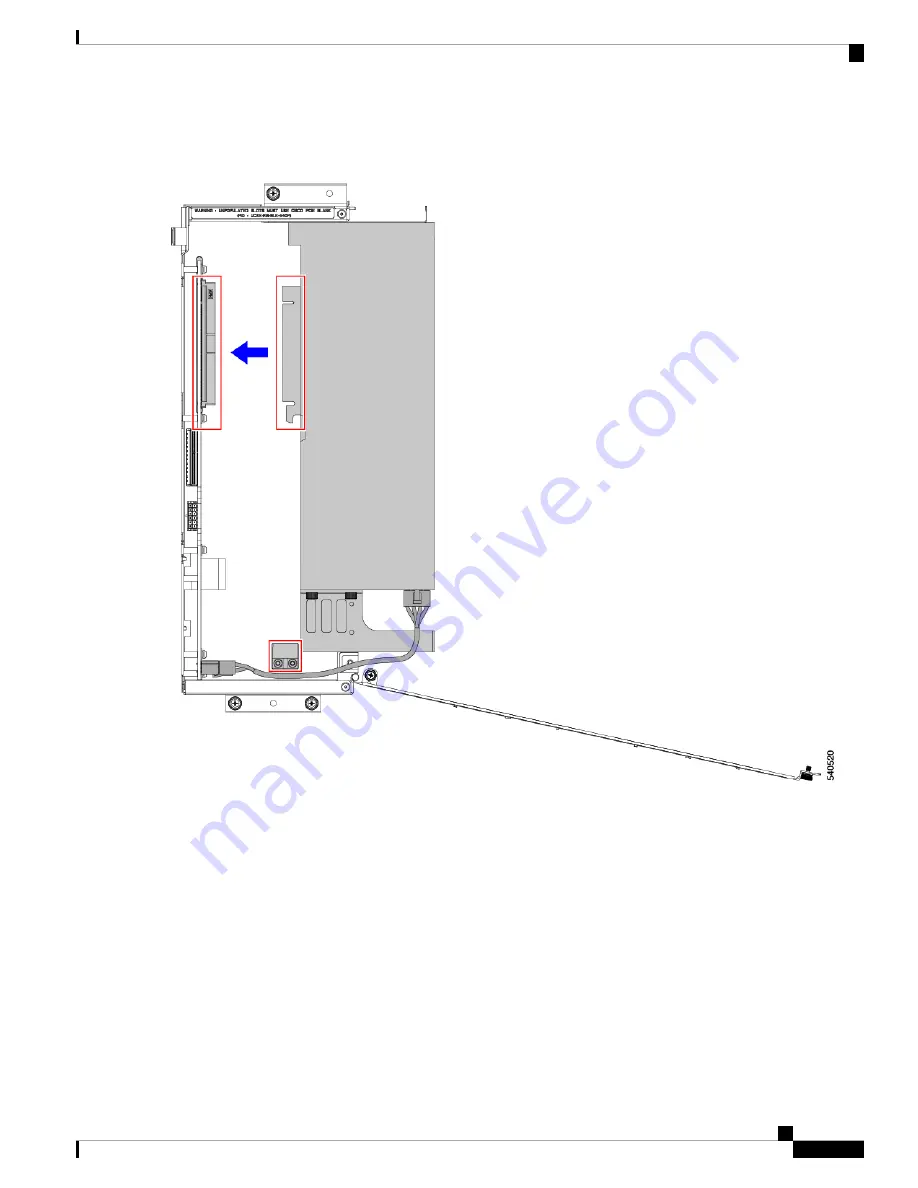
e) Fully seat the FHFL GPU into the socket.
You should feel the GPU snap into place when it is fully seated.
Step 3
Routing the GPU AUX power cable between the retaining bracket and the riser wall as shown in the preceding illustration,
plug the white end of the GPU AUX power cable into the riser cage's socket.
Make sure that the power cable lies on the floor of the riser cage.
Handle the GPU power cable carefully while removing or installing the FHFL GPU. See
Guidelines and Limitations, on page 26
.
Caution
Step 4
When the GPU is seated, close the riser door.
a) Gently push the door inward so that it swings closed in an arc.
Make sure to hold the door level when you close it! Do not push the door down or lift the door up while
closing it. Pushing down or pulling up can apply force to the door's hinge.
Caution
b) Using a #2 Phillips screwdriver, tighten the vertical securing screw on the wall of the riser.
Cisco UCS X440p PCIe Node Installation and Service Guide
31
Servicing the Cisco UCS X440p PCIe Node
Installing a FHFL GPU


