A Division of Cisco Systems, Inc.
®
Model No.
WIRED
with WebView and Power over Ethernet
24-Port 10/100 + 2-Port Gigabit Switch
SRW224P
User Guide
Page 1: ...A Division of Cisco Systems Inc Model No WIRED with WebView and Power over Ethernet 24 Port 10 100 2 Port Gigabit Switch SRW224P User Guide ...
Page 2: ... for technical terms that are presented like this Also each figure diagram screenshot or other image is provided with a figure number and description like this Figure numbers and descriptions can also be found in the List of Figures section in the Table of Contents This exclamation point means there is a caution or warning and is something that could damage your property or the Switch This checkma...
Page 3: ... 5 Chapter 3 Connecting the Switch 6 Overview 6 Pre Installation Considerations 7 Hardware Installation 8 Placement Options 8 Uplinking the Switch 9 Chapter 4 Configuration using the Console Interface 10 Overview 10 Configuring the Switch through the Console Interface 11 Chapter 5 Configuring the Switch through the Web Utility 24 Overview 24 System Information 25 IP Config 31 Switch Config 33 QoS ...
Page 4: ...nd Gigabit Ethernet 83 About Fast Ethernet 83 About Gigabit Ethernet 83 Appendix B Cabling 84 Overview 84 Twisted Pair Cabling 84 Fiber Optic Cabling 84 Appendix C Glossary 85 Appendix D Specifications 88 Appendix E Warranty Information 89 Appendix F Regulatory Information 90 Appendix G Contact Information 96 ...
Page 5: ... 4 COM1 Properties 11 Figure 4 5 Login 11 Figure 4 6 Switch Main Menu 12 Figure 4 7 System Configuration Menu 12 Figure 4 8 System Information 13 Figure 4 9 Versions 13 Figure 4 10 General Information 13 Figure 4 11 Serial Port Configuration 14 Figure 4 12 CPU Performance 14 Figure 4 13 User and Password Settings 15 Figure 4 14 IP Configuration 16 Figure 4 15 IP Address Configuration Screen 16 Fig...
Page 6: ...en 28 Figure 5 9 Sys Info Time Synchronization Screen 29 Figure 5 10 Sys Info CPU Performance 30 Figure 5 11 Sys Info Logout 30 Figure 5 12 IP Config IP Address 31 Figure 5 13 Switch Config Port Configuration 33 Figure 5 14 Edit Port Configuration Screen 34 Figure 5 15 Switch Config VLAN 36 Figure 5 16 Adding Editing VLAN Screen 37 Figure 5 17 Switch Config VLAN Port 38 Figure 5 18 Switch Config L...
Page 7: ... ACL 57 Figure 5 41 ACL Conf Adding Editing Extended ACL 57 Figure 5 42 ACL Conf Adding Editing MAC ACL 59 Figure 5 43 Security ACL Port Binding 60 Figure 5 44 Security 802 1x Users 61 Figure 5 45 Security 802 1x Port Conf 62 Figure 5 46 Security RADIUS Server 62 Figure 5 47 Security Port Security 63 Figure 5 48 Security Storm Control 63 Figure 5 49 Security HTTPS Settings 64 Figure 5 50 Security ...
Page 8: ...7 Figure 5 65 IGMP IGMP Router Info 78 Figure 5 66 IGMP IGMP Router Conf 78 Figure 5 67 IGMP IP Multicast Reg Table 79 Figure 5 68 IGMP IGMP Member Conf 79 Figure 5 69 Maintenance Reset 80 Figure 5 70 Maintenance File Download 80 Figure 5 71 Maintenance File Upload 81 Figure 5 72 Maintenance Restore Defaults 81 Figure 5 73 Maintenance Save Config 81 Figure 5 74 Maintenance Integrated Cable Test 82...
Page 9: ... need for an additional power source and cutting down on the amount of cables attached to each device Once configured to supply power an automatic detection process is initialized by the Switch that is authenticated by a PoE signature from the connected device Detection and authentication prevent damage to non PoE devices The Switch features WebView monitoring and configuration via your web browse...
Page 10: ...ing the Switch Chapter 5 Configuring the Switch through the Web Utility This chapter shows you how to configure the Switch using the Web Utility Appendix A Fast Ethernet and Gigabit Ethernet This appendix describes the various types of ethernet Appendix B Cabling This appendix discusses different types of cabling Appendix C Glossary This appendix gives a brief glossary of terms frequently used in ...
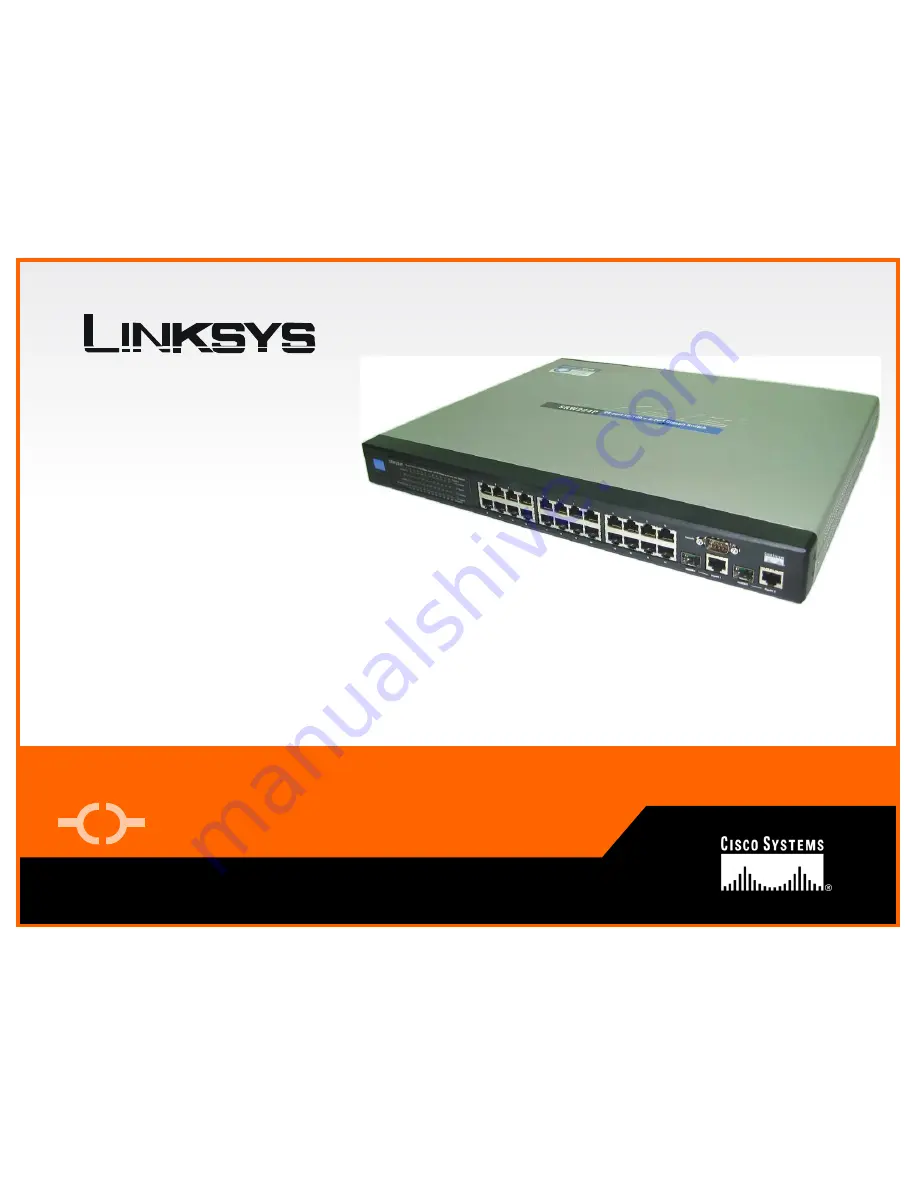
Page 11: ...gress but when this blinks amber that indicates that the POST has failed Link Act A green LED indicates a functional network link through the corresponding port 1 through 26 with an attached device A blinking LED indicates that the Switch is actively sending or receiving data over that port PoE A green LED indicates a powered device is connected to the corresponding port 1 through 24 Speed A green...
Page 12: ...IC ports If a Gigabit mini GBIC port is being used the associated RJ 45 port cannot be used They link to high speed network peripheral system or clients at speeds of up to 1000Mbps Console The Console port is where you connect a serial cable from a PC s serial port The Back Panel The power port is located on the back panel Power The Power port is where you will connect the power cord The Side Pane...
Page 13: ... device using the two data wire pairs in the twisted pair cable Each port can provide up to 15 4 W of power at the standard 48 VDC voltage To connect a device to a port you will need to use a network cable You will need to use Category 5 or better cable For more information on twisted pair cabling refer to Appendix B Cabling The Gigabit Expansion Ports The Switch is equipped with two Gigabit Ether...
Page 14: ...rk configuration When you connect your network devices make sure you don t exceed the maximum cabling distances which are listed in the following table Maximum Cabling Distances A hub refers to any type of 100Mbps hub A 10Mbps hub connected to another 10Mbps hub can span up to 100 meters 328 feet From To Maximum Distance Switch Switch or Hub 100 meters 328 feet Hub Hub 5 meters 16 4 feet Switch or...
Page 15: ...port s potential data throughput If you will be using the Switch in full duplex mode the maximum cable length using Category 5 cable is 328 feet 100 meters Positioning the Switch Before you choose a location for the Switch observe the following guidelines 1 Make sure that the Switch is accessible and that the cables can be connected easily 2 Keep cabling away from sources of electrical noise power...
Page 16: ...he supplied power cord to the Switch s power port and plug the other end into an electrical outlet When connecting power always use a surge protector 8 Power on the devices connected to the Switch Each active port s corresponding LED will light up on the Switch Placement Options There are two ways to physically install the Switch either set the Switch on its four rubber feet for desktop placement ...
Page 17: ...able screws to securely attach the brackets to any standard 19 inch rack 6 Connect the Switch to network devices according to the Hardware Installation instructions above Uplinking the Switch To uplink the Switch connect one end of a Cat5 or better cable into one of the 24 10 100 ports and then connect the other end of the cable into the peripheral device s uplink port MDI MDIX will automatically ...
Page 18: ... HyperTerminal Application 1 Click the Start button Select Accessories and then select Communications HyperTerminal should be one of the options listed in the next menu Select HyperTerminal to run the utility program 2 Enter a name for this connection In the example shown the name of connection is SRW224P Select an icon for the application Click OK 3 Select a port to communicate with the Switch Se...
Page 19: ...onsole interface screens consist of a series of menus Each menu has several options which are listed vertically A highlight in each menu lets you select the option you wish to choose pressing the Enter key activates the highlighted option To navigate through the Console Interface use the Up Arrow or Down Arrow keys to move up or down or use the number keys to select the respective option for examp...
Page 20: ...displays six menu choices System Configuration Menu Port Status Port Configuration PoE Configuration Help and Logout System Configuration Menu System Configuration Menu displays 1 System Configuration 2 Management Settings 3 User and Password Settings 4 IP Configuration 5 File Management 6 Restore System Default Setting 7 Reboot System 8 Back to Main Menu Figure 4 7 System Configuration Menu Figur...
Page 21: ...are Version Boot Version This file runs when the Switch is turned on It loads the operating system for the Switch Software Version This file contains the programming code that runs the Switch Loader Version This file loads the software from storage memory to main memory Hardware Version The current hardware setup of the Switch General Information The General Information screen displays the System ...
Page 22: ...figuration and CPU Performance Serial Port Configuration The Serial Port Configuration screen displays the current setting for the baud rate The baud rate can be changed by selecting edit then using the spacebar to toggle through the different baud rates Use the save action to set the new baud rate CPU Performance The CPU performance screen displays the percentage of processor power being used by ...
Page 23: ...he administrator account To add a new user use the arrow keys to select edit then enter the username of the new account and assign a password to the account The password must be re entered into the Again Password column to cofirm the password To save the new user account information use the arrow key to select save and press enter Figure 4 13 User and Password Settings NOTE While only five account...
Page 24: ...management access to the Switch By default all ports on the Switch are members of VLAN 1 so a management station can be connected to any port on the Switch However if other VLANs are configured and you change the Management VLAN you may lose management access to the Switch In this case you should reconnect the management station to a port that is a member of the Management VLAN IP Mode Choose to h...
Page 25: ...Switch s SNMP settings SNMP Server Enable or Disable the SNMP function for the Switch SNMP Port Set the TCP port that will be used for sending and receiving SNMP packets Network Configuration The Network Configuration Screen allows you to use PING to test network connectivity Enter the IP address of the interface or device you wish to PING and select the Execute action Figure 4 17 SNMP Figure 4 18...
Page 26: ... the file is on a TFTP server Image if the file is a local image file or startup config if the file is a local configuration file Destination File Specify where the file is to be transferred Select TFTP if the file is to be uploaded to a TFTP server Image if the file is to be downloaded as a image file startup config if the file is a configuration file or boot if the file is a boot file File Name ...
Page 27: ...itch back to the factory default settings select Restore System Default Setting and press Enter A confirmation message will appear stating that All User Configuration data will be reset to Default Continue y n Press the y key to continue or the n key to cancel the action Reboot System If you would like to reboot the Switch select Reboot System and press Enter Figure 4 20 Restore System Default Set...
Page 28: ...nterface Configuring the Switch through the Console Interface 24 Port 10 100 2 Port Gigabit Switch with Webview and Power over Ethernet Back to Main Menu Select Back to Main Menu if you want to return to the main menu Figure 4 22 Back to Main Menu ...
Page 29: ...xcessive collisions and then enable it again once the problem has been resolved You may also disable an interface for security reasons Auto negotiation Port Capabilities Allows auto negotiation to be enabled disabled When auto negotiation is enabled you need to specify the capabilities to be advertised When auto negotiation is disabled you can force the settings for speed mode and flow control The...
Page 30: ...ected to a port its power requirements are detected by the Switch before power is supplied If the power required by a device exceeds the power budget of the port or the whole Switch power is not supplied Port PoE Status The Power Port Status screen allows you to view the current PoE settings for each port on the Switch Ports can be set to one of three power priority levels critical high or low To ...
Page 31: ...t Configuration screen allows you to set the PoE settings for each port Select the edit action and use the left right and up down arrows to select the attribute you would like to set You can set the Admin Status the Priority and the Power Allocation Use the Save action to save the new settings Logout Select Logout to log out of the console configuration utility Figure 4 28 Power Port Configuration...
Page 32: ...t a new password later from the Security tab s System Password screen The first screen that appears displays the System Description screen for the Sys Info tab There are 14 tabs that run across the top of the screen Sys Info IP Conf Switch Conf QoS DiffServ Security SNTP Statistics PoE Spanning Tree SNMP IGMP Maintenance and Help Each tab contains further screens described in this chapter to help ...
Page 33: ...o the switch system up to 255 characters long System Location Assign a name to the system location up to 255 characters long System Contact Enter the name of the administrator responsible for the system up to 255 characters long System up time Length of time the management agent has been up IP Address The IP Address assigned to the Switch is displayed The default IP address is 192 168 1 254 Base M...
Page 34: ...rocess protocol encapsulation fields To use jumbo frames both the source and destination end nodes such as a computer or server must support this feature Also when the connection is operating at full duplex all switches in the network between the two end nodes must be able to accept the extended frame size And for half duplex connections all devices in the collision domain would need to support ju...
Page 35: ...iscarded Set the Aging Interval by entering the number of seconds into the text field provided Click Submit to save the changes To query a Dynamic IP address click on the Dynamic address icon To query a Static IP address click on the Static address icon Address Table Settings Switches store the addresses for all known devices This information is used to pass traffic directly between the inbound an...
Page 36: ...arned Current Dynamic Address Table Lists all the dynamic addresses Specify the search type that is check the Interface MAC Address and or VLAN checkbox select the method of sorting the displayed addresses and then click Query Static address A static address can be assigned to a specific interface on this switch Static addresses are bound to the assigned interface and will not be moved When a stat...
Page 37: ...ed sequence The Time Synchronization screen displays the following information SNTP Client Configures the switch to operate as an SNTP client This requires at least one time server to be specified in the SNTP Server field Default Disabled Current Time Displays the current time Name Assign a name for the time setting Hours Set the hours for the clock Minutes Set the minutes for the clock Direction ...
Page 38: ... over Ethernet CPU Performance The CPU Performance screen displays the current percentage of processor power being used by the switch Logout To logout click the Logout hyper link Then click OK to proceed or Cancel to cancel Then click Yes to close the window or No to cancel Figure 5 10 Sys Info CPU Performance Figure 5 11 Sys Info Logout ...
Page 39: ...l BOOTP If DHCP BOOTP is enabled IP will not function until a reply has been received from the server Requests will be broadcast periodically by the switch for an IP address DHCP BOOTP values can include the IP address subnet mask and default gateway Host Name Specifies the name of the switch Enter the name into the textfield provided up to 255 characters long Default None IP Address Address of th...
Page 40: ...atic will allow you to enter a static IP address subnet mask and default gateway using the text field provided Selecting BOOTP or DHCP disables these text boxes and auto assigns an IP address Enter a name for each IP address using the textfield provided and the Current Management Interface using the drop down menu box Click submit to save the changes Click Restart DHCP to assign a new IP address u...
Page 41: ...control should also be enabled to control network traffic during periods of congestion and prevent the loss of packets when port buffer thresholds are exceeded The switch supports flow control based on the IEEE 802 3x standard This screen displays the current connection status including link state speed duplex mode flow control and auto negotiation The Port Configuration screen displays the follow...
Page 42: ...h Name Allows you to label an interface Range 1 64 characters Admin Allows you to manually disable an interface You can disable an interface due to abnormal behavior e g excessive collisions and then enable it again once the problem has been resolved You may also disable an interface for security reasons Speed Duplex Allows you to manually set the port speed and duplex mode i e with auto negotiati...
Page 43: ...e frame loss by blocking traffic from end stations or segments connected directly to the switch when its buffers fill When enabled back pressure is used for half duplex operation and IEEE 802 3x for full duplex operation Avoid using flow control on a port connected to a hub unless it is actually required to solve a problem Otherwise back pressure jamming signals may degrade overall performance for...
Page 44: ...d VLAN Lists all the current VLAN groups created for this system Up to 128 VLAN groups can be defined VLAN 1 is the default untagged VLAN Up Time at Creation This displays the amount of time since this VLAN was created that is System Up Time Status Shows if this VLAN is enabled or disabled VLAN ID ID of configured VLAN 1 4094 no leading zeroes VLAN Name Name of the VLAN 1 to 32 characters VLAN typ...
Page 45: ... ports or lags Click Submit Membership Type Select VLAN membership for each interface by marking the appropriate radio button for a port or LAG Tagged Interface is a member of the VLAN All packets transmitted by the port will be tagged that is carry a tag and therefore carry VLAN or CoS information Untagged Interface is a member of the VLAN All packets transmitted by the port will be untagged that...
Page 46: ...r VLANs for which the ingress port is not a member Default Disabled Ingress filtering only affects tagged frames If ingress filtering is disabled and a port receives frames tagged for VLANs for which it is not a member these frames will be flooded to all other ports except for those VLANs explicitly forbidden on this port If ingress filtering is enabled and a port receives frames tagged for VLANs ...
Page 47: ...hows you the label assigned to an interface Range 1 64 characters Type Indicates the port type 100BASE TX 1000BASE T or SFP Admin Status Shows if the interface is enabled or disabled Oper Status Shows if the link is Up or Down Speed Duplex Status Shows the current speed and duplex mode Auto or fixed choice Flow Control Status Indicates the type of flow control currently in use IEEE 802 3x Back Pre...
Page 48: ...pt all frame types including tagged or untagged frames or only tagged frames When set to receive all frame types any received frames that are untagged are assigned to the default VLAN Options All Tagged Default All Mode Indicates VLAN membership mode for an interface Trunk Specifies a port as an end point for a VLAN trunk A trunk is a direct link between two switches so the port transmits tagged f...
Page 49: ...ay be dropped from the monitor port All mirror sessions have to share the same destination port When mirroring port traffic the target port must be included in the same VLAN as the source port Set the following attributes for port mirroring using the Port Mirroring screen Mirror Sessions Displays a list of current mirror sessions Source Port The port whose traffic will be monitored Type Allows you...
Page 50: ... local side of an aggregate link that is the ports on this switch Set Port Partner This menu sets the remote side of an aggregate link that is the ports on the attached device The command attributes have the same meaning as those used for the port actor However configuring LACP settings for the partner only applies to its administrative state not its operational state and will only take effect the...
Page 51: ...h the Web Utility QoS 24 Port 10 100 2 Port Gigabit Switch with Webview and Power over Ethernet QoS The QoS tab includes links to the following screens CoS Settings Queue Settings CoS to Queue IP Precedence DSCP IP Port ACL Priority Rate Limit ...
Page 52: ...standard for various network applications are shown in the following table However you can map the priority levels to the switch s output queues in any way that benefits application traffic for your own network Priority CoS value Range 0 7 where 7 is the highest priority Traffic Type Output queue buffer Range 0 3 where 3 is the highest CoS priority queue Modify the default priority for any interfa...
Page 53: ...he switch services each queue before moving on to the next queue This prevents the head of line blocking that can occur with strict priority queuing WRR Weighted Round Robin shares bandwidth at the egress ports by using scheduling weights 1 2 4 6 for queues 0 through 3 respectively Strict Services the egress queues in sequential order transmitting all traffic in the higher priority queues before s...
Page 54: ...mation may be contained in the traffic this switch maps priority values to the output queues in the following manner The precedence for priority mapping is IP Port Priority IP Precedence or DSCP Priority and then Default Port Priority IP Precedence and DSCP Priority cannot both be enabled Enabling one of these priority types will automatically disable the other The switch allows you to choose betw...
Page 55: ...t Priority Table Shows the IP port to CoS map IP Port Number TCP UDP Set a new IP port number such as HTTP 80 FTP 21 Telnet 23 and POP3 110 Class of Service Value Sets a CoS value for a new IP port Note that 0 represents low priority and 7 represent high priority Set IP Port Priority Status to Enabled by checking the IP Port Priority Global Status checkbox Enter the port number for a network appli...
Page 56: ...the matching packet to an output queue it is not written to the packet itself Port Port identifier Name Name of ACL Type Type of ACL IP or MAC CoS Priority CoS value used for packets matching an IP ACL rule Range 0 7 ACL CoS Priority Mapping Displays the configured information Select an ACL rule specify a CoS priority then click Add To remove an ACL CoS priority mapping click the Remove button in ...
Page 57: ...obal setting that applies to Fast Ethernet or Gigabit Ethernet interfaces Use the drop down menus to change the rate limit for fast ethernet and or gigabit granularity click submit Set the Input Rate Limit Status or Output Rate Limit Status then set the rate limit for the individual interfaces and click Apply To configure input rate limit for each port or lag click Port Conf or Trunk Conf in the I...
Page 58: ... different kinds of forwarding All switches or routers that access the Internet rely on class information to provide the same forwarding treatment to packets in the same class Class information can be assigned by end hosts or switches or routers along the path Priority can then be assigned based on a general policy or a detailed examination of the packet However note that detailed examination of p...
Page 59: ...pens Match Class Settings for the selected class entry Modify the criteria used to classify ingress traffic Add Class Opens Class Configuration Enter a class name and description and click Add to open Match Class Settings Enter the criteria used to classify ingress traffic Remove Class Removes the selected class Click Add Class to create a new class or select a class and click Edit Rules to change...
Page 60: ...lass Name Name of the class map Range 1 32 characters Type Only one match command is permitted per class map so the match any field refers to the criteria specified by the lone match command Description A brief description of a class map Range 1 256 characters Add Adds the specified class Back Returns to previous screen without making any changes Enter the class name and description into the textf...
Page 61: ...er the criteria used to service ingress traffic Remove Policy Deletes a specified policy Click Add Policy to create a new policy or select a policy and click Edit Classes to change the policy rules of the selected policy or Remove Policy to delete the policy Adding a Policy Policy Name Name of policy map Range 1 32 characters Description A brief description of a policy map Range 1 256 characters A...
Page 62: ...S 0 7 DSCP 0 63 IP Precedence 0 7 Meter Check this to define the maximum throughput burst rate and the action that results from a policy violation Rate kbps Rate in kilobits per second Range 1 100000 kbps or maximum port speed whichever is lower Burst byte Burst in bytes Range 64 1522 Exceed Specifies whether the traffic that exceeds the specified rate or burst will be dropped or the DSCP service ...
Page 63: ... Switch with Webview and Power over Ethernet DiffServ Service Policy This function binds a policy map to the ingress queue of a particular interface Check Enabled and choose a Policy Map for a port from the drop down menu Click Submit to save the changes Figure 5 38 DiffServ Diffserv Service Policy ...
Page 64: ...ACL provide packet filtering for IP frames based on address protocol Layer 4 protocol port number or TCP control code or any frames based on MAC address or Ethernet type To filter incoming packets first create an access list add the required rules specify a mask to modify the precedence in which the rules are checked and then bind the list to a specific port Enter an ACL name in the Name field wit...
Page 65: ...k for an address range Set any other required criteria such as service type protocol type or TCP control code Then click Add Action An ACL can contain any combination of permit or deny rules Source Address Destination Type Specifies the source or destination IP address Use Any to include all possible addresses Host to specify a specific host address in the Address field or IP to specify a range of...
Page 66: ... header Range 0 63 Control Code Bitmask 0 63 Decimal number representing the code bits to match The control bitmask is a decimal number for an equivalent binary bit mask that is applied to the control code Enter a decimal number where the equivalent binary bit 1 means to match a bit and 0 means to ignore a bit The following bits may be specified 1 fin Finish 2 syn Synchronize 4 rst Reset 8 psh Pus...
Page 67: ...ask fields Options Any Host MAC Default Any Source Destination MAC Address Source or destination MAC address Source Destination Bitmask Hexidecimal mask for source or destination MAC address VID VLAN ID Range 1 4094 Ethernet Type This option can only be used to filter Ethernet II formatted packets Range 0 65535 A detailed listing of Ethernet protocol types can be found in RFC 1060 A few of the mor...
Page 68: ...r SFP module Range 1 26 IP Specifies the IP Access List to enable for a port MAC Specifies the MAC Access List to enable globally IN ACL for ingress packets ACL Name Name of the ACL Click Submit to save the changes 802 1xUsers Network switches can provide open and easy access to network resources by simply attaching a client PC Although this automatic configuration and access is a desirable featur...
Page 69: ...esponds to the appropriate method with its credentials such as a password or certificate The RADIUS server verifies the client credentials and responds with an accept or reject packet If authentication is successful the switch allows the client to access the network Otherwise network access is denied and the port remains blocked The operation of 802 1X on the switch requires the following The swit...
Page 70: ... period during an authentication session that the switch waits before re transmitting an EAP packet Range 1 65535 Default 30 seconds Supplicant This Indicates the MAC address of a connected client Radius Server Remote Authentication Dial in User Service RADIUS and Terminal Access Controller Access Control System Plus TACACS are logon authentication protocols that use software running on a central ...
Page 71: ...sses to allow on the port and then let the switch dynamically learn the source MAC address VLAN pair for frames received on the port When the port has reached the maximum number of MAC addresses the selected port will stop learning The MAC addresses already in the address table will be retained and will not age out Any other device that attempts to use the port will be prevented from accessing the...
Page 72: ...er has only read access for most configuration parameters However a Privileged user has write access for all parameters governing the switch The default Normal user name is guest with the password guest The default Privileged user name is admin with no password You should therefore assign a new password for the admin user account or create new Privileged user accounts and store them in a safe plac...
Page 73: ...o set its internal clock based on periodic updates from a time server SNTP or NTP Maintaining an accurate time on the switch enables the system log to record meaningful dates and times for event entries To receive updates the switch sends unicast packets to the SNTP server Set the Polling Interval using the text field provided Set the IP address of up to three SNTP servers using the text fields pr...
Page 74: ... well as a detailed breakdown of traffic based on the RMON MIB Interfaces and Ethernet like statistics display errors on the traffic passing through each port The Statistics tab includes links to the following screens Interface Statistics Etherlike Statistics RMON Statistics Interface Statistics To view the interface statistics for a port or lag select the required interface from the drop down men...
Page 75: ...ke Statistics To view the Etherlike statistics for a port or lag select the required interface from the drop down menu and click Refresh RMON Statistics To view the RMON statistics for a port or lag select the required interface from the drop down menu and click Refresh Figure 5 53 Statistics Etherlike Statistics Figure 5 54 Statistics RMON Statistics ...
Page 76: ...nnected device Detection and authentication prevent damage to non 802 3af compliant devices The PoE tab includes links to the following screens Power Config Power Port Config Power Port Status Power Status Power Config A maximum PoE power budget for the switch power available to all switch ports can be defined so that power can be centrally managed preventing overload conditions at the power sourc...
Page 77: ...ains off If the power demand from devices connected to switch ports exceeds the power budget set for the switch the port power priority settings are used to control the supplied power Mark the Enabled checkbox to enable PoE power on selected ports set the priority using the drop down menu provided and set the power allocation for each port Click Submit to save the changes Power Port Status Use Pow...
Page 78: ...ity PoE 24 Port 10 100 2 Port Gigabit Switch with Webview and Power over Ethernet Power Status This screen displays the following information Maximum Available Power System Operation Status Mainpower Consumption Software Version Figure 5 58 PoE Power Status ...
Page 79: ...kup links between switches bridges or routers This allows the switch to interact with other bridging devices that is an STA compliant switch bridge or router in your network to ensure that only one route exists between any two stations on the network and provide backup links which automatically take over when a primary link goes down The Spanning Tree tab includes links to the following screens In...
Page 80: ...ssage before attempting to reconfigure All device ports except for designated ports should receive configuration messages at regular intervals Any port that ages out STA information provided in the last configuration message becomes the designated port for the attached LAN If it is a root port a new root port is selected from among the device ports attached to the network References to ports in th...
Page 81: ...e the global settings for STA using this screen Global settings apply to the entire switch Modify the required attributes for STA Click Submit to save the changes Port LAG Info The Port Information and LAG Information screens display the current status of ports and lags in the Spanning Tree Figure 5 61 Spanning Tree Port LAG Info Figure 5 60 Spanning Tree Configuration ...
Page 82: ...nd edge port You may use a different priority or path cost for ports of the same media type to indicate the preferred path link type to indicate a point to point connection or shared media connection and edge port to indicate if the attached device can support fast forwarding References to ports in this section means interfaces which includes both ports and lags Modify the required attributes Clic...
Page 83: ...gement platforms such as HP OpenView You can specify up to five management stations that will receive authentication failure messages and other notification messages from the switch The SNMP tab displays the SNMP Config screen SNMP Config Add up to five new community strings select the access rights from the Access Mode drop down menu These strings act as passwords They are case sensitive and can ...
Page 84: ...is elected querier and assumes the role of querying the LAN for group members It then propagates the service requests on to any adjacent multicast switch router to ensure that it will continue to receive the multicast service Based on the group membership information learned from IGMP a router switch can determine which if any multicast traffic needs to be forwarded to each of its ports At Layer 3...
Page 85: ...efore the switch takes action to drop a client from the multicast group Range 2 10 Default 2 IGMP Query Interval Sets the frequency at which the switch sends IGMP host query messages Range 60 125 seconds Default 125 IGMP Report Delay Sets the time between receiving an IGMP Report for an IP multicast address on a port before the switch sends an IGMP Query out of that port and removes the entry from...
Page 86: ... neighboring multicast router switch for each VLAN ID IGMP Router Conf Depending on your network connections IGMP snooping may not always be able to locate the IGMP querier Therefore if the IGMP querier is a known multicast router switch connected over the network to an interface port or lag on the Switch you can manually configure the interface and a specified VLAN to join all the current multica...
Page 87: ...r Conf Multicast filtering can be dynamically configured using IGMP Snooping and IGMP Query messages For certain applications that require tighter control you may need to statically configure a multicast service on the switch First add all the ports attached to participating hosts to a common VLAN and then assign the multicast service to that VLAN group Specify the interface attached to a multicas...
Page 88: ...ck Yes to restart the switch To cancel the restart click No or Cancel then click OK File Download Downloads switch firmware or configuration files from a TFTP server You must specify the file type to transfer along with TFTP server IP address and file names as required Select Firmware of Configuration download using the radio buttons Enter the IP address of the TFTP server enter the file name of t...
Page 89: ... downloaded to the switch to restore operation To Upload a file from the switch select Firmware of Configuration upload using the radio buttons Enter the IP address of the TFTP server enter the destination file name and click Apply Restore Defaults To restore default settings click the Restore Company Defaults link Then click OK to proceed or Cancel to cancel Save Config To save the current config...
Page 90: ...ection quality of cables click on the test icon for the port The following screen will display the last test results Click the Submit button to start the test Test results are shown on the Integrated Cable Test Screen Help The Help tab includes links to the screens shown in the web utility and how to navigate them Figure 5 74 Maintenance Integrated Cable Test Figure 5 75 Help ...
Page 91: ...orts high speed signaling and is relatively inexpensive Because it uses four wires for data transmission and the same packet format packet length error control and management information as 10BaseT 100BaseTX can be made to communicate with slower 10BaseT equipment when routed through a switch 5 This backwards compatibility is one of 100BaseTX s major advantages over other forms of Fast Ethernet it...
Page 92: ... goes into a wall jack first is facing away from you Face the clip down so that the copper side faces up the springy clip will now be parallel to the floor When looking down on the copper side wire 1 will be on the far left Fiber Optic Cabling Fiber optic cabling is made from flexible optically efficient strands of glass and coated with a layer of rubber tubing fiber optics use photons of light in...
Page 93: ... Default Gateway A device that forwards Internet traffic from your local area network DHCP Dynamic Host Configuration Protocol A networking protocol that allows administrators to assign temporary IP addresses to network computers by leasing an IP address to a user for a limited amount of time instead of assigning permanent IP addresses DNS Domain Name Server The IP address of your ISP s server whi...
Page 94: ...transmission between users Packet A unit of data sent over a network Port The connection point on a computer or networking device used for plugging in cables or adapters Power over Ethernet PoE A technology enabling an Ethernet network cable to deliver both data and power PPPoE Point to Point Protocol over Ethernet A type of broadband connection that provides authentication username and password i...
Page 95: ...e recipient of data sent TCP IP Transmission Control Protocol Internet Protocol A set of instructions PCs use to communicate over a network Telnet A user command and TCP IP protocol used for accessing remote PCs TFTP Trivial File Transfer Protocol A version of the TCP IP FTP protocol that has no directory or password capability Throughput The amount of data moved successfully from one node to anot...
Page 96: ...UTP CAT 5e or better LEDs System Link Act PoE Speed Gigabit 1 Gigabit 2 Dimensions 16 93 x 1 75 x 13 78 L x W x H 43cm x 4 45cm x 35cm Unit Weight 9 04 lbs 4 1 kg Power Voltage Range 100 240VAC Frequency range 47 63Hz 225W max Certifications FCC Class A CE UL Operating Temp 0ºC to 50ºC 32ºF to 121ºF Storage Temp 40ºC to 70ºC 40ºF to 158ºF Operating Humidity 10 to 90 Non Condensing Storage Humidity...
Page 97: ...ONDITIONS REPRESENTATIONS AND WARRANTIES INCLUDING ANY IMPLIED WARRANTY OF NON INFRINGEMENT ARE DISCLAIMED Some jurisdictions do not allow limitations on how long an implied warranty lasts so the above limitation may not apply to You This warranty gives You specific legal rights and You may also have other rights which vary by jurisdiction This warranty does not apply if the Product a has been alt...
Page 98: ...You are cautioned that changes or modifications not expressly approved by the party responsible for compliance could void your authority to operate the equipment You may use unshielded twisted pair UTP for RJ 45 connections Category 3 or better for 10 Mbps connections Category 5 or better for 100 Mbps connections Category 5 5e or 6 for 1000 Mbps connections For fiber optic connections you may use ...
Page 99: ... removal of the unit must be carried out by qualified personnel only The unit must be connected to an earthed grounded outlet to comply with international safety standards Do not connect the unit to an A C outlet power supply without an earth ground connection The appliance coupler the connector to the unit and not the wall plug must have a configuration for mating with an EN 60320 IEC 320 applian...
Page 100: ...tre facile Vous ne pouvez mettre l appareil hors circuit qu en débranchant son cordon électrique au niveau de cette prise Power Cord Set U S A and Canada The cord set must be UL approved and CSA certified The minimum specifications for the flexible cord are No 18 AWG not longer than 2 meters or 16 AWG Type SV or SJ 3 conductor The cord set must have a rated current capacity of at least 10 A The at...
Page 101: ...itsnormen erfüllt Der Gerätestecker der Anschluß an das Gerät nicht der Wandsteckdosenstecker muß einen gemäß EN 60320 IEC 320 konfigurierten Geräteeingang haben Die Netzsteckdose muß in der Nähe des Geräts und leicht zugänglich sein Die Stromversorgung des Geräts kann nur durch Herausziehen des Gerätenetzkabels aus der Netzsteckdose unterbrochen werden Cordon électrique Il doit être agréé dans le...
Page 102: ...terconnected with other equipment that must be contained within the same building including the interconnected equipmentís associated LAN connections Note When selecting a fiber SFP device considering safety please make sure that it can function at a temperature that is not less than the recommended maximum operational temperature of the product You must also use an approved Laser Class 1 SFP tran...
Page 103: ...one depleting materials in this product Documentation All printed documentation for this product uses biodegradable paper that originates from sustained and managed forests The inks used in the printing process are non toxic Purpose This guide details the hardware features of the switch including Its physical and performance related characteristics and how to install the switch Audience This guide...
Page 104: ...o know more about networking with Linksys products Give our advice line a call at 800 546 5797 LINKSYS Or fax your request in to 949 823 3002 If you experience problems with any Linksys product you can call us at 800 326 7114 Don t wish to call You can e mail us at support linksys com If any Linksys product proves defective during its warranty period you can call the Linksys Return Merchandise Aut...