background image

Cisco 2600 Series Memory Upgrade Configuration Note  13

Closing the Chassis

Closing the Chassis

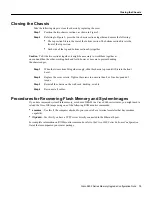
Take the following steps to close the chassis by replacing the cover:

Step 1

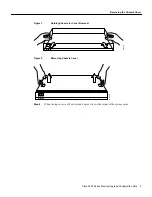
Position the two chassis sections, as shown in Figure 2.

Step 2

Referring to Figure 2, press the two chassis sections together and ensure the following:

The top section fits into the rear of the bottom section. The bottom section fits into the
front of the top section.

Each side of the top and bottom sections fits together.

Step 3

When the two sections fit together snugly, slide the chassis top so until it fits into the front
bezel.

Step 4

Replace the cover screws. Tighten the screws to no more than 8 or 9 inches/pound of
torque.

Step 5

Reinstall the chassis on the wall, rack, desktop, or table.

Step 6

Reconnect all cables.

Procedures for Recovering Flash Memory and System Images

If you have increased system Flash memory, or reduced DRAM in a Cisco 2600 series router, you might need to
reload the Cisco IOS image using one of the following ROM monitor commands:

xmodem—Use this if the computer attached to your console has a terminal emulator that has xmodem
capability.

tftpdnld—Use this if you have a TFTP server directly connected to the Ethernet 0 port.

For complete information on ROM monitor commands, refer to the Cisco 2600 Series Software Configuration
Guide
 that accompanied your router package.

Caution

To fit the two sections together, it might be necessary to work them together at

one end and then the other, working back and forth; however, use care to prevent bending
the chassis edges.

Summary of Contents for MEM2600-16D

Page 1: ...ry modules DIMMs in a Cisco 2600 series router Use this document in conjunction with the Cisco 2600 Series Hardware Installation Guide and the Regulatory Compliance and Safety Information document for your router If you have questions or need help refer to the section Obtaining Service and Support later in this document This document includes the following sections Safety Recommendations page 2 Up...

Page 2: ...akelingen betrokken risico s en dient u op de hoogte te zijn van standaard maatregelen om ongelukken te voorkomen Varoitus Tämä varoitusmerkki merkitsee vaaraa Olet tilanteessa joka voi johtaa ruumiinvammaan Ennen kuin työskentelet minkään laitteiston parissa ota selvää sähkökytkentöihin liittyvistä vaaroista ja tavanomaisista onnettomuuksien ehkäisykeinoista Attention Ce symbole d avertissement i...

Page 3: ...ning Before working on a chassis or working near power supplies unplug the power cord on AC units disconnect the power at the circuit breaker on DC units Warning Before working on a system that has an on off switch turn OFF the power and unplug the power cord Warning Before performing any of the following procedures ensure that power is removed from the DC circuit To ensure that all power is OFF l...

Page 4: ...needs rescue breathing or external cardiac compressions then take appropriate action Preventing Electrostatic Discharge Damage Electrostatic discharge ESD can damage equipment and impair electrical circuitry It occurs when electronic printed circuit cards are improperly handled and can result in complete or intermittent failures Always follow ESD prevention procedures when removing and replacing c...

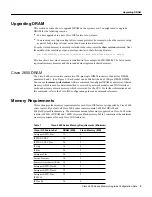
Page 5: ...led with a dual 100 pin DRAM DIMM You can use the memory size iomem software command to configure DRAM as a mixture of shared memory which is used for data transmitted or received by network modules and WAN interface cards and primary or main memory which is reserved for the CPU For further information about this command refer to the Cisco IOS configuration guides and command references Memory Req...

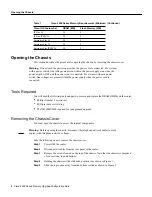
Page 6: ...t the chassis is comprised of two sections top and bottom Step 4 Holding the chassis with both hands position it as shown in Figure 1 Step 5 Slide the top section away from the bottom section as shown in Figure 2 IP Plus 56 20 8 IP Plus IPSEC 56 20 8 Enterprise Plus 40 24 8 Enterprise Plus 56 24 8 Enterprise Plus IPSEC 56 24 8 Warning Do not touch the power supply when the power cord is connected ...

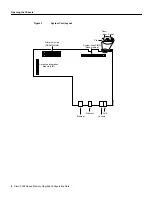
Page 7: ... Chassis Cover Figure 1 Holding Chassis for Cover Removal Figure 2 Removing Chassis Cover Step 6 When the top cover is off set it aside Figure 3 shows the layout of the system cards POWER RPS ACTIVITY H11658 Cisco 2600SERIES H11659 POWER RPS ACTIVITY Cisco 2600SERIES ...

Page 8: ...ry Upgrade Configuration Note Opening the Chassis Figure 3 System Card Layout H11599 Ethernet Console AUX Ethernet Primary memory DRAM DIMMs Advanced Integration Module AIM System code SIMM Flash memory Pin 1 Duart reset Reset ...

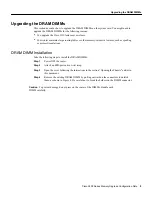
Page 9: ...atures such as spoofing or protocol translations DRAM DIMM Installation Take the following steps to install the DRAM DIMMs Step 1 Power OFF the router Step 2 Attach an ESD preventive wrist strap Step 3 Open the cover following the instructions in the section Opening the Chassis earlier in this document Step 4 Remove the existing DRAM DIMM by pulling outward on the connectors to unlatch them as sho...

Page 10: ...ew DRAM DIMM by sliding the end with the metal fingers into the DIMM connector socket at approximately a 90 degree angle to the system card Gently push the DIMM back into place until the latches on both sides snap into place Do not use excessive force because the connector might break Step 7 Replace the router cover Follow the instructions in the section Closing the Chassis later in this document ...

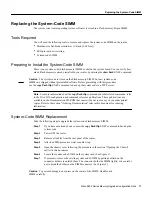
Page 11: ...mentation later in this document for ordering information System Code SIMM Replacement Take the following steps to upgrade the system code Flash memory SIMM Step 1 If you have not already done so enter the copy flash tftp EXEC command to back up the system code Step 2 Power OFF the router Step 3 Remove all cables from the rear panel of the router Step 4 Attach an ESD preventive wrist or ankle stra...

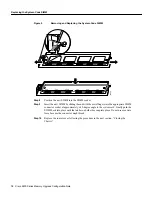
Page 12: ...t the new SIMM by sliding the end with the metal fingers into the appropriate SIMM connector socket at approximately a 45 degree angle to the system card Gently push the SIMM back into place until the latches on both sides snap into place Do not use excessive force because the connector might break Step 10 Replace the router cover following the procedure in the next section Closing the Chassis 102...

Page 13: ...es pound of torque Step 5 Reinstall the chassis on the wall rack desktop or table Step 6 Reconnect all cables Procedures for Recovering Flash Memory and System Images If you have increased system Flash memory or reduced DRAM in a Cisco 2600 series router you might need to reload the Cisco IOS image using one of the following ROM monitor commands xmodem Use this if the computer attached to your con...

Page 14: ...nld command downloads a Cisco IOS software image from a remote server into Flash memory using TFTP tftpdnld Begins the TFTP copy command The following variables are required IP_ADDRESS The IP address for the router you are using IP_SUBNET_MASK The subnet mask for the router you are using DEFAULT_GATEWAY The default gateway for the router you are using TFTP_SERVER The IP address of the server from ...

Page 15: ...om a reseller you can access Cisco Connection Online CCO as a guest CCO is Cisco Systems primary real time support channel Your reseller offers programs that include direct access to CCO s services For service and support for a product purchased directly from Cisco use CCO Cisco Connection Online Cisco Connection Online CCO is Cisco Systems primary real time support channel Maintenance customers a...

Page 16: ... stop bits 1 and connection rates up to 28 8 kbps For a copy of CCO s Frequently Asked Questions FAQ contact cco help cisco com For additional information contact cco team cisco com Note If you are a network administrator and need personal technical assistance with a Cisco product that is under warranty or covered by a maintenance contract contact Cisco s Technical Assistance Center TAC at 800 553...

Page 17: ...d in conjunction with the Cisco 2600 Series Hardware Installation Guide publication AccessPath AtmDirector the CCIE logo CD PAC Centri Changing the Way We Work Live Play and Learn the Cisco Capital logo CiscoLink the Cisco NetWorks logo the Cisco Powered Network logo the Cisco Press logo ClickStart ControlStream DAGAZ Fast Step FireRunner IGX JumpStart Kernel Proxy LoopRunner MGX Natural Network V...

Page 18: ...18 Cisco 2600 Series Memory Upgrade Configuration Note Ordering Documentation ...

Reviews: