S e n d d o c u m e n t a t i o n c o m m e n t s t o m d s f e e d b a c k - d o c @ c i s c o . c o m
2-12
Cisco MDS 9200 Series Hardware Installation Guide
OL-19588-01
Chapter 2 Installing the Cisco MDS 9200 Series
Installing the Switch in a Cabinet with Insufficient Front Clearance
The rack-mount kit provided with the switch contains the items listed in
Table 2-1
. If you do not find all
of the parts listed in
Table 2-1
, you may have an older version of the rack-mount kit, which only included
the front rack-mount brackets. If this is the case, you can either install the switch in the rack with just
the front rack-mount brackets, or contact your customer service representative for a current version of
the rack-mount kit.
Note
If you purchased Cisco support through a Cisco reseller, contact the reseller directly. If you purchased
support directly from Cisco, contact Cisco Technical Support at this URL:
http://www.cisco.com/warp/public/687/Directory/DirTAC.shtml
Installing Front Rack-Mount Brackets for Cabinets with 26 Inches or Greater of
Rail Spacings
Before installing the switch into the cabinet, the front rack-mount brackets for the Cisco MDS 9200
Series must be installed onto the switch. To install the brackets for cabinets with front-mounting rail to
rear-mounting rail spacing greater than or equal to 26 inches, follow these steps:
Step 1
Install the front rack-mount brackets as follows:
a.
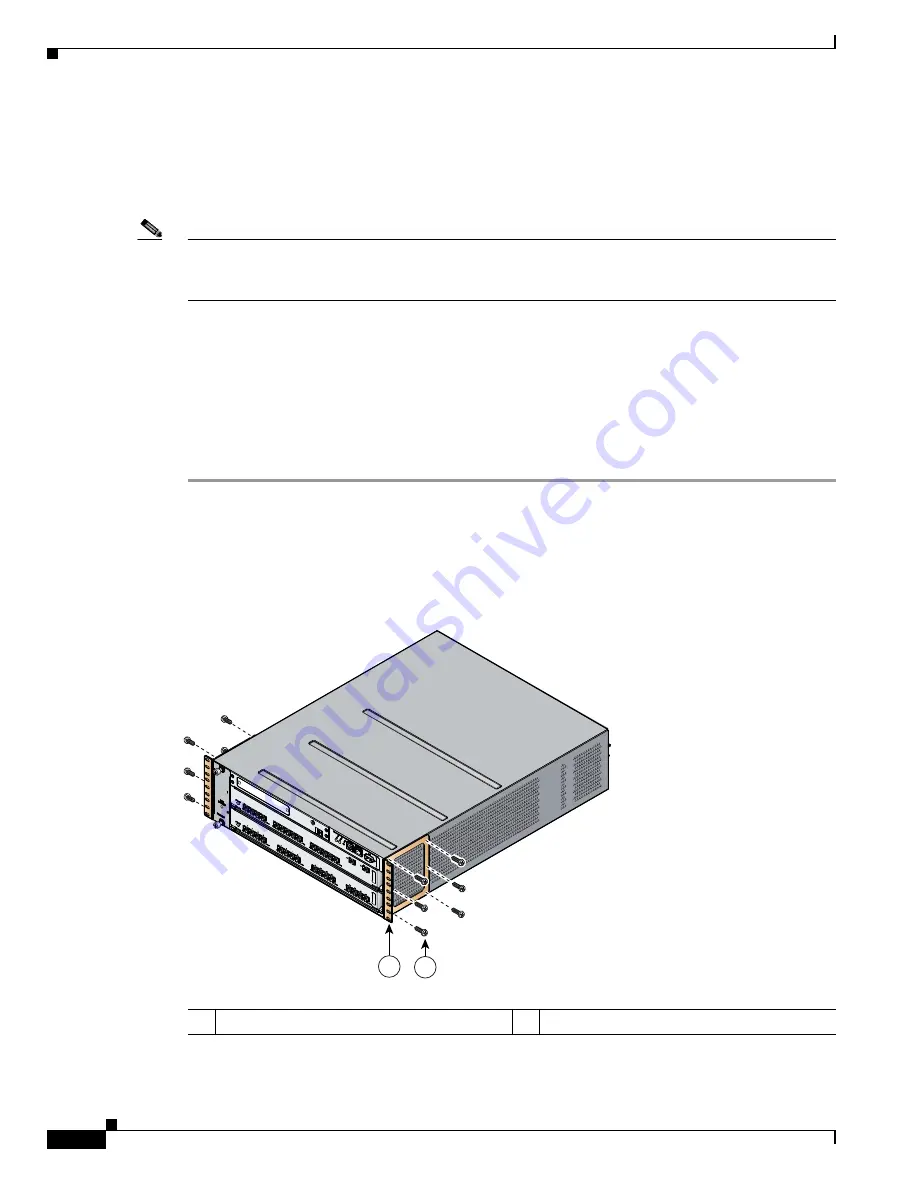
Position a front rack-mount bracket against the chassis and align the screw holes as shown in
Figure 2-7
. Then attach the front rack-mount bracket to the chassis with six of the M4 screws.
b.
Repeat with the other front rack-mount bracket on the other side of the switch.
Figure 2-7
Attaching Front Rack-Mount Bracket to the Cisco MDS 9200 Series
116891
MDS 9216i
GE1
LINK
GE2
LINK
5
6
7
8
9
10
11
12
13
14
1
2
3
4
1
2
1
Front rack-mount bracket
2
Screws, M4


