background image

G.711 mu-law

G.722

G.729a

G.729ab

iLBC

Opus

These phones decode the following codecs:

G.711 a-law

G.711 mu-law

G.722

G.729

G.729a

G.729b

G.729ab

iLBC

Opus

Use of a cell, mobile, or GSM phone, or two-way radio in close proximity to a Cisco IP Phone might
cause interference. For more information, see the manufacturer documentation of the interfering device.

As with other network devices, you must configure Cisco IP Phones to prepare them to access Cisco
Unified Communications Manager and the rest of the IP network. By using DHCP, you have fewer settings
to configure on a phone. If your network requires it, however, you can manually configure information
such as: an IP address, TFTP server, and subnet information.

Cisco IP Phones can interact with other services and devices on your IP network to provide enhanced
functionality. For example, you can integrate Cisco Unified Communications Manager with the corporate
Lightweight Directory Access Protocol 3 (LDAP3) standard directory to enable users to search for coworker
contact information directly from their IP phones. You can also use XML to enable users to access
information such as weather, stocks, quote of the day, and other web-based information.

Caution

Cisco IP Phone 7811

Phone Connections

Use an Ethernet cable to connect your phone to your LAN and enable the phone's full functionality. If your
Ethernet port is equipped with Power over Ethernet (PoE), you can power the phone through the LAN port.
Do not extend the LAN Ethernet cable outside the building. For your phone to work, it must be connected to
the IP telephony network.

   Cisco IP Phone 7800 Series Administration Guide for Cisco Unified Communications Manager

18

Cisco IP Phone 7811

Summary of Contents for MCS 7800 Series

Page 1: ...or Cisco Unified Communications Manager First Published 2015 05 05 Last Modified 2017 01 30 Americas Headquarters Cisco Systems Inc 170 West Tasman Drive San Jose CA 95134 1706 USA http www cisco com Tel 408 526 4000 800 553 NETS 6387 Fax 408 527 0883 ...

Page 2: ...e encouraged to try to correct the interference by using one or more of the following measures Reorient or relocate the receiving antenna Increase the separation between the equipment and receiver Connect the equipment into an outlet on a circuit different from that to which the receiver is connected Consult the dealer or an experienced radio TV technician for help Modifications to this product no...

Page 3: ...hanged Information 1 New Information for Firmware Release 11 7 1 1 New Information for Firmware Release 11 5 1 SR1 1 New Information for Firmware Release 11 5 1 2 New Information for Firmware Release 11 0 2 P A R T I About the Cisco IP Phone 3 C H A P T E R 2 Technical Details 5 Physical and Operating Environment Specifications 5 Cable Specifications 6 Network and Computer Port Pinouts 7 Network P...

Page 4: ...24 Terminology Differences 25 P A R T I I Cisco IP Phone Installation 27 C H A P T E R 4 Cisco IP Phone Installation 29 Verify the Network Setup 29 Enable Autoregistration for Phones 30 Install the Cisco IP Phone 31 Set Up the Phone From the Setup Menus 33 Apply Phone Password 34 Text and Menu Entry From the Phone 34 Configure Network Settings 35 Set Domain Name Field 36 Set Admin VLAN ID Field 36...

Page 5: ...sco Unified Communications Manager 49 Add a User from an External LDAP Directory 50 Add User Directly to Cisco Unified Communications Manager 50 Add User to End User Group 51 Associate Phones with Users 52 Surviveable Remote Site Telephony 52 C H A P T E R 6 Self Care Portal Management 55 Self Care Portal Overview 55 Set Up User Access to the Self Care Portal 56 Customize the Self Care Portal Disp...

Page 6: ...the Handset Rest 90 P A R T I V Cisco IP Phone Administration 93 C H A P T E R 9 Cisco IP Phone Security 95 Cisco IP Phone Security Overview 95 Security Enhancements for Your Phone Network 96 View Current Security Features on Phone 96 View Security Profiles 97 Supported Security Features 97 Set Up Locally Significant Certificate 100 Enable FIPS Mode 101 Phone Call Security 101 Secure Conference Ca...

Page 7: ...ents 143 Field Always Use Prime Line 144 Set up Power Save 144 Set up EnergyWise 145 Set Up Client Matter Codes 146 Set Up Forced Authorization Codes 146 Set up AS SIP 147 Set Up Do Not Disturb 148 Enable Agent Greeting 149 Set Up Monitoring and Recording 150 Set Up Call Forward Notification 150 Enable BLF for Call Lists 151 Set up Energy Efficient Ethernet 152 Enable Device Invoked Recording 152 ...

Page 8: ...tries Setup 168 Download Cisco IP Phone Address Book Synchronizer 168 Cisco IP Phone Address Book Synchronizer Deployment 169 Install Synchronizer 169 Set Up Synchronizer 169 P A R T V Cisco IP Phone Troubleshooting 171 C H A P T E R 1 3 Monitoring Phone Systems 173 Monitoring Phone Systems Overview 173 Cisco IP Phone Status 173 Display the Phone Information Window 174 Display Status Menu 174 Disp...

Page 9: ... Startup Problems 207 Cisco IP Phone Does Not Go Through the Normal Startup Process 207 Phone Displays Error Messages 208 Phone Cannot Connect Using DNS 208 Configuration File Corruption 208 Cisco IP Phone Cannot Obtain IP Address 209 Phone Reset Problems 209 Phone Resets Due to Intermittent Network Outages 209 Phone Resets Due to DHCP Setting Errors 209 Phone Resets Due to Incorrect Static IP Add...

Page 10: ...c Reset 215 Perform Factory Reset Phone Keypad 216 Perform Factory Reset from Phone Menu 216 Voice Quality Monitoring 216 Voice Quality Troubleshooting Tips 217 Cisco IP Phone Cleaning 217 C H A P T E R 1 6 International User Support 219 Unified Communications Manager Endpoints Locale Installer 219 International Call Logging Support 219 Language Limitation 220 Cisco IP Phone 7800 Series Administra...

Page 11: ...rm in Cisco Unified Communications Manager or other network devices Audience Network engineers system administrators and telecom engineers should review this guide to learn the steps that are required to set up Cisco IP Phones The tasks described in this document involve configuring network settings that are not intended for phone users The tasks in this manual require a familiarity with Cisco Uni...

Page 12: ...rds are in angle brackets Means reader take note Notes contain helpful suggestions or references to material not covered in the publication Note Means reader be careful In this situation you might do something that could result in equipment damage or loss of data Caution Warnings use the following convention IMPORTANT SAFETY INSTRUCTIONS This warning symbol means danger You are in a situation that...

Page 13: ...on feedback reviewing security guidelines and also recommended aliases and general Cisco documents see the monthly What s New in Cisco Product Documentation which also lists all new and revised Cisco technical documentation at http www cisco com en US docs general whatsnew whatsnew html Subscribe to the What s New in Cisco Product Documentation as a Really Simple Syndication RSS feed and set conte...

Page 14: ...Cisco IP Phone 7800 Series Administration Guide for Cisco Unified Communications Manager xiv Preface Cisco Product Security Overview ...

Page 15: ...ences into Cisco Unified Communications Manager documentation have been updated to support all Cisco Unified Communications Manager releases Table 1 Cisco IP Phone 7800 Administration Guide Revisions for Firmware Release 11 5 1 SR1 Updated Section Revision New presentation of phone feature configuration in Cisco Unified Communications Manager Phone Feature Configuration on page 129 General Product...

Page 16: ...mation Screen on page 181 Added Display Network Info Screen New Information for Firmware Release 11 0 All new features have been added to Telephony Features for the Cisco IP Phone on page 112 All references into Cisco Unified Communications Manager documentation have been updated to support all Cisco Unified Communications Manager releases Table 3 Cisco IP Phone 7800 Administration Guide Revisions...

Page 17: ...P A R T I About the Cisco IP Phone Technical Details page 5 Cisco IP Phone Hardware page 17 ...

Page 18: ......

Page 19: ...cal and Operating Environment Specifications The following table shows the physical and operating environment specifications for the Cisco IP Phone 7800 Series Table 4 Physical and Operating Specifications Value or Range Specification 32 to 104 F 0 to 40 C Operating temperature 10 to 90 noncondensing Operating relative humidity 14 to 140 F 10 to 60 C Storage temperature 8 14 in 207 mm Height Cisco...

Page 20: ...5e 6 for 100 Mbps cables with 4 pairs Cisco IP Phone 7841 Category 5 5e 6 for 1000 Mbps cables with 4 pairs Cables have 4 pairs of wires for a total of 8 conductors Note Cables As supported by the Ethernet Specification it is assumed that the maximum cable length between each Cisco IP Phone and the switch is 100 meters 330 feet Distance Requirements Cable Specifications RJ 9 jack 4 conductor for h...

Page 21: ...work port The computer access port is the 10 100 PC port the Cisco IP Phone 7841 has a 10 100 1000 PC computer port Network Port Connector The following table describes the network port connector pinouts Table 5 Network Port Connector Pinouts Function Pin Number BI_DA 1 BI_DA 2 BI_DB 3 BI_DC 4 BI_DC 5 BI_DB 6 BI_DD 7 BI_DD 8 BI stands for bidirectional while DA DB DC and DD stand for Data A Data B...

Page 22: ... Ethernet cable When you install a phone that is powered with external power connect the power supply to the phone and to a power outlet before you connect the Ethernet cable to the phone When you remove a phone that is powered with external power disconnect the Ethernet cable from the phone before you disconnect the power supply Note Table 7 Guidelines for Cisco IP Phone Power Guidelines Power Ty...

Page 23: ...e Your access to emergency service through the phone requires that the phone receive power If a power interruption occurs service or emergency calling service dialing does not function until power is restored If a power failure or disruption occurs you may need to reset or reconfigure the equipment before you can use service or emergency calling service dialing Power Reduction You can reduce the a...

Page 24: ...nformation such as its IP address Bootstrap Protocol BootP The Cisco IP Phone uses CAST as an interface between CUVA and Cisco Unified Communications Manager using the Cisco IP Phone as a SIP proxy The CAST protocol allows IP phones and associated applications behind the phone to discover and communicate with the remote endpoints without requiring changes to the traditional signaling components li...

Page 25: ...r XML services provisioning upgrade and for troubleshooting purposes HTTP is the standard protocol for transfer of information and movement of documents across the Internet and the web Hypertext Transfer Protocol HTTP The Cisco IP Phone implements the IEEE 802 1X standard through support for the following authentication methods EAP FAST and EAP TLS When 802 1X authentication is enabled on the phon...

Page 26: ...hone supports LLDP MED on the SW port to communicate information such as Voice VLAN configuration Device discovery Power management Inventory management For more information about LLDP MED support see the LLDP MED and Cisco Discovery Protocol white paper at this URL http www cisco com en US tech tk652 tk701 technologies_white_ paper0900aecd804cd46d shtml LLDP MED is an extension of the LLDP standa...

Page 27: ...ted transport protocol Transmission Control Protocol TCP When security is implemented Cisco IP Phones use the TLS protocol when securely registering with the Cisco Unified Communications Manager For more information see the documentation for your particular Cisco Unified Communications Manager release TLS is a standard protocol for securing and authenticating communications Transport Layer Securit...

Page 28: ...nd from the IP phone auxiliary VLAN on the Cisco Catalyst 6000 series for example Data traffic to and from the PC that connects to the switch through the computer access port of the IP phone native VLAN Isolating the phones on a separate auxiliary VLAN increases the quality of the voice traffic and allows a large number of phones to be added to an existing network that does not have enough IP addr...

Page 29: ... cannot guarantee the performance of external devices cables and connectors In European Union countries use only external speakers microphones and headsets that are fully compliant with the EMC Directive 89 336 EC Caution Cisco IP Phone 7800 Series Administration Guide for Cisco Unified Communications Manager 15 External Devices ...

Page 30: ...Cisco IP Phone 7800 Series Administration Guide for Cisco Unified Communications Manager 16 External Devices ...

Page 31: ...ion because the phone connects to your data network it offers enhanced IP telephony features including access to network information and services and customizable features and services The Cisco IP Phones have the following features Programmable line keys supports up to 16 lines Cisco IP Phone 7821 supports 2 lines Cisco IP Phone 7841 supports 4 lines and Cisco IP Phone 7861 supports 16 lines or t...

Page 32: ...her services and devices on your IP network to provide enhanced functionality For example you can integrate Cisco Unified Communications Manager with the corporate Lightweight Directory Access Protocol 3 LDAP3 standard directory to enable users to search for coworker contact information directly from their IP phones You can also use XML to enable users to access information such as weather stocks ...

Page 33: ...our Cisco IP phone to your LAN with an Ethernet cable to enable full functionality of your Cisco IP phone If your Ethernet port is equipped with Power over Ethernet PoE you can power the Cisco IP phone through the LAN port Do not extend the LAN Ethernet cable outside the building For your phone to work it must be connected to the IP telephony network Cisco IP Phone 7800 Series Administration Guide...

Page 34: ...one 7841 Phone Connections Connect your Cisco IP phone to your LAN with an Ethernet cable to enable full functionality of your Cisco IP phone If your Ethernet port is equipped with Power over Ethernet PoE you can power the Cisco IP phone through the LAN port Do not extend the LAN Ethernet cable outside the building For your phone to work it must be connected to the IP telephony network Cisco IP Ph...

Page 35: ...IP Phone 7861 Phone Connections Connect your Cisco IP phone to your LAN with an Ethernet cable to enable full functionality of your Cisco IP phone If your Ethernet port is equipped with Power over Ethernet PoE you can power the Cisco IP phone through the LAN port Do not extend the LAN Ethernet cable outside the building For your phone to work it must be connected to the IP telephony network Cisco ...

Page 36: ... 802 3af power enabled 4 Buttons and Hardware The Cisco IP Phone 7800 Series has distinct hardware types Cisco IP Phone 7811 No buttons on either side of the screen Cisco IP Phone 7821 Two buttons on the left side of the screen Cisco IP Phone 7841 Two buttons on either side of the screen Cisco IP Phone 7861 16 buttons at the right edge of the phone Cisco IP Phone 7800 Series Administration Guide f...
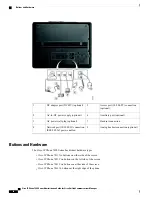
Page 37: ...ine and Feature Buttons on page 24 The Cisco IP Phone 7811 does not have programmable feature buttons or line buttons Programmable feature buttons and line buttons 2 Access functions and services For more information see Softkey Line and Feature Buttons on page 24 Softkey buttons 3 Navigation ring and Select button Scroll through menus highlight items and select the highlighted item Navigation clu...

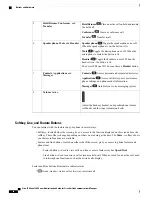
Page 38: ...kerphone volume off hook and the ringer volume on hook Volume button 8 Softkey Line and Feature Buttons You can interact with the features on your phone in several ways Softkeys located below the screen give you access to the function displayed on the screen above the softkey The softkeys change depending on what you are doing at the time The More softkey shows you that more functions are availabl...

Page 39: ...lowing table highlights some of the terminology differences in the Cisco IP Phone 7800 Series User Guide the Cisco IP Phone 7800 Series Administration Guide for Cisco Unified Communications Manager and the Cisco Unified Communications Manager documentation Table 9 Terminology Differences Administration Guide User Guide Busy Lamp Field BLF Line Status Message Waiting Indicator MWI or Message Waitin...

Page 40: ...Cisco IP Phone 7800 Series Administration Guide for Cisco Unified Communications Manager 26 Terminology Differences ...

Page 41: ...P A R T II Cisco IP Phone Installation Cisco IP Phone Installation page 29 Cisco Unified Communications Manager Phone Setup page 43 Self Care Portal Management page 55 ...

Page 42: ......

Page 43: ... configuring a Cisco IP telephony network see the documentation for your particular Cisco Unified Communications Manager release For the phone to operate successfully as an endpoint in your network your network must meet specific requirements The phone displays the date and time from Cisco Unified Communications Manager The time displayed on the phone can differ from the Cisco Unified Communicatio...

Page 44: ...from Cisco Unified Communications Manager Move autoregistered phones to new locations and assign them to different device pools without affecting their directory numbers Autoregistration is disabled by default In some cases you might not want to use autoregistration for example if you want to assign a specific directory number to the phone or if you want to use a secure connection with Cisco Unifi...

Page 45: ... Line Template Starting Directory Number and Ending Directory Number Step 4 Click Save Related Topics Cisco Unified Communications Manager Documentation on page xiii Phone Addition Methods on page 48 Install the Cisco IP Phone After the phone connects to the network the phone startup process begins and the phone registers with Cisco Unified Communications Manager To finish installing the phone con...

Page 46: ...ts on page 7 Step 6 Connect a straight through Ethernet cable from another network device such as a desktop computer to the computer port on the Cisco IP Phone You can connect another network device later if you do not connect one now Use Category 3 5 5e or 6 cabling for 10 Mbps connections Category 5 5e or 6 for 100 Mbps connections and Category 5e or 6 for 1000 Mbps connections For more informat...

Page 47: ... additional network options Security Setup Provides options for viewing and configuring a variety of security settings You can control whether a phone has access to the Settings menu or to options on this menu by using the Settings Access field in the Cisco Unified Communications Manager Administration Phone Configuration window The Settings Access field accepts these values Note Enabled Allows ac...

Page 48: ...ice Device Settings Common Phone Profile Step 2 Enter a password in the Local Phone Unlock Password option Step 3 Apply the password to the common phone profile that the phone uses Text and Menu Entry From the Phone When you edit the value of an option setting follow these guidelines Use the arrows on the navigation pad to highlight the field that you wish to edit then press Select in the navigati...

Page 49: ... 215 Configure Network Settings Procedure View and configure the following network settings Domain name field Admin VLAN ID field PC VLAN field Switch port configuration field PC port configuration field DHCP enabled field IP address field Subnet mask field Default router field DNS server field Alternate TFTP field TFTP server 1 and server 2 fields Related Topics Text and Menu Entry From the Phone...

Page 50: ...ep 3 Press Apply Set Admin VLAN ID Field Procedure Step 1 Scroll to the Admin VLAN ID option and press Edit Step 2 Enter a new VLAN ID setting Step 3 Press Apply Step 4 Press Save Set PC VLAN Field Procedure Step 1 Ensure that the Admin VLAN ID option is set Step 2 Scroll to the PC VLAN option and press Edit Step 3 Enter a new PC VLAN setting Step 4 Press Apply Step 5 Press Save Cisco IP Phone 780...

Page 51: ...CP Enabled option Step 2 Press Edit Step 3 Press Disable to disable DHCP or press Enable to enable DHCP Step 4 Press Back Set IP Address Field Procedure Step 1 Set the DHCP Disabled option to Disable Step 2 Press scroll to the IP Address option press Select and enter a new IP Address Step 3 Press Validate and then press Apply to apply the changes or Revert to discard the changes What to Do Next Yo...

Page 52: ...ter a new subnet mask Step 3 Press Validate and then press Apply to apply the changes or Revert to discard the changes Set DNS Server Fields Procedure Step 1 Set the DHCP Disabled option to Disable Step 2 Press Back scroll to the Subnet Mask option press Edit and enter a new subnet mask Step 3 Press Validate and then press Apply to apply the changes or Revert to discard the changes Step 4 If multi...

Page 53: ... Erase to erase the Trust List or press Continue to continue applying changes without erasing the Trust List Set TFTP Server 2 Field Procedure Step 1 Enter an IP address for the TFTP Server 1 option Step 2 Press Back then scroll to the TFTP Server 2 option Step 3 Press Edit and then enter a new backup TFTP server IP address If there is no secondary TFTP Server you can use to clear the field of a p...

Page 54: ... Communications Manager Administration to configure services that are not present by default The user must subscribe to services by using the Cisco Unified Communications Self Care Portal This web based application provides a graphical user interface GUI for limited end user configuration of IP phone applications However a user cannot subscribe to any service that you configure as an enterprise su...

Page 55: ...of the information that you must provide to end users Related Topics Cisco Unified Communications Manager Documentation on page xiii Cisco IP Phone 7800 Series Administration Guide for Cisco Unified Communications Manager 41 Configure Phone Services for Users ...

Page 56: ...Cisco IP Phone 7800 Series Administration Guide for Cisco Unified Communications Manager 42 Configure Phone Services for Users ...

Page 57: ...he Cisco IP Phone in Cisco Unified Communications Manager Administration manually Some tasks in this procedure are optional depending on your system and user needs For more information on any of the steps see the documentation for your particular Cisco Unified Communications Manager release Perform the configuration steps in the following procedure using Cisco Unified Communications Manager Admini...

Page 58: ...ile Select Device Device settings Common Phone Profile Common phone profiles provide data that the Cisco TFTP server requires as well as common phone settings such as Do Not Disturb and feature control options Step 6 Define a Calling Search Space In Cisco Unified Communications Manager Administration click Call Routing Class of Control Calling Search Space A Calling Search Space is a collection of...

Page 59: ... Number field in the End User Configuration window Note d From the Route Partition drop down list choose the partition to which the directory number belongs If you do not want to restrict access to the directory number choose None for the partition e From the Calling Search Space drop down list choose the appropriate calling search space The value that you choose applies to all devices that are us...

Page 60: ...ociations area of the screen set the Primary Extension from the drop down list e In the Mobility Information area check the Enable Mobility box f In the Permissions Information area use the Add to Access Control Group buttons to add this user to any user groups For example you may want to add the user to a group that is defined as a Standard CCM End User Group g To view the details of a group sele...

Page 61: ... the User ID and last name fields b Assign a password for Self Care Portal c Assign a PIN for Cisco Extension Mobility and Personal Directory d Associate the user with a phone Provides users with control over their phone such a forwarding calls or adding speed dial numbers or services Some phones such as those in conference rooms do not have an associated user Note Step 18 Associate a user with a ...

Page 62: ...e information about the Bulk Administration Tool see the documentation for your particular Cisco Unified Communications Manager release Related Topics Cisco Unified Communications Manager Documentation on page xiii Enable Autoregistration for Phones on page 30 Add Phones Individually Collect the MAC address and phone information for the phone that you will add to the Cisco Unified Communications M...

Page 63: ...er the details of phone specific parameters such as Device Pool Phone Button Template and Device Security Profile Step 5 Click Save Step 6 Select Device Phone Add New to add a phone using the BAT phone template Related Topics Cisco Unified Communications Manager Documentation on page xiii Add Users to Cisco Unified Communications Manager You can display and maintain information about the users reg...

Page 64: ... Unified Communications Manager immediately the LDAP Directory Synchronization Schedule on the LDAP Directory window determines when the next autosynchronization is scheduled Synchronization must occur before you can associate a new user to a device Note Procedure Step 1 Sign into Cisco Unified Communications Manager Administration Step 2 Select System LDAP LDAP Directory Step 3 Use Find to locate...

Page 65: ...o add a user to the Cisco Unified Communications Manager Standard End User group perform these steps Procedure Step 1 From Cisco Unified Communications Manager Administration choose User Management User Settings Access Control Group The Find and List Users window displays Step 2 Enter the appropriate search criteria and click Find Step 3 Select the Standard CCM End Users link The User Group Config...

Page 66: ...p down list in the upper right corner of the window select Back to User and click Go The End User Configuration window appears and the associated devices that you chose display in the Controlled Devices pane Step 9 Choose Save Selected Changes Surviveable Remote Site Telephony Survivable Remote Site Telephony SRST ensures that basic phone functions remain accessible when communications with the co...

Page 67: ... All settings are not preserved on failover to SRST from the Cisco Unified Communications Manager or from SRST fail back to the Communications Manager Any original Call Forward All still active on the Communications Manager should be indicated when the device reconnects to the Communications Manager after failover Yes Call Forward All Yes Speed Dial The iDivert softkey does not display No To Voice...

Page 68: ...The softkey causes no action No Group PickUp The softkey causes no action No Other PickUp The softkey causes no action No Malicious Call ID The softkey causes no action No QRT The softkey causes no action No Hunt Group The softkey causes no action No Intercom The softkey causes no action No Mobility The softkey causes no action No Privacy The Call Back softkey does not display No Call Back Cisco I...

Page 69: ... Unified Communications Manager End User group You must provide end users with the following information about the Self Care Portal The URL to access the application This URL is http server_name portnumber ucmuser where server_name is the host on which the web server is installed and portnumber is the port number on that host A user ID and default password to access the application An overview of ...

Page 70: ...s display on the Self Care Portal However you must set the following options by using Enterprise Parameters Configuration settings in Cisco Unified Communications Manager Administration Show Ring Settings Show Line Label Settings The settings apply to all Self Care Portal pages at your site Note Procedure Step 1 In Cisco Unified Communications Manager Administration select System Enterprise Parame...

Page 71: ...P A R T III Hardware and Accessory Installation Cisco IP Phone Accessories page 59 Wall Mounts page 63 ...

Page 72: ......

Page 73: ... of third party headsets for use with Cisco IP Phones Cisco does not certify nor support products from headset or handset vendors The Cisco IP Phone 7811 does not support a headset Note The phone reduces some background noise that a headset microphone detects but if you want to further reduce the background noise and improve the overall audio quality use a noise cancelling headset Cisco recommend ...
Page 74: ...leading headset manufacturers are reported to perform well with Cisco IP Phones For additional information see http www cisco com c en us products unified communications uc_endpoints_ accessories html Analog Headsets Analog headsets are supported on the Cisco IP Phone 7821 7841 and 7861 However the Cisco IP Phone 7821 7841 and 7861 cannot detect when an analog headset is plugged in For this reason...

Page 75: ... Step 2 Select Accessories Step 3 Highlight the analog headset then press Setup Step 4 Press On to turn on the wideband and press Off to turn off the wideband Cisco IP Phone 7800 Series Administration Guide for Cisco Unified Communications Manager 61 Headsets ...

Page 76: ...Cisco IP Phone 7800 Series Administration Guide for Cisco Unified Communications Manager 62 Headsets ...

Page 77: ...er phone If you are planning to attach a phone to a wall purchase the wall mount kit specific to your phone For additional information refer to the Data Sheet for your phone Table 11 Wall Mount Kits Notes Cisco Wall Mount Kit Cisco IP Phone Wallmount Kit for Cisco IP Phone 7811 Cisco IP Phone 7811 Wallmount Kit for Cisco IP Phone 7800 Series Cisco IP Phone 7821 and 7841 Wallmount Kit for Cisco IP ...
Page 78: ...unt Kit Components for 7811 The package includes these items One phone bracket One wall bracket Four M4 x 25 mm Phillips head screws with four anchors Two M3 x 7 mm Self tapping screws One 200 mm Ethernet cable Cisco IP Phone 7800 Series Administration Guide for Cisco Unified Communications Manager 64 Non Lockable Wall Mount Components for 7811 ...

Page 79: ...Wall Mount Kit for 7811 The wall mount kit can be mounted on most surfaces including concrete brick and similar hard surfaces To mount the kit on concrete brick or similar hard surfaces you must provide the appropriate screws and anchors for your wall surface Before You Begin You need these tools to install the bracket Cisco IP Phone 7800 Series Administration Guide for Cisco Unified Communication...

Page 80: ...nearby jack If the jack is to be placed behind the phone the Ethernet jack must be flush to the wall or recessed Note a Hold the bracket on the wall and place it so that the arrow on the back of the bracket points up b Use the level to ensure that the bracket is level and use a pencil to mark the screw holes c Using a 2 Phillips head screwdriver carefully center the anchor over the pencil mark and...

Page 81: ...attached cords from the base of the phone except the handset cord and headset cord if there is a headset b Attach the phone bracket by inserting the tabs into the mounting tabs on the back of the phone The phone ports should be accessible through the holes in the bracket Cisco IP Phone 7800 Series Administration Guide for Cisco Unified Communications Manager 67 Non Lockable Wall Mount Components f...

Page 82: ...onal If you are connecting a network device such as a computer to the phone attach the cable to the 10 100 1000 Computer PC access port c Optional If you use an external power supply plug the power cord into the phone Dress the cord by clipping it into the clips that are incorporated into the phone body next to the PC port Cisco IP Phone 7800 Series Administration Guide for Cisco Unified Communica...

Page 83: ...et 1 AC Adapter Port 5 Network Port 2 Optional Power Cable 6 Wall Bracket 3 Step 4 Attach the phone to the wall bracket by inserting the tabs on the top of the wall bracket into the slots on the phone bracket Cisco IP Phone 7800 Series Administration Guide for Cisco Unified Communications Manager 69 Non Lockable Wall Mount Components for 7811 ...

Page 84: ...acket openings together form circular openings with room for one cable per opening Figure 8 Phone to Wall Bracket Attachment Step 5 Press the phone firmly into the wall bracket and slide the phone down The tabs in the bracket click into position Step 6 Proceed to Adjust the Handset Rest on page 90 Cisco IP Phone 7800 Series Administration Guide for Cisco Unified Communications Manager 70 Non Locka...

Page 85: ... figure shows the location and shape of the tabs Figure 9 Tab Location To remove the phone and mounting plate from the wall bracket you must disengage these tabs Before You Begin You require two screwdrivers or metal rods Cisco IP Phone 7800 Series Administration Guide for Cisco Unified Communications Manager 71 Non Lockable Wall Mount Components for 7811 ...

Page 86: ...the screwdriver handles up to push down on the tabs Figure 10 Disengage Tabs Step 3 Press firmly to disengage the tabs and move the phone up at the same time to release the phone from the wall bracket Cisco IP Phone 7800 Series Administration Guide for Cisco Unified Communications Manager 72 Non Lockable Wall Mount Components for 7811 ...

Page 87: ...all Mount Kit Components The package includes these items One phone bracket One wall bracket Four M8 18 x 1 25 inch Phillips head screws with four anchors Two M2 5 x 6 mm machine screws One 6 inch Ethernet cable Cisco IP Phone 7800 Series Administration Guide for Cisco Unified Communications Manager 73 Non Lockable Wall Mount Components ...

Page 88: ...talled on Phone Install the Non Lockable Wall Mount Kit The wall mount kit can be mounted on most surfaces including concrete brick and similar hard surfaces To mount the kit on concrete brick or similar hard surfaces you must provide the appropriate screws and anchors for your wall surface Cisco IP Phone 7800 Series Administration Guide for Cisco Unified Communications Manager 74 Non Lockable Wal...

Page 89: ...n the Ethernet network cable to a nearby jack If the jack is to be placed behind the phone the Ethernet jack must be flush to the wall or recessed Note a Hold the bracket on the wall and place it so that the arrow on the back of the bracket points up b Use the level to ensure that the bracket is level and use a pencil to mark the screw holes c Using a 2 Phillips head screwdriver carefully center t...

Page 90: ... the handset cord and headset cord if there is a headset b Remove the label covers that conceal the screw holes Cisco IP Phone 7811 does not have label covers Note c Attach the phone bracket by inserting the tabs into the mounting tabs on the back of the phone The phone ports should be accessible through the holes in the bracket Cisco IP Phone 7800 Series Administration Guide for Cisco Unified Com...

Page 91: ...d wall jack b Optional If you are connecting a network device such as a computer to the phone attach the cable to the 10 100 1000 Computer PC access port c Optional If you use an external power supply plug the power cord into the phone Dress the cord by clipping it into the clips that are incorporated into the phone body next to the PC port Cisco IP Phone 7800 Series Administration Guide for Cisco...

Page 92: ...Bracket 1 AC Adapter Port 5 Network Port 2 Optional Power Cable 6 Wall Bracket 3 Step 4 Attach the phone to the wall bracket by inserting the tabs on the top of the wall bracket into the slots on the phone bracket Cisco IP Phone 7800 Series Administration Guide for Cisco Unified Communications Manager 78 Non Lockable Wall Mount Components ...

Page 93: ...l bracket openings together form circular openings with room for one cable per opening Figure 17 Phone to Wall Bracket Attachment Step 5 Press the phone firmly into the wall bracket and slide the phone down The tabs in the bracket click into position Step 6 Proceed to Adjust the Handset Rest on page 90 Cisco IP Phone 7800 Series Administration Guide for Cisco Unified Communications Manager 79 Non ...

Page 94: ...figure shows the location and shape of the tabs Figure 18 Tab Location To remove the phone and mounting plate from the wall bracket you must disengage these tabs Before You Begin You require two screwdrivers or metal rods Cisco IP Phone 7800 Series Administration Guide for Cisco Unified Communications Manager 80 Non Lockable Wall Mount Components ...

Page 95: ...Lift the screwdriver handles up to push down on the tabs Figure 19 Disengage Tabs Step 3 Press firmly to disengage the tabs and move the phone up at the same time to release the phone from the wall bracket Cisco IP Phone 7800 Series Administration Guide for Cisco Unified Communications Manager 81 Non Lockable Wall Mount Components ...

Page 96: ...unt Kit Components for 7861 The package includes these items One phone bracket One wall bracket Four M4 x 25 mm Phillips head screws with four anchors Two M3 x 7 mm Self tapping screws One 200 mm Ethernet cable Cisco IP Phone 7800 Series Administration Guide for Cisco Unified Communications Manager 82 Non Lockable Wall Mount Components for 7861 ...

Page 97: ... Figure 21 Back View of ADA Non Lockable Wall Mount Kit Installed on Phone Figure 22 Side View of ADA Non Lockable Wall Mount Kit Installed on Phone Cisco IP Phone 7800 Series Administration Guide for Cisco Unified Communications Manager 83 Non Lockable Wall Mount Components for 7861 ...

Page 98: ...phone jack Procedure Step 1 Mount the wall bracket in the desired location You can install the bracket over an Ethernet jack or you can run the Ethernet network cable to a nearby jack If the jack is to be placed behind the phone the Ethernet jack must be flush to the wall or recessed Note a Hold the bracket on the wall and place it so that the arrow on the back of the bracket points up b Use the l...

Page 99: ... attached cords from the base of the phone except the handset cord and headset cord if there is a headset b Attach the phone bracket by inserting the tabs into the mounting tabs on the back of the phone The phone ports should be accessible through the holes in the bracket Cisco IP Phone 7800 Series Administration Guide for Cisco Unified Communications Manager 85 Non Lockable Wall Mount Components ...

Page 100: ...l jack b Optional If you are connecting a network device such as a computer to the phone attach the cable to the 10 100 1000 Computer PC access port c Optional If you use an external power supply plug the power cord into the phone Dress the cord by clipping it into the clips that are incorporated into the phone body next to the PC port Cisco IP Phone 7800 Series Administration Guide for Cisco Unif...

Page 101: ...ket 1 AC Adapter Port 5 Network Port 2 Optional Power Cable 6 Wall Bracket 3 Step 4 Attach the phone to the wall bracket by inserting the tabs on the top of the wall bracket into the slots on the phone bracket Cisco IP Phone 7800 Series Administration Guide for Cisco Unified Communications Manager 87 Non Lockable Wall Mount Components for 7861 ...

Page 102: ...cket openings together form circular openings with room for one cable per opening Figure 26 Phone to Wall Bracket Attachment Step 5 Press the phone firmly into the wall bracket and slide the phone down The tabs in the bracket click into position Step 6 Proceed to Adjust the Handset Rest on page 90 Cisco IP Phone 7800 Series Administration Guide for Cisco Unified Communications Manager 88 Non Locka...

Page 103: ...re shows the location and shape of the tabs Figure 27 Tab Location To remove the phone and mounting plate from the wall bracket you must disengage these tabs Before You Begin You require two screwdrivers or metal rods Cisco IP Phone 7800 Series Administration Guide for Cisco Unified Communications Manager 89 Non Lockable Wall Mount Components for 7861 ...

Page 104: ...mly to disengage the tabs and move the phone up at the same time to release the phone from the wall bracket Adjust the Handset Rest If your phone is wall mounted or if the handset slips out of the cradle too easily you may need to adjust the handset rest to ensure that the receiver does not slip out of the cradle Cisco IP Phone 7800 Series Administration Guide for Cisco Unified Communications Mana...

Page 105: ...ween two fingers with the corner notches facing you Step 4 Line up the tab with the slot in the cradle and press the tab evenly into the slot An extension protrudes from the top of the rotated tab Step 5 Return the handset to the handset rest Cisco IP Phone 7800 Series Administration Guide for Cisco Unified Communications Manager 91 Adjust the Handset Rest ...

Page 106: ...Cisco IP Phone 7800 Series Administration Guide for Cisco Unified Communications Manager 92 Adjust the Handset Rest ...

Page 107: ...P A R T IV Cisco IP Phone Administration Cisco IP Phone Security page 95 Cisco IP Phone Customization page 105 Phone Features and Setup page 111 Corporate and Personal Directory Setup page 167 ...

Page 108: ......

Page 109: ...the CTL client Signing of the phone configuration files Phone configuration file encryption HTTPS with Tomcat and other Web services Secure signaling and media features still require you to run the CTL client and use hardware eTokens Note For more information about the security features see the documentation for your particular Cisco Unified Communications Manager release A Locally Significant Cer...

Page 110: ... protect you and your users These security enhancements include Contact search authentication TCP as the default protocol for remote audit logging FIPS mode An improved credentials policy Support for the SHA 2 family of hashes for digital signatures Support for a RSA key size of 3072 and 4096 bits For additional information about working with and enabling these security requirements see the FIPS 1...

Page 111: ...ect System Security Phone Security Profile Step 2 Look at the Security Mode setting Related Topics Cisco Unified Communications Manager Documentation on page xiii Supported Security Features The following table provides an overview of the security features that the Cisco IP Phone 7800 Series support For more information about these features Cisco Unifie Communications Manager and Cisco IP Phone se...

Page 112: ...on Each Cisco IP Phone contains a unique manufacturing installed certificate MIC which is used for device authentication The MIC is a permanent unique proof of identity for the phone and allows Cisco Unified Communications Manager to authenticate the phone Manufacturing installed certificate After you configure a SRST reference for security and then reset the dependent devices in Cisco Unified Com...

Page 113: ...s Manager Release 10 5 2 and later the phones support AES 256 encryption support for TLS and SIP for signaling and media encryption This enables phones to initiate and support TLS 1 2 connections using AES 256 based ciphers that conform to SHA 2 Secure Hash Algorithm standards and are Federal Information Processing Standards FIPS compliant The new ciphers are For TLS connections TLS_ECDHE_RSA_WITH...

Page 114: ... or Update The phone prompts for an authentication string Step 4 Enter the authentication code and press Submit The phone begins to install update or remove the LSC depending on how the CAPF is configured During the procedure a series of messages appears in the LSC option field in the Security Configuration menu so you can monitor progress When the procedure is complete Installed or Not Installed ...

Page 115: ...ing of a call to indicate that the other connected phone is also receiving and transmitting secure audio If your call connects to a nonsecure phone the security tone does not play Secure calling is supported between two phones Secure conference Cisco Extension Mobility and shared lines can be configured by secure conference bridge Note When a phone is configured as secure encrypted and trusted in ...

Page 116: ...ared lines and Extension Mobility are not available when secure calling is configured Note The following table provides information about changes to conference security levels depending on the initiator phone security level the security levels of participants and the availability of secure conference bridges Table 13 Security Restrictions with Conference Calls Results of action Security level of p...

Page 117: ...If the overall call status changes during the call the indication tone changes and the protected phone plays the appropriate tone A protected phone plays a tone or not under these circumstances When the Play Secure Indication Tone option is enabled When end to end secure media is established and the call status is secure the phone plays the secure indication tone three long beeps with pauses When ...

Page 118: ...2 1X standard does not consider VLANs and thus recommends that only a single device should be authenticated to a specific switch port However some switches including Cisco Catalyst switches support multidomain authentication The switch configuration determines whether you can connect a PC to the PC port of the phone Enabled If you are using a switch that supports multidomain authentication you can...

Page 119: ... along with an XML file named Ringlist wb xml that describes the ring list options that are available at your site exist in the TFTP directory on each Cisco Unified Communications Manager server All file names are case sensitive If you use ringlist wb xml for the file name the phone will not apply your changes Attention For more information see the documentation for your particular Cisco Unified C...

Page 120: ...Formats The Ringlist wb xml file defines an XML object that contains a list of phone ring types This file includes up to 50 ring types Each ring type contains a pointer to the PCM file that is used for that ring type and the text that appears on the Ring Type menu on a Cisco IP Phone for that ring The Cisco TFTP server for each Cisco Unified Communications Manager contains this file The CiscoIPPho...

Page 121: ...reater sensitivity means improved audio clarity but also means that the far endpoint can hear more background noise noise such as rustling papers or nearby conversations Even without a wideband headset or handset some users may prefer the additional sensitivity of G 722 distracting Other users may prefer the additional sensitivity of G 722 The Advertise G 722 Codec service parameter affects whethe...

Page 122: ...RL Graphics on Cisco IP Phone at this URL http www cisco com en US products sw voicesw ps556 products_tech_note09186a00801c0764 shtml In addition see the documentation for your particular Cisco Unified Communications Manager release for the following information Specifying the URL of the idle display XML service For a single phone Idle field in the Phone Configuration window in Cisco Unified Commu...

Page 123: ...om three dial tone options Default A different dial tone for inside and outside calls Inside The inside dial tone is used for all calls Outside The outside dial tone is used for all calls Always Use Dial Tone is a required field on Cisco Unified Communications Manager Procedure Step 1 In Cisco Unified Communications Manager Administration select System Service Parameters Step 2 Select the appropri...

Page 124: ...Cisco IP Phone 7800 Series Administration Guide for Cisco Unified Communications Manager 110 Customize Dial Tone ...

Page 125: ...nd voice message system options users must receive information from you or from your network team or must be able to contact you for assistance Make sure to provide users with the names of people to contact for assistance and with instructions for contacting those people We recommend that you create a web page on your internal support site that provides end users with important information about t...

Page 126: ... 199 on the phone keypad You can use Abbreviated Dialing while on hook or off hook Note Users assign index codes from the Self Care Portal Abbreviated Dialing Provides different options to control the incoming call alerts You can disable or enable the call alert You can also activate or deactivate the caller ID display Because the Cisco IP Phone 7811 does not have line key it enables the call aler...

Page 127: ...ease Auto Answer Enables the phone to synchronize the PC and SW ports to the same speed and to duplex Only ports configured for auto negotiate change speeds See Automatic Port Synchronization Product Specific Configuration on page 131 Automatic Port Synchronization Allows a user to use one touch pickup functionality for call pickup features See call pickup information in the documentation for your...

Page 128: ...ll Forward Detects and prevents Call Forward All loops When a Call Forward All loop is detected the Call Forward All configuration is ignored and the call rings through Call Forward All Loop Breakout Prevents a user from configuring a Call Forward All destination directly on the phone that creates a Call Forward All loop or that creates a Call Forward All chain with more hops than the existing For...

Page 129: ...all the active call is put on hold which causes the recording session to terminate and the monitoring session to suspend To resume the monitoring session the party whose call is being monitored must resume the call Note Call Recording Indicates and allows users to answer an incoming call that rings while on another call Incoming call information appears on the phone display See directory number in...

Page 130: ...ion Mobility Enables a user configured in one cluster to log into a Cisco IP Phone in another cluster Users from a home cluster log into a Cisco IP Phone at a visiting cluster Configure Cisco Extension Mobility on Cisco IP Phones before you configure EMCC Note Cisco Extension Mobility Cross Cluster EMCC Provides support for the Cisco IP Phone 7811 The phone does not support headset display backlig...

Page 131: ... due to an incompatible CAL the phone displays a failure message You set up the failure message that the user sees Confidential Access Level CAL Provides a method to control EEE functions on personal computer port and switch port by enabling or disabling EEE The feature controls both type of ports individually The default value is Enabled See Energy Efficient Ethernet for Port and Switch Product S...

Page 132: ... two Call Park features Note See call park information in the documentation for your particular Cisco Unified Communications Manager release Directed Call Park The softkeys are controlled by configuration in the Cisco Unified Communications Manager The Line Key Barge parameter in the Administration window has the following options Default Press Line Key can conference into the call Off Press Line ...

Page 133: ...orced Authorization Code FAC Allows an administrator to set the sidetone level of a wired headset The Cisco IP Phone 7811 does not support a headset Note Headset Sidetone Control Allows a user to answer a call that is ringing on a directory number in another group See call pickup information in the documentation for your particular Cisco Unified Communications Manager release Group Call Pickup Lim...

Page 134: ... Timer Allows users to place and receive intercom calls using programmable phone buttons You can configure intercom line buttons to Directly dial a specific intercom extension Initiate an intercom call and then prompt the user to enter a valid intercom number If your user logs into the same phone on a daily basis using their Cisco Extension Mobility profile assign the phone button template that co...

Page 135: ...block calls from ringing their phone when they are not available to take calls Logging out of hunt groups does not prevent nonhunt group calls from ringing their phone See hunt group information in the documentation for your particular Cisco Unified Communications Manager release and Set Up Softkey Template on page 160 Log out of hunt groups Allows users to notify the system administrator about su...

Page 136: ...secured the security status of the call is displayed as a lock icon on Cisco IP Phones The connected parties might also hear an audible alert tone that indicates the call is secured and is being monitored When an active call is being monitored or recorded the use can receive or place intercom calls however if the user place an intercom call the active call will be put on hold which causes the reco...

Page 137: ...oll Over Users can set up the speed dial feature to reach destinations that require Forced Authorization Code FAC or Client Matter Code CMC dialing pauses and additional digits such as a user extension a meeting access code or a voicemail password without manual intervention When the user presses the speed dial the phone establishes the call to the specified DN and sends the specified FAC CMC and ...

Page 138: ... as soon as the handset goes off hook This can be useful for phones that are designated for calling emergency or hotline numbers See directory number information in the documentation for your particular Cisco Unified Communications Manager release Private Line Automated Ringdown PLAR Submit phone logs or report problems to an administrator See Problem Report Tool on page 158 Problem Report Tool PR...

Page 139: ... are not dropped by the gateway The gateway checks the status of the RTCP port to determine if a call is active or not By keeping the phone port open the gateway will not end held calls RTCP Hold For SIP Allows secure phones to place conference calls using a secured conference bridge As new participants are added by using Confrn Join cBarge softkeys or MeetMe conferencing the secure call icon disp...

Page 140: ...s than one minute the time is displayed in the Second SS format Show Duration for Call History Dials a specified number that has been previously stored Speed Dial Allows you to enable or disable the SSH Access setting using Cisco Unified Communications Manager Administration Enabling the SSH server allows the phone to accept the SSH connections Disabling the SSH server functionality of the phone b...

Page 141: ...nnects with each caller The announcement plays only to the agent the caller hears ringing based on existing ring tone patterns while the announcement plays The content of the announcement can contain information about the caller that helps prepare the agent to handle the call The information can include caller language preference choices the caller made from a menu Sales Service customer status Pl...

Page 142: ...s Softkey Programmable Feature Button Dedicated Feature Button Feature Name X X Answer X Barge X X Call Back X X Call Forward All X X Call Park X Call Park Line Status X X Call Pickup Pick Up X Call Pickup Line Status X only displayed during connected call conference scenario X Conference X Divert X X Do Not Disturb X X Group Pickup Group Pick Up X X Hold X X Hunt Groups X Intercom X X Malicious C...

Page 143: ... Cisco Unified Communications Manager Administration window displays information that is applicable to all phones and information that is applicable to the phone model The information that is specific to the phone model is in the Product Specific Configuration Layout area of the window For information on the fields applicable to all phone models see the Cisco Unified Communications Manager documen...

Page 144: ...Phone Profile Step 3 Locate the phones Step 4 Navigate to the Product Specific Configuration Layout pane and set the fields Step 5 Check the Override Common Settings check box for any changed fields Step 6 Click Save Step 7 Click Apply Config Step 8 Restart the phones Set Up Phone Features for a Group of Phones Procedure Step 1 Sign into Cisco Unified Communications Manager Administration as an ad...

Page 145: ...e capability of the phone Unchecked Checkbox Disable Speakerphone Turns off the speakerphone and headset capability of the phone Unchecked Checkbox Disable Speakerphone and Headset Controls the ability to use the PC port to connect a computer into the LAN Enabled Disabled Enabled PC Port Enables disables or restricts access to local phone configuration settings in the Settings app Disabled The Set...

Page 146: ...the Backlight On Time field Choose the day or days from the drop down list To choose more than one day Ctrl click each day that you want Days of the week Days Backlight Not Active Defines the time each day that the backlight turns on automatically except on the days specified in the Backlight Display Not Active field Enter the time in this field in 24 hour format where 0 00 is midnight For example...

Page 147: ...s about emergency e911 concerns While Power Save Plus Mode the Mode is in effect endpoints that are configured for the mode are disabled for emergency calling and from receiving inbound calls By selecting this mode you agree to the following i You take full responsibility for providing alternate methods for emergency calling and receiving calls while the mode is in effect ii Cisco has no liability...

Page 148: ...own Enter the time in this field in 24 hour format where 00 00 is midnight For example to automatically power down the phone at 7 00 a m 0700 enter 7 00 To power down the phone at 2 00 p m 1400 enter 14 00 The default value is blank which means 00 00 The Phone On Time must be at least 20 minutes later than the Phone Off Time For example if the Phone Off Time is 7 00 the Phone On Time must be no ea...

Page 149: ...ke effect on schedule even if EnergyWise sends an override For example assuming the Phone Off Time is set to 22 00 10 00 p m the value in the Phone On Time field is 06 00 6 00 a m and the Enable Power Save Plus has one or more days selected If EnergyWise directs the phone to turn off at 20 00 8 00 p m that directive remains in effect assuming no phone user intervention occurs until the configured ...

Page 150: ...he logs display Disabled Indicates that logging doesn t display to the console nor to the connected downstream port Enabled Indicates that logs are always sent to the console and to the downstream port Use Enabled to force logs on so they can be captured with a packet sniffer PC Controlled Indicates that the workstation attached to the PC port controls whether logging is enabled Disabled Disabled ...

Page 151: ... security information Wi Fi Logs Wi Fi information VPN Logs virtual private network information Energywise Logs energy savings information MobileRemoteAC Logs Mobile and Remote Access through Expressway information Preset Default Preset Telephony SIP UI Network Media Upgrade Accessory Security Wi Fi VPN Energywise MobileRemoteAc Log Profile Identifies the IPv6 log server The format for the address...

Page 152: ...2 1x authentication feature status User Controlled The user can configure the 802 1x on the phone Disabled 802 1x authentication is not used Enabled 802 1x authentication is used and you configure the authentication for the phones User Controlled User Controlled Disabled Enabled 802 1x Authentication Synchronizes ports to the lowest speed between ports of a phone to eliminate packet loss Disabled ...

Page 153: ...ll automatically converts to a conference allowing the user and other parties to access conference features Turn on Softkey Enables a user to conference into a call on a shared line using cBarge Barge Enables a user to add another user to a call but does not convert the call into a conference Off Disables barge A new call initiates when the user presses the line key cBarge cBarge Turn on Softkey B...

Page 154: ...ith firmware upgrades in branch or remote office deployment scenarios that run over bandwidth limited WAN links Enabled Disabled Enabled Peer Firmware Sharing Identifies the alternate IPv4 server that the phone uses to obtain firmware loads and upgrades The format for the address is address port base 0 7 pfs 0 1 String of up to 256 characters Load Server Identifies the alternate IPv6 server that t...

Page 155: ...connection the opportunity to reestablish The precise time difference between Normal and Delayed connection failure detection depends on many variables that are constantly changing Normal Normal Delayed Detect Unified CM Connection Failure Controls custom features from Engineering Special ES loads String Special Requirement ID Specifies whether the serial console is enabled or disabled Disabled Di...

Page 156: ...ist for Expressway Sign in Controls the type of communication to the phone If you select HTTPS only phone communication is more secure HTTP and HTTPS enabled HTTP and HTTPS enabled HTTPS only HTPS Server Provides the URL for the Problem Report Tool PRT If you deploy devices with Mobile and Remote Access through Expressway you must also add the PRT server address to the HTTP Server Allow list on th...

Page 157: ...nt we recommend that you set up some features in a specific way Recommended Setting Administration Area Field Off or On For more information see Field Always Use Prime Line on page 144 Device Information Always Use Prime Line Show for all Incoming Call Product Specific Configuration Layout Actionable Incoming Call Alert Enabled Product Specific Configuration Layout Show All Calls on Primary Line E...

Page 158: ...d inbound calls are not answered on the second line Only dial tone is heard on the prime line There are certain high call volume environments where this is the desired user experience In general it is best to leave this field disabled except for high call volume environments that require this feature Set up Power Save To conserve power and ensure the longevity of the phone screen display you can s...

Page 159: ... The switch returns either an acceptance or a rejection of the request If the switch rejects the request or if the switch does not reply the phone does not power down If the switch accepts the request the idle phone goes to sleep thus reducing the power consumption to a predetermined level A phone that is not idle sets an idle timer and goes to sleep after the idle timer expires Procedure Step 1 F...

Page 160: ...ated Topics Cisco Unified Communications Manager Documentation on page xiii Set Up Forced Authorization Codes Forced Authorization Codes FACs ensure that the user is authorized to make the call For more information see the documentation for your particular Cisco Unified Communications Manager release Procedure Step 1 In Cisco Unified Communications Manager Administration select Call Routing Forced...

Page 161: ...ministration choose Device Device Settings SIP Profile Step 2 Select a profile Step 3 Set the Is Assured SIP Service Enabled check box This setting provides specific Assured Service behavior that affects services such as Conference factory and SRTP Step 4 Enable MLPP Authorization for a device by checking the MLPP User Authorization check box When the MLPP User Authorization check box is enabled t...

Page 162: ...e to the MLPP Authorization section and configure MLPP Authorization for a user The MLPP User Identification number must be composed of 6 to 20 numeric characters The MLPP Password must be composed of 4 to 20 numeric 0 9 characters The Precedence Authorization level can be set to any standard precedence level from Routine to Executive Override Step 12 Select Save Step 13 Set up the MLPP DSCP for a...

Page 163: ...ent can prerecord a single greeting or multiple greetings as needed and create and update the greetings When a customer calls the agent and the caller hear the prerecorded greeting The agent can remain on mute until the greeting ends or the agent can answer the call over the greeting All codecs supported for the phone are supported for Agent Greeting calls For more information see the barge and pr...

Page 164: ...itoring session the person being monitored must resume the call For more information see the monitoring and recording information in the documentation for your particular Cisco Unified Communications Manager release The following procedure adds a user to the standard monitoring user groups Before You Begin The Cisco Unified Communications Manager must be configured to support Monitoring and Record...

Page 165: ...as forwarded all calls to D the notification box that D sees contains the phone information for caller C By default this check box is not checked Redirected Number When this check box is checked the information about the original recipient of the call displays in the notification window Example If Caller A calls B but B has forwarded all calls to C and C has forwarded all calls to D then the notif...

Page 166: ... feature from Cisco Unified Communications Manager Administration For more information see the documentation for your particular Cisco Unified Communications Manager release Procedure Step 1 Set the IP Phone Built In Bridge parameter to On Step 2 In the Line Configuration page set Recording Option to Selective Call Recording Enabled and select the appropriate Recording profile Related Topics Cisco...

Page 167: ...Configuration IP Addressing Mode Device Device Settings Common Device Configuration IP Addressing Mode Preference for Signaling Set Up UCR 2008 in Common Device Configuration Use this procedure to set the following UCR 2008 parameters IP Addressing Mode IP Addressing Mode Preference for Signaling Procedure Step 1 In Cisco Unified Communications Manager Administration choose Device Device Settings ...

Page 168: ...nabled Step 6 Select Save Set Up UCR 2008 in Enterprise Phone Configuration Use this procedure to set the following UCR 2008 parameters FIPS Mode 80 bit SRTCP Web Access Procedure Step 1 In Cisco Unified Communications Manager Administration choose System Enterprise Phone Configuration Step 2 Set the FIPS Mode parameter to Enabled Step 3 Set the 80 bit SRTCP parameter to Enabled Step 4 Set the Web...

Page 169: ...nd sRTP For more information see SIP Profile information in the documentation for your particular Cisco Unified Communications Manager release Procedure Step 1 Select Device Device Settings SIP Profile Step 2 Choose the search criteria to use and click Find Step 3 Select the profile to modify Step 4 Set the Start Media Port and Stop Media Port to contain the start and end of the port range The fol...

Page 170: ...sway users For additional information about working with Mobile and Remote Access Through Expressway see Cisco Preferred Architecture for Enterprise Collaboration Design Overview Cisco Preferred Architecture for Enterprise Collaboration CVD Unified Communications Mobile and Remote Access via Cisco VCS Deployment Guide Cisco TelePresence Video Communication Server VCS Configuration Guides During th...

Page 171: ...t of the box users may skip the reset Network Settings requirement If users have the DHCP option 150 or option 66 enabled on their network router they may not be able to log in to the corporate network Users should disable these DHCP settings or configure their static IP address directly Off premises user logs into the enterprise network with Mobile and Remote Access Through Expressway Phone Featu...

Page 172: ...eport Tool Users submit problem reports to you with the Problem Report Tool The Problem Report Tool logs are required by Cisco TAC when troubleshooting problems Note To issue a problem report users access the Problem Report Tool and provide the date and time that the problem occurred and a description of the problem If the PRT upload fails you can access the PRT file for the phone from the URL htt...

Page 173: ...ile example probrep 20141021 162840 tar gz A sample script is shown below This script is provided for reference only Cisco does not provide support for the upload script installed on a customer s server php NOTE you may need to edit your php ini file to allow larger size file uploads to work Modify the setting for upload_max_filesize I used upload_max_filesize 20M Retrieve the name of the uploaded...

Page 174: ...isco Unified Communications Manager Administration select Device Phone Step 2 Locate the phone to be configured Step 3 Locate the line instance and set the Line Text Label field Step 4 Optional If the label needs to be applied to other devices share the line check the Update Shared Device Settings check box and click Propagate Selected Step 5 Select Save Set Up Softkey Template You can associate u...

Page 175: ...key or as a softkey Yes Call Park Park Call Park Configure as a programmable line key or as a softkey Yes Pick Up Pickup Call Pickup Configure as a programmable line key or as a softkey Yes Conference Barge cBarge cBarge Configure as a softkey only Yes Conference Conf Conference Phone displays Details Yes Details Conference List Phone displays Divert Starting with Firmware Release 10 3 1 the phone...

Page 176: ...mmable feature button or softkey Yes Quality Reporting Tool QRT Quality Reporting Tool Enables Disables the softkey Yes Recents Recents Yes Redial Redial Redial Phone displays Remove when a participant is selected Yes Remove Last Conference Participant Remove Remove Last Conference Participant Resume is a dedicated button Yes Resume Resume Resume Phone displays SpeedDial Yes Abbreviated Dial AbbrD...

Page 177: ...about IP Phone services and configuring line buttons see the documentation for your particular Cisco Unified Communications Manager release Procedure Step 1 From Cisco Unified Communications Manager Administration choose Device Device Settings Phone Button Template Step 2 Click Find Step 3 Select the phone model Step 4 Select Copy enter a name for the new template and then select Save The Phone Bu...

Page 178: ...d New The IP Phone Services Configuration window displays Step 3 Enter the following settings Service Name Enter Personal Address Book Service Description Enter an optional description of the service Service URL For PAB enter the following URL http Unified CM server name 8080 ccmpd login do name DEVICENAME service pab For Fast Dial enter the following URL http Unified CM server name 8080 ccmpd log...

Page 179: ...ou must click Update Subscriptions to update all currently subscribed users with the changes otherwise users must resubscribe to the service to rebuild the correct URL Note Related Topics Cisco Unified Communications Manager Documentation on page xiii Cisco IP Phone 7800 Series Administration Guide for Cisco Unified Communications Manager 165 Phone Button Templates ...

Page 180: ...Cisco IP Phone 7800 Series Administration Guide for Cisco Unified Communications Manager 166 Phone Button Templates ...

Page 181: ...establishes user rights to access the system Authorization identifies the telephony resources that a user is permitted to use such as a specific phone extension For more information see the documentation for your particular Cisco Unified Communications Manager release After you complete the LDAP directory configuration users can use the Corporate Directory service on their phone to look up users i...

Page 182: ...ith a URL and sign in information User Personal Directory Entries Setup Users can configure personal directory entries on the Cisco IP Phone To configure a personal directory users must have access to the following Self Care Portal Make sure that users know how to access their Self Care Portal See Set Up User Access to the Self Care Portal on page 56 for details Cisco IP Phone Address Book Synchro...

Page 183: ...greement information and select the I Accept Select Next Step 6 Choose the directory in which you want to install the application and select Next Step 7 Select Install Step 8 Select Finish Step 9 To complete the process follow the steps in Set Up Synchronizer on page 169 Set Up Synchronizer To configure the Cisco IP Phone Address Book Synchronizer perform these steps Procedure Step 1 Open the Cisc...

Page 184: ...icate Selection window displays Step 7 Choose the entry that you want to include in your Personal Address Book and select OK Step 8 When synchronization is complete select Exit to close the Cisco Unified CallManager Address Book Synchronizer Step 9 To verify whether the synchronization worked sign in to your Self Care Portal and choose Personal Address Book The users from your Windows address book...

Page 185: ...P A R T V Cisco IP Phone Troubleshooting Monitoring Phone Systems page 173 Troubleshooting page 205 Maintenance page 215 International User Support page 219 ...

Page 186: ......

Page 187: ...ormation that you can obtain from the phone web page You can use this information to remotely monitor the operation of a phone and to assist with troubleshooting For more information about troubleshooting the Cisco IP Phone see Troubleshooting on page 205 Cisco IP Phone Status The following sections describes how to view model information status messages and network statistics on the Cisco IP Phon...

Page 188: ... certificate displays in the Phone Information Screen to the right of the server option If the user is not connected to a secure or authenticated server no icon appears Step 3 To exit the Model Information screen press Back Step 4 To exit the Model Information screen press Exit or Display Status Menu Procedure Step 1 To display the Status menu press Applications Step 2 Select Admin Settings Status...

Page 189: ...ld not acquire an IP address from DHCP Power cycle the phone The configuration file is too large for file system on the phone TFTP Size Error Obtain a new copy of the phone firmware and place it in the TFTPPath directory You should only copy files into this directory when the TFTP server software is shut down otherwise the files may be corrupted Downloaded software file is corrupted ROM Checksum E...

Page 190: ... response Phone is not registered with Cisco Unified Communications Manager You must manually add the phone to Cisco Unified Communications Manager if you are not allowing phones to autoregister If you are using DHCP verify that the DHCP server is pointing to the correct TFTP server If you are using static IP addresses check configuration of the TFTP server The name based and default configuration...

Page 191: ... errors should resolve themselves when the network load reduces No network connectivity between the IPv4 DNS server and the phone Verify the network connections IPv4 DNS server is down Check configuration of the IPv4 DNS server IPv4 DNS server did not respond IPv4 DNS Timeout Network is busy The errors should resolve themselves when the network load reduces No network connectivity between the IPv6...

Page 192: ...ver has not provided a IPv4 DNS server Check the DHCP server configuration A name was specified but DHCP or static IP configuration did not specify a IPv4 DNS server address No IPv4 DNS Server If the phone has a static IP address verify that the IPv6 DNS server is configured If you are using DHCP the DHCP server has not provided a IPv6 DNS server Check the DHCP server configuration A name was spec...

Page 193: ...ed TFTP Error Network is busy The errors should resolve themselves when the network load reduces No network connectivity between the TFTP server and the phone Verify the network connections TFTP server is down Check configuration of TFTP server TFTP server did not respond TFTP Timeout Authentication typically times out if 802 1X is not configured on the switch Supplicant attempted 802 1X transacti...

Page 194: ... the TVS server is active and functioning normally Verify whether the security token and the TFTP server are valid Manually delete the CTL and ITL files if all the preceding solutions fail reset the phone Update of the CTL and ITL files failed Trust List Update Failed None This message is informational only The CTL file the ITL file or both files are updated Trust List Updated Make sure that the p...

Page 195: ...Network Statistics Step 3 To reset the Rx Frames Tx Frames and Rx Broadcasts statistics to 0 press Clear Step 4 To exit the Status menu press Back Network Statistics Fields The following table describes the information in the Network Statistics screen Table 20 Network Statistics Fields Description Item Number of packets sent by the phone Tx Frames Number of broadcast packets sent by the phone Tx b...

Page 196: ... protocol CDP Neighbor Port Cause of the last reset of the phone Restart Cause One of these values Hardware Reset Power on reset Software Reset memory controller also reset Software Reset memory controller not reset Watchdog Reset Unknown Link state and connection of the PC port for example Auto 100 Mb Full Duplex means that the PC port is in a link up state and has auto negotiated a full duplex 1...

Page 197: ...HCP INIT DHCP INVALID DHCP REBINDING DHCP REBOOT DHCP RENEWING DHCP REQUESTING DHCP RESYNC DHCP UNRECOGNIZED DHCP WAITING COLDBOOT TIMEOUT DISABLED DUPLICATE IP SET DHCP COLDBOOT SET DHCP DISABLED SET DHCP FAST IPv4 Cisco IP Phone 7800 Series Administration Guide for Cisco Unified Communications Manager 183 Cisco IP Phone Status ...

Page 198: ...NG DHCP6 DECLINED DHCP6 INFOREQ DHCP6 INFOREQ DONE DHCP6 INVALID DISABLED DUPLICATE IPV6 DHCP6 DECLINED DUPLICATE IP ROUTER ADVERTISE DHCP6 WAITING COLDBOOT TIMEOUT DHCP6 TIMEOUT USING RESTORED VAL DHCP6 TIMEOUT CANNOT RESTORE IPV6 STACK TURNED OFF ROUTER ADVERTISE ROUTER ADVERTISE UNRECOGNIZED MANAGED BY ILLEGAL IPV6 STATE IPv6 Cisco IP Phone 7800 Series Administration Guide for Cisco Unified Com...

Page 199: ...pplications Step 2 Select Admin Settings Status Call Statistics Step 3 To exit the Status menu press Back Call Statistics Fields The following table describes the items on the Call Statistics screen Table 21 Call Statistics Items for the Cisco IP Phone Description Item Type of received voice stream RTP streaming audio from codec G 729 G 722 G 711 mu law G 711 A law and iLBC Receiver Codec Type of ...

Page 200: ... by total number of speech frames that were received from start of the voice stream Cumulative Conceal Ratio Ratio of concealment frames to speech frames in preceding 3 second interval of active speech If using voice activity detection VAD a longer interval might be required to accumulate 3 seconds of active speech Interval Conceal Ratio Highest interval concealment ratio from start of the voice s...

Page 201: ...nformation about the phone including Device Information Displays device settings and related information for the phone Network Setup Displays network setup information and information about other phone settings Network Statistics Displays hyperlinks that provide information about network traffic Device Logs Displays hyperlinks that provide information that you can use for troubleshooting Streaming...

Page 202: ...Device Information area on a phone web page displays device settings and related information for the phone The following table describes these items Some of the items in the following table do not apply to all phone models Note To display the Device Information area access the web page for the phone and then click the Device Information hyperlink Table 23 Device Information Area Items Description ...

Page 203: ...gs This information comes from Cisco Unified Communications Manager Time Time zone for the Date Time Group to which the phone belongs This information comes from Cisco Unified Communications Manager Time Zone Date for the Date Time Group to which the phone belongs This information comes from Cisco Unified Communications Manager Date Amount of available system memory System Free Memory Amount of fr...

Page 204: ...bnet mask that the phone uses Subnet Mask Default router used that the phone uses Default Router 1 Primary Domain Name System DNS server DNS Server 1 and optional backup DNS servers DNS Server 2 and 3 that the phone uses DNS Server 1 3 Indicates whether the phone is using an alternative TFTP server Alternate TFTP Primary Trivial File Transfer Protocol TFTP server used that the phone uses TFTP Serv...

Page 205: ...anager servers become unreachable The SRST Cisco Unified Communications Manager always appears last in the list of servers even if it is active You configure the SRST router address in the Device Pool section in Cisco Unified Communications Manager Configuration window Unified CM 1 5 URL of the help text that appears on the phone Information URL URL of the server from which the phone obtains direc...

Page 206: ...font date and time formatting and alphanumeric keyboard text information User Locale Network locale that associates with the phone user Identifies a set of detailed information to support the phone in a specific location including definitions of the tones and cadences that the phone uses Network Locale Version of the user locale that is loaded on the phone User Locale Version Version of the networ...

Page 207: ...icates whether the phone accepts or blocks the SSH connections SSH Access Enabled Indicates whether CDP support exists on the switch port default is enabled Enable CDP on the switch port for VLAN assignment for the phone power negotiation QoS management and 802 1x security Enable CDP on the switch port when the phone connects to a Cisco switch When CDP is disabled in Cisco Unified Communications M...

Page 208: ... Server used by the phone TFTP Server The name of the TFTP Server used by the phone TFTP Server Synchronizes the ports to the lower speed which eliminates packet loss Automatic Port Synchronization Allows the administrator to configure the speed and function of the Cisco Desktop Collaboration Experience table port remotely by using Cisco Unified Communications Manager Administration Switch Port Re...

Page 209: ...gns IPv6 address to devices when you connect them to the network Cisco Unified IP Phones enable DHCP by default DHCPv6 Displays the current IPv6 address of the phone or allows the user to enter a new IPv6 address IPv6 Address Displays the current prefix length for the subnet or allows the user to enter a new prefix length IPv6 Prefix Length Displays the default router used by the phone or allows t...

Page 210: ...work port on the phone To display a network statistics area access the web page for the phone and then click the Ethernet Information the Access or the Network hyperlink Related Topics Access Web Page for Phone on page 187 Ethernet Information Web Page The following table describes the contents of the Ethernet Information web page Table 25 Ethernet Information Items Description Item Total number o...

Page 211: ...ckets that the phone received Rx unicast Total number of received FCS error packets or Align error packets that are less than 64 bytes in size Rx shortErr Total number of received good packets that are less than 64 bytes size Rx shortGood Total number of received good packets that are greater than 1522 bytes in size Rx longGood Total number of received FCS error packets or Align error packets that...

Page 212: ...mber of broadcast packets that the phone transmitted Tx broadcast Total number of multicast packets that the phone transmitted Tx multicast Total number of LLDP frames that the phone sent out LLDP FramesOutTotal Total number of LLDP frames that timed out in the cache LLDP AgeoutsTotal Total number of LLDP frames that were discarded when any of the mandatory TLVs is missing out of order or contains...

Page 213: ...ebug and error messages that the phone received Core Dumps Includes hyperlinks to individual dump files The core dump files include data from a phone crash Status Messages Displays the 10 most recent status messages that the phone has generated since it last powered up The Status Messages screen on the phone also displays this information Display Status Messages Window describes the status message...

Page 214: ...ber of times the RTCP Sender Report has been sent Sender Reports Sent see note Internal time stamp indication as to when the last RTCP Sender Report was sent Sender Report Time Sent see note Total number of RTP data packets that have been lost since data reception started on this connection Defined as the number of expected packets less the number of packets actually received where the number of r...

Page 215: ...m the start of the voice stream Max Conceal Ratio Number of seconds that have concealment events lost frames from the start of the voice stream includes severely concealed seconds Conceal Seconds Number of seconds that have more than five percent concealment events lost frames from the start of the voice stream Severely Conceal Seconds Estimate of the network latency expressed in milliseconds Repr...

Page 216: ... the information The phone must be associated with a user Procedure Step 1 For Call Info enter the following URL in a browser http phone ip address CGI Java CallInfo x where phone ip address is the IP address of the phone x is the line number to obtain information about The command returns an XML document Step 2 For Line Info enter the following URL in a browser http phone ip address CGI Java Line...

Page 217: ... Show Detail VisibleFeatureList CiscoIPPhoneCallLineInfo Sample LineInfo Output The following XML code is an example of the output from the LineInfo command CiscoIPPhoneLineInfo Prompt Notify Status null Status CiscoIPPhoneLines LineType 9 LineType lineDirNum 1028 lineDirNum MessageWaiting NO MessageWaiting RingerName Chirp1 RingerName LineLabel LineIconState ONHOOK LineIconState CiscoIPPhoneLines...

Page 218: ...yIndex 0 PlaneSoftKeyIndex PlaneSoftKeyMask 0 PlaneSoftKeyMask Prompt Prompt Notify Notify Status Status CiscoIPPhoneFields FieldType 0 FieldType FieldAttr FieldAttr fieldHelpIndex 0 fieldHelpIndex FieldName Call History FieldName FieldValue FieldValue CiscoIPPhoneFields CiscoIPPhoneFields FieldType 0 FieldType FieldAttr FieldAttr fieldHelpIndex 0 fieldHelpIndex FieldName Preferences FieldName Fie...

Page 219: ...n Summary Cisco does not support connecting an IP phone to another IP Phone through the PC port Each IP Phone should connect directly to a switch port If phones are connected together in a line by using the PC port the phones do not work Connecting a Cisco IP Phone to another Cisco IP Phone A prolonged Layer 2 broadcast storm lasting several minutes on the voice VLAN may cause IP phones to reset l...

Page 220: ...atistics show the codec that is used for a conversation between this Cisco IP Phone and the other device The values of these statistics should match If they do not verify that the other device can handle the codec conversation or that a transcoder is in place to handle the service See Display Call Statistics Window on page 185 for details Codec mismatch between the phone and another device The RxS...

Page 221: ... network port is functional Exchange the Ethernet cables with cables that you know are functional Disconnect a functioning Cisco IP Phone from another port and connect it to this network port to verify that the port is active Connect the Cisco IP Phone that does not start up to a different network port that is known to be good Connect the Cisco IP Phone that does not start up directly to the port ...

Page 222: ...about accessing status messages and for a list of potential errors their explanations and their solutions Related Topics Display Status Messages Window on page 174 Phone Cannot Connect Using DNS Problem The DNS settings may be incorrect Solution If you use DNS to access the TFTP server or Cisco Unified Communications Manager you must ensure that you specify a DNS server Related Topics Verify DNS S...

Page 223: ...lem Your network may be experiencing intermittent outages Solution Intermittent network outages affect data and voice traffic differently Your network might be experiencing intermittent outages without detection If so data traffic can resend lost packets and verify that packets are received and transmitted However voice traffic cannot recapture lost packets Rather than retransmitting a lost networ...

Page 224: ...e does not appear to be powered up Solution In most cases a phone restarts if it powers up by using external power but loses that connection and switches to PoE Similarly a phone may restart if it powers up by using PoE and then connects to an external power supply Phone Cannot Connect to LAN Problem The physical connection to the LAN may be broken Solution Verify that the Ethernet connection to w...

Page 225: ...arge variance between these statistics might indicate a problem with jitter on the network or periodic high rates of network activity General Telephone Call Problems The following sections help troubleshoot general telephone call problems Phone Call Cannot Be Established Problem A user complains about not being able to make a call Cause The phone does not have a DHCP IP address is unable to regist...

Page 226: ...tings Network Setup Ethernet Setup IPv4 Setup and look at the following options DHCP Server If you have assigned a static IP address to the phone you do not need to enter a value for the DHCP Server option However if you are using a DHCP server this option must have a value If no value is found check your IP routing and VLAN configuration See the Troubleshooting Switch Port and Interface Problems ...

Page 227: ...entry was made in the DNS server for the TFTP server and for the Cisco Unified Communications Manager system You must also ensure that DNS is configured to do reverse lookups Related Topics Phone Cannot Connect Using DNS on page 208 Additional Troubleshooting Information If you have additional questions about troubleshooting your phone go to the following Cisco website and navigate to the desired ...

Page 228: ...Cisco IP Phone 7800 Series Administration Guide for Cisco Unified Communications Manager 214 Additional Troubleshooting Information ...

Page 229: ...hat is appropriate for your situation Table 29 Basic Reset Methods Explanation Action Operation Resets any user and network setup changes that you have made but that the phone has not written to its Flash memory to previously saved settings then restarts the phone Press Services Applications or Directories and then press Restart phone Restores phone configuration or settings to factory default Res...

Page 230: ...ntil it completes the factory reset process and the main screen appears Caution Perform Factory Reset from Phone Menu Procedure Step 1 Press Applications Step 2 To restore phone configuration or settings to factory default press Ok Voice Quality Monitoring To measure the voice quality of calls that are sent and received within the network Cisco IP Phones use these statistical metrics that are base...

Page 231: ...cellular network or calling card network Acoustic problems coming from a speakerphone handsfree cellular phone or wireless headset Check packet transmit TxCnt and packet receive RxCnt counters to verify that voice packets are flowing Conceal Ratio is near or at zero but the voice quality is poor Voice quality metrics do not account for noise or distortion only frame loss Note Cisco IP Phone Cleani...

Page 232: ...Cisco IP Phone 7800 Series Administration Guide for Cisco Unified Communications Manager 218 Cisco IP Phone Cleaning ...

Page 233: ...navigate to your phone model and select the Unified Communications Manager Endpoints Locale Installer link For more information see the documentation for your particular Cisco Unified Communications Manager release The latest Locale Installer may not be immediately available continue to check the website for updates Note Related Topics Cisco Unified Communications Manager Documentation on page xii...

Page 234: ... Entry KATE support for the following Asian locales Chinese China Chinese Hong Kong Chinese Taiwan Japanese Japan Korean Korea Republic The default English United States KATE is presented to the user instead For example the phone screen will show text in Korean but the 2 key on the keypad will display a b c 2 A B C Cisco IP Phone 7800 Series Administration Guide for Cisco Unified Communications Ma...

Reviews: