background image

21

Installing the Cisco BWX360 WiMAX Outdoor Modem

Cisco BWX360 WiMAX Outdoor Modem / engbt / 253306943 / Installation.fm / 07.04.2010

T

e

m

p

lat

e

 2006_02_28

Precisely aligning the antenna

Once you have established a wireless connection to a WiMAX base station, align the 
antenna precisely using the Basic Setup Wizard. For this it can be useful if an assistant 
follows the alignment on the PC. Please ask the customer for support. If this is not pos-
sible, read "Aligning the antenna with the acoustic response" on page 21.

1. Turn the antenna step by step and have the assistant watch the connection status 

on the PC.

2. When a connection to a WiMAX base station has been established, the assistant 

clicks on 

Next

 to make fine adjustments to the antenna.

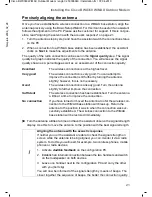
The quality of the radio connection can be seen in the 

Signal quality

 area. The signal 

quality bar graph indicates the quality of the connection. You will also see the signal 
quality shown as a percentage as well as an assessment of the connection quality:

³

Turn the antenna a little at a time and have the assistant observe the signal strength 
display. Use this to move the antenna to the position with the best signal strength.

Excellent


The wireless connection is at the highest level. 

Very good


The wireless connection is very good. You can attempt to 
improve the connection still further by turning the antenna 
slightly; however, this is not necessary.

Good


The wireless connection is already good. Turn the antenna 
slightly to further improve the connection.

Sufficient


The wireless connection has been established. Turn the antenna 
a little at a time to improve the connection.

No connection


If you have turned or moved the antenna too far the wireless con-
nection to the WiMAX base station will break up. Return the 
antenna to the position it was in when the connection was suc-
cessfully established. The wireless connection to the WiMAX 
base station will be restored immediately.

Aligning the antenna with the acoustic response

If neither you nor the assistant are able to check the signal strength on 
screen while the antenna is being aligned, you can monitor it via a radio 
system. To do this you will need, for example, two cordless phones, mobile 
phones or radio devices:

1. Activate 

Audible feedback 

on the configuration PC.

2. Establish an internal connection between the two handsets and switch 

on the loudspeaker on both devices.

3. Leave one handset next to the configuration PC and carry the other 

with you (belt clip).

You will now be informed of the signal strength by means of beeps. The 
closer together the sequence of beeps, the better the connection quality.

Summary of Contents for BWX360 WiMAX

Page 1: ..._28 Cisco BWX360 WiMAX Outdoor Modem Installation Guide This device works in a frequency band for which a general licence might have to be obtained Please contact your service provider or your National Authority for Frequency Management about licensing before putting this device into service ...

Page 2: ......

Page 3: ...iMAX Outdoor Modem 8 Choosing locations 9 Setting up the antenna mast 10 Protecting the mast against lightning 10 Assembling the outdoor modem 12 Connecting the indoor unit 15 Preparing to use the Cisco BWX360 WiMAX Outdoor Modem 17 Launching the user interface 18 Connecting to the WiMAX network and the Internet 19 Precisely aligning the antenna 21 Finishing off the assembly 22 Appendix 23 Trouble...

Page 4: ... accessories The outdoor modem must only be installed by a qualified electrician in accordance with the assembly instructions Safety precautions for the Cisco BWX360 WiMAX Outdoor Modem The operation of medical appliances may be affected Be aware of the technical conditions in your particular environment e g doctor s surgery The Cisco BWX360 WiMAX Outdoor Modem can interfere with the functioning o...

Page 5: ...e assembly instructions describe the assembly and operation of the individual components of the Cisco BWX360 WiMAX Outdoor Modem The configuration of the fully installed system is discussed in the user guide that you received with the Cisco BWX360 WiMAX Outdoor Modem Please read the assembly instructions carefully before using the devices for the first time ...

Page 6: ...le non assembled for the Ethernet connection to the indoor unit For the connection of the outdoor modem to the indoor unit only use a round Ethernet cable Ø 6 0 8 5 mm which is approved for the outdoor use We recommend to contact one of the manufacturers which are mentioned in the chapter Ethernet cable on page 24 RJ45 plug Phoenix for the connections required indoors Also a standard CAT5e Etherne...

Page 7: ...her services The Cisco BWX360 WiMAX Outdoor Modem works in the 2 6 and 3 5 GHz frequency range respectively Due to its architecture interfaces and simple network integration the Cisco BWX360 WiMAX Outdoor Modem is designed to deliver high speed Internet access including data streaming services This solution represents a cost effective wireless alternative to wired xDSL systems It provides you with...

Page 8: ...Cisco BWX360 WiMAX Outdoor Modem Cisco BWX360 WiMAX Outdoor Modem engbt 253306943 Product_intro fm 07 04 2010 Template 2006_02_28 Connectors and LEDs Outdoor modem Ethernet socket Outdoor antennas integrated ...

Page 9: ...em Green The indoor unit is properly connected to the outdoor modem 3 FAULT The LED shows whether or not the indoor unit is properly con nected to the outdoor modem Red The connection between the indoor unit and the out door modem is faulty 4 ON The LED shows that power is being supplied Green The Cisco BWX360 WiMAX Outdoor Modem is powered correctly 5 IN Ethernet socket for data exchange with a P...

Page 10: ...indoor unit see page 15 When the installation is completed you have to perform the following steps in order to put your Cisco BWX360 WiMAX Outdoor Modem into operation 1 Preparing to use the Cisco BWX360 WiMAX Outdoor Modem see page 17 2 Launching the user interface see page 18 3 Connecting to the WiMAX network and the Internet see page 19 4 Precisely aligning the antenna see page 21 5 Finishing o...

Page 11: ... the outside of the building It must be possible to make a suit able wall duct at or close to the indoor unit Please note that the maximum permitted cable length is 50 m PC or network Establishing a connection between the indoor unit and a PC or network switch should ideally be possible from the location via the Ethernet cable If the PC is moved from its original place the indoor unit should still...

Page 12: ...u can attach the mast brackets to the mast when you install it Protecting the mast against lightning Preparation The outdoor modem is not designed to withstand being struck directly by lightning and must be protected accordingly The antenna must therefore be installed in areas that are protected against lightning Lightning Protection Zone 0B The cor responding separation distance IEC 62305 must be...

Page 13: ... can ensure this for example by crimping it twice once on the flex and again on the insulation or by applying an appropriately designed shrink tubing which covers the cable lug and the insulation 3 Attach the cable lug to the casing with the M5 earthing grounding screw Make sure that the screwed connection cannot come loose To ensure this use a toothed contact disc not supplied which you fit betwe...

Page 14: ... down on a mast with an angled bracket see Angled installation on a mast on page 13 Choose the type of installation that allows the best alignment of modem to base station on your building Directly attached to a wall Vertical installation on a mast 1 Take the four bolts with the welded on nuts and screw them into the housing with the shorter end of the bolts so that the nuts are resting on the hou...

Page 15: ...ttach the bracket to the housing 1 Fasten the bracket to the housing with the nuts welded onto the bolts To have the modem facing up fasten the bracket to the bottom edge of the hous ing to have the modem facing down fasten the bracket to the top edge of the housing Choose your preferred tilt angle You get the largest tilt if you fit the bracket with the smaller notch facing inward and you get the...

Page 16: ... cable must satisfy the requirements for cables used outdoors at the relevant installation location The following influencing factors in particular must be taken into account Ambient temperature Rain water vapour or accumulation of water Presence of corrosive contaminative or other chemical substances Mechanical stresses e g compression stress tensile loading torsional load bending stress alternat...

Page 17: ...gths Connecting an Ethernet cable to the outdoor modem 1 Slip the support sleeve over the unassembled cable to be screwed in later 2 Attach a Phoenix connector to the end of the Ethernet cable that is outside Please read the instructions that come with the plug 3 Insert the RJ45 plug of the assembled cable into the Ethernet socket of the outdoor modem 4 Slide the sleeve over the connected RJ45 plu...

Page 18: ...the PC or laptop 1 Connect the supplied pre assembled Ethernet cable to the IN connector on the in door unit 2 Then connect the Ethernet cable to the Ethernet socket on the PC or laptop that you are using for putting the system into service for the first time The PC or laptop with the special settings can be on and ready for use but this is not obligatory The indoor unit should not be considered a...

Page 19: ...ms a self test After the self test the Cisco BWX360 WiMAX Outdoor Modem continually attempts to register with a base station Registration with the base station may be successful immediately If not registration will take place when the Cisco BWX360 WiMAX Outdoor Modem is being configured see Connecting to the WiMAX network and the Internet on page 19 Only use the Cisco BWX360 WiMAX Outdoor Modem wi...

Page 20: ...oor Modem in the browser s address field http 192 168 2 1 3 Press Enter Return Login If a system password has been set up on the Cisco BWX360 WiMAX Outdoor Modem the login screen will now open 1 Enter the system password supplied by your provider in the text box and clickOk The start page of the user interface opens in which you can change the language if necessary If no system password has been s...

Page 21: ... device on the WiMAX base station You will need the access data supplied by your WiMAX operator for this Enter the access data and click Next Setting up Internet access To allow users in your local network access to the Internet set up the Internet connec tion of your device using the information supplied by your Internet provider Enter the access data and click Next Adjusting the antenna 1 Turn y...

Page 22: ...he integrated antenna is directional This means it must be pointing roughly in the direction of a WiMAX base station in order to establish a radio connection The access data must also have been entered correctly 1 First check your access data by going back to the WiMAX configuration page 2 Turn the modem approx 20 and restart the scan You may need to turn the anten na several times The best result...

Page 23: ... is at the highest level Very good The wireless connection is very good You can attempt to improve the connection still further by turning the antenna slightly however this is not necessary Good The wireless connection is already good Turn the antenna slightly to further improve the connection Sufficient The wireless connection has been established Turn the antenna a little at a time to improve th...

Page 24: ...ned Click on End Finishing off the assembly 1 Tighten the screw fixings Please be aware of local laws Installation should be performed by a qualified per son 2 Attach the Ethernet cable with cable clamps and cable ties Make sure the cable is protected against the effects of pressure 3 Brief the user on what to do if they have any problems or if they need to upgrade the system etc ...

Page 25: ... unit 0 C to 40 C Storage temperature 25 C to 55 C Network interface 1 Ethernet 10 100BaseT RJ45 LAN Frequency 2 3 2 4 2 5 2 7 3 4 3 6 GHz Output power up to 26 dBm at QAM 16 Power consumption 3 6 W on DC input depending on operational state Bandwidth optional 3 5 5 0 7 0 8 75 or 10 0 MHz Type of transmission TDD Modulation technique SOFDMA 512 1024 Subcarrier modulation QPSK 16 64 QAM in up and d...

Page 26: ...dress http www yamaichi de Yamaichi Electronics Deutschland GmbH Karl Schmid Straße 9 81829 München Germany Phone 49 0 89 45109 0 Fax 110 RJ45 Ethernet plug Ethernet plug for outdoor use http www phoenixcontact com VS 08 RJ45 5 Q IP67 SHO Item no 1657973 Colour black Ethernet plug for indoor use http www phoenixcontact com VS 08 RJ45 5 Q IP20 Item no 1656725 Surge protection box http www dehn de D...

Page 27: ... putting into service This device will only operate on Sprint or Clearwire s U S WiMAX network It is not intended for use on any other network Please observe the legal provisions and local restrictions when putting the device into service Please ask your service provider for further information The cable shield can be connected to the equipotential bonding by means of a copper band You must ensure...

Page 28: ...t interference will not occur in a particular installation If this equipment does cause harmful interference to radio or television reception which can be determined by turning the equipment off and on the user is encouraged to try to correct the interference by one or more of the fol lowing measures 1 Reorient or relocate the receiving antenna 2 Increase the separation between the equipment and r...

Page 29: ...6 G Grounding cable 11 Grounding see Earthing I Indoor unit 7 cable connections 16 connecting 15 connecting PC or laptop 16 power supply 17 wall bracket 15 Installation 8 Installing aligning the antenna 21 antenna mast 10 assembling 12 choosing locations 9 connecting to indoor unit 14 earthing cable grounding cable 11 lightning protection 10 Internet access setting up 19 L LEDs during startup 18 L...

Page 30: ... Cisco BWX360 WiMAX Outdoor Modem engbt 253306943 SE680WiMAXSIX fm 07 04 2010 Schablone 2006_02_28 U User interface setting the language 19 W Web browser launching user interface 18 WiMAX network access data 19 ...

Reviews: