3-4
OC12 Packet Over SONET Line Card Installation and Configuration
OL-3437-01
Chapter 3 Removing and Installing Line Cards
Line Card Removal and Installation
Cisco 7304—Removing and Installing a Line Card
Proceed to the
“Connecting OC12 POS Line Card Interface Cables” section on page 3-5
.
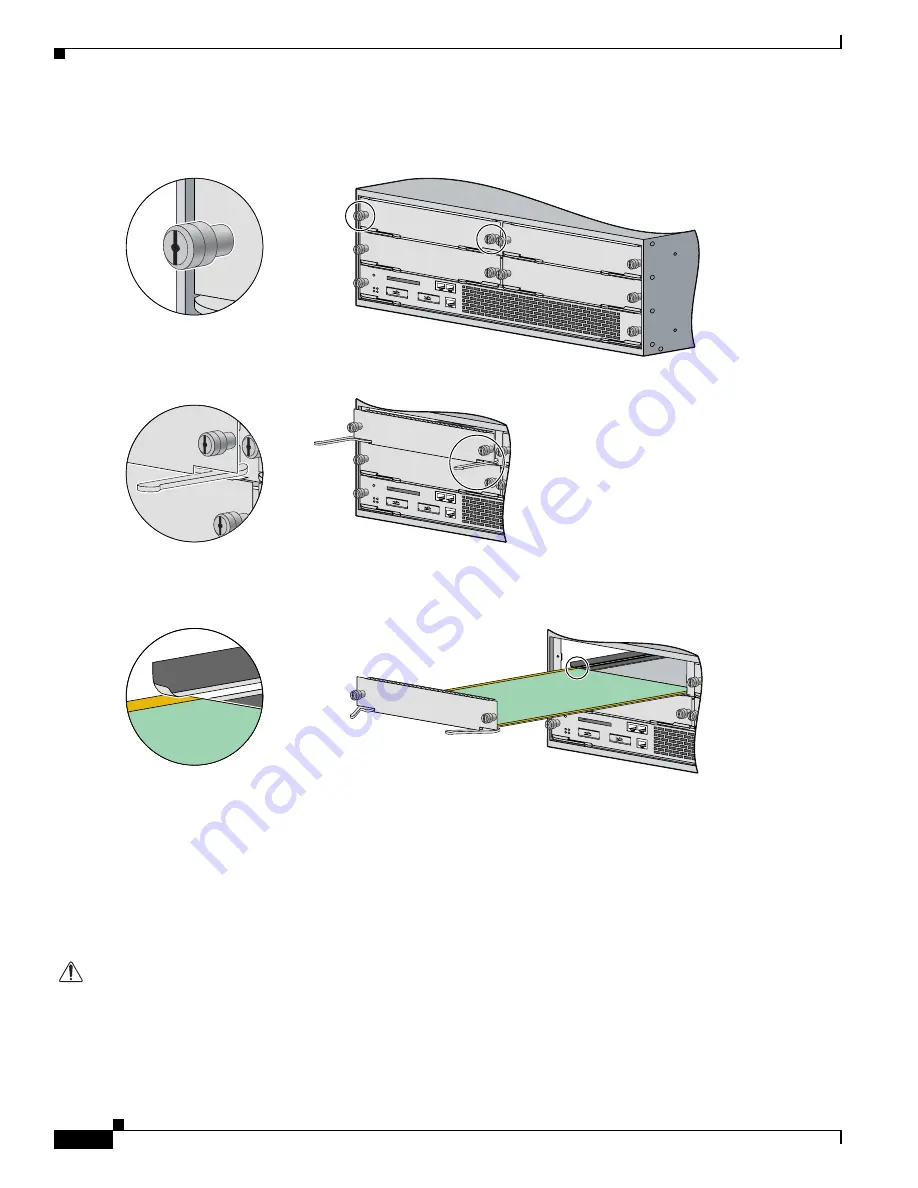
1. To remove the line card, loosen the locking thumbscrews on both sides of the line card.
2. Pull out the line card levers and carefully slide the line card halfway out of the slot. If you are removing a
blank line card, pull the blank line card completely out of the chassis slot.
3. With the line card halfway out of the slot, disconnect all cables from the line card. After disconnecting the
cables, pull the line card out of the chassis slot.
4. To insert the line card, carefully align the edges of the carrier or printed circuit board between the upper
and the lower edges of the chassis slot.
5. Carefully slide the new line card halfway into the line card slot and connect all required cables.
6. With the cables connected, carefully slide the line card into the slot until the line card makes contact with
the backplane.
NOTE: The line card levers must be positioned at a 45-degree angle before the line card makes contact
with the backplane.
7. Push the line card levers in until the line card is fully seated in the router backplane.
NOTE: When the chassis is fully populated, seating a new line card may be difficult. In order to properly
seat the line card and avoid physical damage, loosen the thumbscrews on the neighboring line cards.
CAUTION: Use of excessive force to seat the line card may damage the router or line card.
8. Tighten the locking thumbscrews on both sides of the line card.
57891


