


Note:
You can also cut images from other
Cricut cartridges (sold separately). In
Cricut Craft Room, select a cartridge
from the cartridge list and drag and drop
an image to the mat. Make sure the
corresponding cartridge is plugged into
the machine before you click Cut in step 12.
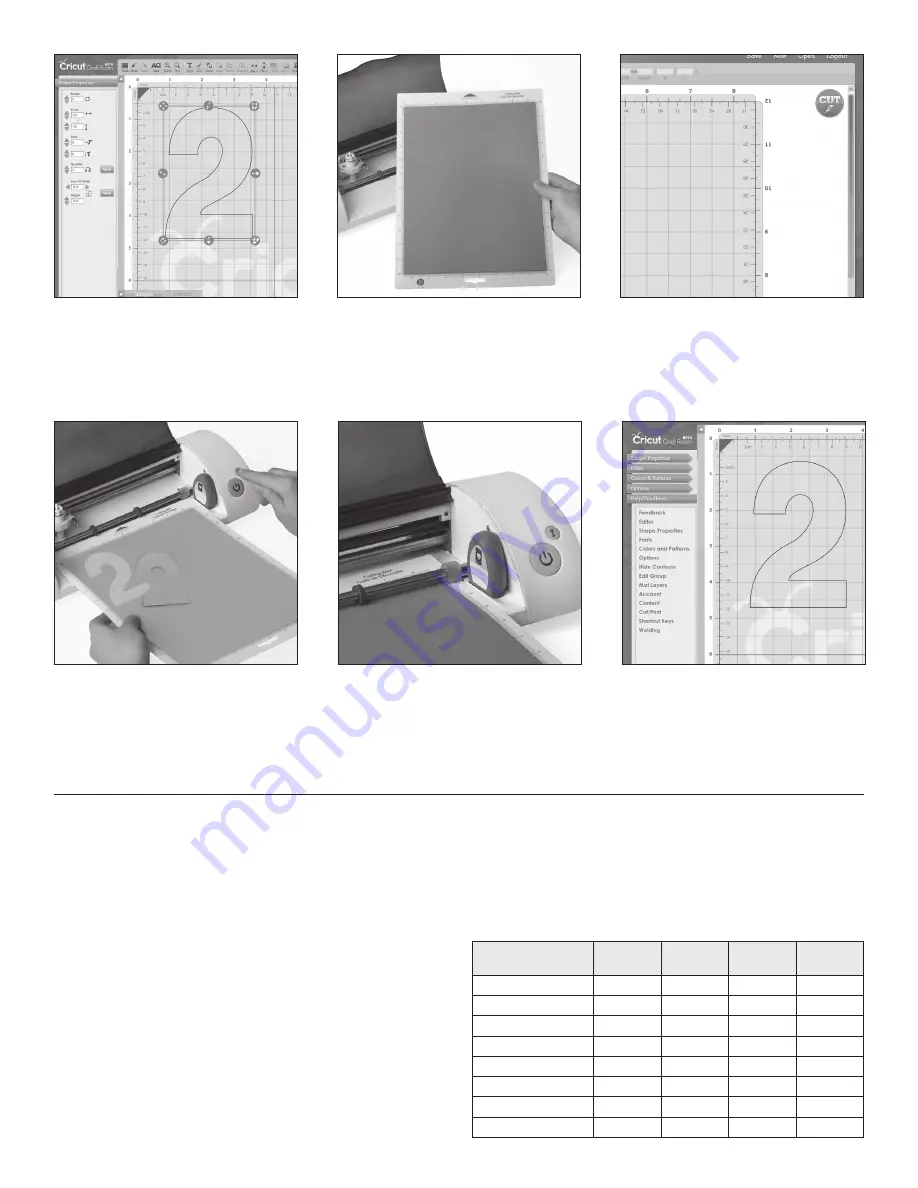
Move, rotate, or resize your image using the
image control handles that appear when
the image is selected. Make sure your
image is within the green grid area of the
mat. For your first cut, an image that is at
least 2" x 2" (5.1 cm x 5.1 cm) is recommended.
Remove the clear plastic protective sheet
from the cutting mat. Mount a piece of
paper up to 8.5" x 12" (21.6 cm x 30.5 cm)
on the mat. Hold the mat up to the rollers
and press the
Load/Unload Mat
button. The
rollers will pull the mat into the machine.
Click the Cut button in the upper right hand
corner of the screen. Check that the paper on
the mat completely covers the area where your
image is shown in the Cut Preview. If desired,
adjust your pressure, blade depth, or cutting
speed settings (see Appendix for more details).
Click
Cut
on the Cut Preview screen to cut
your image. When the cutting operation
ends, press the
Load/Unload Mat
button to
eject the mat from the machine and peel
the image from the mat.
For more information on the Cricut Craft
Room application and advanced image
editing tips, go to www.cricut.com/craftroom
or refer to the help features in the application.
P
{
}
q
w
ADJUSTING PRESSURE, BLADE DEPTH, AND
CUTTING SPEED SETTINGS:
Pressure:
The pressure lever allows you to control how hard the
cutting mechanism presses against the paper. Gently pull the lever,
located above the cutting mechanism, forward to increase pressure,
and backward to decrease pressure. For heavyweight materials, you
may want to increase the cut pressure. For lightweight materials, you
may want to decrease the pressure.
Blade Depth:
Spin the top of the adjustment knob so that the
arrow points to the desired setting. The smaller the number on
the adjustment knob, the shorter the blade depth will be. Shorter
blade depths are recommended for lightweight materials, and
long blade depths for heavier materials.
Cutting Speed:
The cut speed allows you to control the cutting
speed for an optimal cut on a variety of papers. High speeds work
well for simple shapes. For lightweight materials or for smaller,
more detailed cuts, you may want to decrease the cutting
speed. The cutting speed can be adjusted in the Cut Preview
screen on the Cricut Craft Room application.
Material
Pressure
Blade
Depth
Cutting
Speed
Multi-cut
Cardstock
4
5
4
1
Fabric (iron on)
4
5
3
3
Magnet Material
5
6
3
4
Vinyl
1
2
3
1
Stencil Material
5
6
3
2
Chipboard
4
6
3
5
Construction Paper
3
6
3
1
Standard Paper (20 lbs.)
1
2
3
1
Settings Matrix*
APPENDIX:
*Settings may vary from machine to machine.


